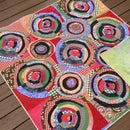
Introduction: Bubble Felt
Wool is an incredible raw material to work with because it has a memory. Bubble Felt makes use of this memory
From felt - wool that has been 'felted', you can make clothing, wall hangings, rugs, 3D figures, handbags, decorative or useful objects such as coasters, potholders, tea cosy's, shoes, slippers, and phone cases. it's pretty much endless because if you can think of it you can probably make it from felted wool.
This instructable assumes you already have some basic experience with making felt from wool
Step 1: Pre-felt or Wool
Just in case you didn't know, "pre-felt" is about one step before "felt". It is wool that has been layered multiple times, worked with a bit of soap and water - but is still fragile. Though it can be easily picked up and worked with, it has no real bulk or strength yet. At this stage it is good for cutting out shapes for designs, or capitalizing on its ability to memorize a shape it's been manipulated into.
You can make pre-felt or buy it. In this example of bubble felt I used commercially available pre-felt that I purchased from Outback Fibers. They have a huge selection of colors and the quality is great.
You may use a nice 100% wool scarf to do this same technique, this could be a woven or knitted wool scarf, or a giant piece of an old wool coat you find. It's fine - either will get 'felted' with the bubbles in the fabric.
Step 2: Supplies
- pre-felt or piece of wool such as a scarf
- marbles
- plastic bags cut into squares
- rubberbands
- scissors
- soap
Step 3: Wrap, Tie, Repeat
Making bubble felt is a labor intensive process. There is no way to speed it up, so just find a good movie to watch and start wrapping. The fist thing to do to streamline the work is to cut numerous plastic bags into squares that are large enough to comfortably cover your marbles.
Place a marble in the center of a piece of plastic and twist it into the shape shown. Then wrap the wool around the little plastic package you've made, secure with a rubber band and repeat.
The reason to wrap the marble in the plastic instead of simply just tying the rubber band around the marble encased wool is that if you did that the wool would felt to itself and that marble would be stuck inside. The plastic ensures that there is a way to keep the wool from felting to itself as it acts as a resist to the fibers finding each other and uniting into felt.
Could you use buttons? Yes - you will get a totally different look where the 'bubbles' will be flat on top. Could you use bottle caps? No, probably the pointy parts would be crazy difficult to remove from the felt. Could you use wooden balls? Maybe - I think as long as you are wrapping them the plastic they won't get wet and expand. Or even if they did I think it might not be too much work to be able to remove them.
Step 4: Felting
I don't want to go into detail about how to felt as I am assuming you are an experienced felter already. Briefly I'll say that a few dunks in hot and cold soapy water will work wonders because it's rather difficult to rub the whole thing adequately. I simply did a lot of dunking. What ever you method it will be fine to use - except don't throw it or you will have broken glass instead of marbles.
Step 5: ...And There You Have It - Bubble Felt!
Carefully cut all those tiny rubber bands. Ease out the marbles and the plastic, the plastic could be used again but I think since it will be so twisted that you may as well just cut up some new bags instead of fussing with the used stuff.
In conclusion (as my son was taught to write at the end of all his papers in grade school) this is a fun technique to lean in your arsenal of felt effects and the amazing things you can do with felt. I'd love to see what you do with this technique. Post a photo of your bubbles for a 3 month pro membership.


