Introduction: CNC Jewellery Box
The project was part of a 2nd-year collaborative brief at Falmouth University. We were tasked with creating a sustainable Christmas gift.
The design uses parametric configurations to create the models. This allowed me to iterate the design quickly to form different shapes. It also made it easier to create a model for mass manufacture; another component of the brief.
Supplies
To make the prototypes, we used polystyrene foam.
The final prototype is made from hard wood for the case and the insert is cork
Step 1: Base CAD
The base is modelled with one sketch, and extruding the base and walls.
Step 2: Lid CAD Pt.1
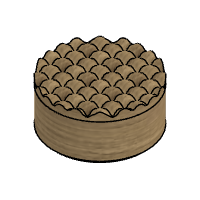
The lid is made using a projection of the previous sketch and extrudes for the top and inner. The wave is then projected as a plane
Step 3: Lid CAD Pt.2
The lid is then split, and the plane and remaining body are removed.
Step 4: CAD Configuration
All measurements have functions and are configured to create different shaped lids.
Step 5: CNC Prototypes
The files were then exported to Makr - the CNC software used on the Uni machines.
Step 6: Insert CAD
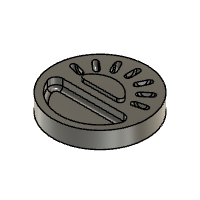
The insert was made by extruding the internal diameter of the outer box. I then sketched the two profiles on the top and extruded. The ring slots were made by revolving a shape and then creating a partial circular pattern.
Step 7: Final Prototype
We milled the final prototypes using a flip cut on both the wooden base using a 6mm square end mill and the Lid using a 6mm ball nose end mill. The cork insert used a 6mm ball nose end mill. We used a glued-up piece of oak for the base, and the lid used a scrap piece of hardwood.
Step 8: Final Project: Thoughts
The final product for manufacture would have been made from a slab of oak sourced locally. There were also plans to use die-cast metal to make a mass manufactured version.

Second Prize in the
CNC Student Design Challenge


