Introduction: CNC Weird Shapes
CNC machining weird shapes can be a challenge, but usually for all the wrong reasons. Those reasons being how do you sequence it, hold it down securely and where's your XYZ reference point?
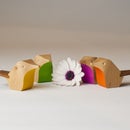
Take the body in the image. It's going to need to be machined both sides. It's not concentric but eccentric in profile. Fortunately it has a parallel top and bottom.
Let's get started.
Supplies
A body already sketched and developed in Fusion 360
Step 1: Design a Blank
First thing to do is design a blank. I'll use mdf as a for instance.
View body from top. Create sketch on XY plane. Project outline of body. Finish Sketch.
Turn body to view from side. INSPECT - Measure height. In my case it's 30mm high.
Select area of the projected body in last sketch and right click Extrude 30mm. Name new body 30mm Blank.
We need to cut this blank out accurately. You could machine thinner layers, then glue together to make up the 30mm, or start with one piece 30mm thick? I'll use 30mm stock material. Now I'm going to secure the blank using two 8mm dia dowels glued to a Backboard. The Backboard will be clamped.
CREATE - Create Sketch on top face of blank. Project top and bottom body profiles. Sketch two 8mm dia circles on axis. Select those 8mm dia profiles and Extrude - Cut through the blank. Edit that last Sketch and sketch a Point on the face of 30mm Blank at the centre of the two 8mm holes. Finish Sketch.
Step 2: Machine the Blank and Baseboard
Select MANUFACTURE from the drop down. SETUP - New Setup. By default Fusion will offer you a rectangular blank with 1mm clearance all round. In Setup tab select Model orientation drop down. Select Z axis/plane & ..
The blue Z axis arrow is pointing North, so that's OK, but red X arrow is pointing South IF you want the longest width to run East West on your CNC table. In Setup select X axis arrow and select YZ plane. Arrow orientation will change. Now select Stock tab. If you look at the Dimensions of the default blank it's measurements aren't rounded off. I'll use a block 135mm x 115mm x 30mm. In Mode select Fixed size box and change dimensions to suit. Select Setup tab again. In Origin - Stock box point, change to Selected point. With mouse pointer select the left hole centre point. You've now set your XYZ reference at the centre of the left dowel top face. Rename Setup1 as Setup 30mm Blank
In Fusion MANUFACTURE, select DRILLING. In Tool tab select 8mm dia spot drill. Disable Coolant. In Geometry tab - Hole Faces select with mouse pointer the faces of two hole profiles. In Heights tab - Bottom Height - From - HoleBottom - Offset - minus 3mm. Click OK and Drilling tool path will generate. Now select 2D - 2D Contour. Consider what tooling to use to cut through the 30mm? I'll use a nominal 8mm dia flat end mill. It's really 7.55mm dia as measured with calipers. Always check the actual measurements of tooling and enter these into your tool library. Disable Coolant.
Select Geometry tab. With mouse pointer, select bottom perimeter contour of model. Leave every other option unticked. Select Heights tab. Select Bottom Height. Select Stock bottom. In Offset change to minus 0.5mm. Select Passes tab. Tick Multiple Depths. Maximum Roughing Stepdown change to 4mm. Click OK. A toolpath will generate. ACTIONS - Simulate to check that everything is OK? ACTIONS - Post Process and save to a file the Drilling and Contour tool paths.
In the workshop, using some scrap mdf say 12mm thick, cut a rectangle 40 - 50mm bigger than the 135 x 115mm body blank. This will be your Backboard. Mark the centre and drill two 8mm dia holes in it to match the holes in the 30mm Blank.
After cutting out your Backboard and 30mm Blank, cut two 8mm dia hardwood dowels 44mm long (if using 12mm thick backboard?). Clamp the centered 30mm rectangular blank to the 12mm thick Backboard on the CNC table, orientating to have the axis through the two dowels parallel with CNC X axis.. Zero the tool on the top face, centre of the left hand dowel hole. Run the Drilling toolpath.
Glue the 44mm long dowels into the 30mm blank (flush one end) and then, with 2mm thick washers sandwiched in between the 30mm blank and backboard, glue the dowels into the Backboard holes. When dry, set your backboard & blank back on your CNC bed. Re establish and re zero XYZ , this time on top of the newly glued in dowels. Run the Contour toolpath.
You should now have a contoured blank fixed upon a Backboard. Leave it clamped to the CNC bed.
Step 3: 3D Machine Top Side of Body
In DESIGN switch on the finished body. I call mine Cup. Select MANUFACTURE. Select SETUP - New Setup. In Stock tab Mode select From solid. For Stock Solid, go to tree, expand Models, expand your file (mine's called Weird shapes). Expand Bodies. Select 30mm Blank.
Select Setup tab. Now you might not be able to see that centre point over the left hand dowel hole. Go to Sketches in the tree and expand, switching on sketches till it appears. In Work Coordinate System - Origin - Selected point click with mouse pointer the required point. In Orientation - Model Orientation dropdown select Select Z axis/plane. Z axis arrow is pointing North but X arrow is wrong. Select XZ plane In Model select Cup from tree. OK. Rename Setup2 as Setup 3D top.
Select 3D - Adaptive Clearing. I'll stay with the 7.55 mm flat end mill. In Geometry tab tick Rest Machining. Untick every other option. In Passes tab tick Stock to Leave 0.5 mm. OK. A toolpath will generate. Select ACTIONS - Simulate and watch for errors? That looked OK, but we have 0.5 mm high cusps to remove.
Select 3D - Scallop. I'm using a 4mm dia ballnose. Select Geometry tab. Tick Rest Machining. Adjustment Offset 0.2mm. Select Passes tab. Change Stepover to 0.5mm. OK. Toolpath will generate. Post Process Adaptive and Scallop.
Attachments
Step 4: The Flip?
Nearly there, just one more side to go. We need to flip the body but we don't have any dowels hanging out on the top side to flip and glue in re-drilled holes in the backboard. While we're setup we'll changeover to the 8mm dia drill bit and partly drill out the dowels.
Go back into DESIGN. Select hole profiles with Sketch on. Right click Extrude - Operation - Cut. 25mm.
Back to MANUFACTURE - DRILLING - Drill. Select 8mm dia spot drill in Tool tab. Select Geometry tab. Select Hole Faces with mouse pointer. OK. Toolpath will generate. Save Post Process.
In workshop run the new Drilling toolpath. Cut 39mm long dowels and glue them into topside holes. With a loose hacksaw blade slide blade in space left by washers and cut through dowels holding to Backboard.Your body is now released. Redrill the two dowels out of backboard, flip model ans still using washers as spacers, re-glue flipped model back to Baseboard.
In Fusion, go back to DESIGN. Select Cup. Right click Move/Copy. Use arrows to flip part. Change Z distance to minus 30mm and X distance to 110mm - OK.
Unfortunately we need to do the same with 30mm Blank. Select 30mm Blank. Right click Move/Copy. Use arrows to flip part. Change Z distance to minus 30mm and X distance to minus 110mm - OK.
Step 5: 3D Machine Bottom Side of Body
Now that everything is flipped, you just repeat everything as you did for the Top side.
In DESIGN switch on the finished body. I call mine Cup. Select MANUFACTURE. Select SETUP - New Setup. In Stock tab Mode select From solid. For Stock Solid, go to tree, expand Models, expand your file (mine's called Weird shapes). Expand Bodies. Select 30mm Blank.
Select Setup tab. Now you might not be able to see that centre point over the left hand dowel hole. Go to Sketches in the tree and expand, switching on sketches till it appears. In Work Coordinate System - Origin - Selected point click with mouse pointer the required point. In Orientation - Model Orientation dropdown select Select Z axis/plane. Z axis arrow is pointing North but X arrow is wrong. Select XZ plane In Model select Cup from tree. OK. Rename Setup2 as Setup 3D bottom. Select 3D - Adaptive Clearing. I'll stay with the 7.55 mm flat end mill. In Geometry tab untick every option. In Passes tab tick Stock to Leave 0.5 mm. OK. A toolpath will generate. Select ACTIONS - Simulate and watch for errors? That looked OK, but we have 0.5 mm high cusps to remove. Select 3D - Scallop. I'm using a 4mm dia ballnose. Select Geometry tab. Tick Rest Machining. Adjustment Offset 0.2mm. Select Passes tab. Change Stepover to 0.5mm. OK. Post Process Adaptive and Scallop.
In the workshop proceed with final machining and cut through dowels.
Attachments

Participated in the
CNC Contest


