Introduction: Classroom Experiment: How Pain Medications Work
How do medications work on the body and how can students experience that?
I teach STEAM courses for high school students at Global Citizenship Experience Lab School. This means that I get to bring in several different disciplines as part of my curriculum. However, this activity is designed in such a way that it can highlight certain aspects if you happen to teach a specific discipline. Health/Medicine and Chemistry and Cellular Biology go hand in hand in hand, which makes the activity work so well. It could even be used as a cross-discipline activity if your school has separate health and science classes.
In one of my units, we discuss how chemical compounds dictate what a medication does in the body. Experiential learning is important and effective, but we just can't give students drugs/medications, so I designed this lab to use a weird plant to create a similar effect that is administration and parent approved.
Because of allergies and other risks associated with giving students things to ingest (especially if it is intended to have an effect other than nutritional), I do send out an email to students and parents giving them a chance to opt out of parts all of the lab. If they choose to opt out, they can still collect data from their peers and write up a lab report.
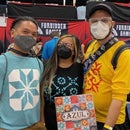
(I don't have many photos from this experiment, so the header is a photo of a game design course learning about the history of mancala... It is me in the center, though.)
Supplies
- Miracle Berries (1 for each participant) - You can buy them as freeze dried berry halves or as tablets. Both work equally well in my experience.
- Foods that are sour (enough for 2 tastes per participant) - My go-to foods are lemon juice, fresh lime eighths, Sour Patch Kids, dill pickles, apple cider vinegar, and salt and vinegar chips. You can really just raid the fridge/pantry for anything sour, though. It is also worth trying some non-sour foods for more variety.
- Water - Since this experiment is about taste changes, and since these foods are very strong in taste, it is important to cleanse the palate after each tasting.
- Bread/crackers/etc - Sour food means extreme pH levels. Have participants eat something before the experiment and go easy on serving sizes. Even though they may not taste very strong, going overboard may cause some stomach discomfort.
- Lab Report Template - This is an experiment we do early in the year, so I provide a template to the students. If they were older or more experienced in writing formal lab reports, I would require them to start from scratch. Technical writing is a skill to be acquired, for sure.
Step 1: Establish a Context for the Experiment
My experience is that many students have enough of an understanding regarding how first aid, surgeries, and other physical treatments function. On the other hand, medication seems to be far more elusive - I have even had students discussing potions a la Hogwarts when trying to describe how they thing it works.
I have my students do their research at home the night before. I ask them to try to describe how medication works, specifically thinking about pain relievers. What could pain feel like if it didn't hurt? While I want them to bring in their own resources, I will start them off with this Ted-Ed video as an introduction. I don't, however, let them have the video as their only source. I also ask them to research how taste buds work and how miraculin, the protein found in miracle berries, affects the taste buds. What kind of an evolutionary advantage might miraculin give to a plant and how would this lead to the trait being favored?
This activity is a chance to talk about several things with the students, as well:
- What is a reputable / disreputable source?
- How can you cite research (we use APA or MLA)?
- How can you construct a summary of research?
(Photos of Miracle Berries here are from Wikimedia Commons (Plant, Package)
Step 2: Prepare the Materials
I like to pace out the experiment so the entire class experiences it together, so I prepare the foods in bowls and pass them out one at a time. You could also let the students self-pace and have stations set up at tables for a lab group. Either way, the food will dictate how you prepare. Pickles, Sour Patch Kids, chips, and other prepackaged foods can just be opened and poured into bowls. Lemon/lime juice needs to be portioned out into cups. Limes (or other sour citrus fruits) should be cut into small pieces.
Make sure to have plenty of water on hand to cleanse the palate. I also have a trashcan nearby, just in case someone decides that a flavor is too much to actually consume.
Note - for consistency, if there is any variance in the food (Sour Patch Kids come in different flavors), make sure that the student either eats half before and half afterwards OR has two of the same flavor.
Step 3: Work Through the Hypothesis
When the lab starts, I like to initiate a discussion of the research findings, just in case someone didn't do their prep work. This leads into the next portion of the lab report - the hypothesis. First, I ask for general assumptions about what the miracle berry will do. Then, as I introduce the various foods we will try, I have them write down what they expect the foods to taste like normally (and I am always surprised when I find students who have never eaten a pickle) as well as what they will taste like when the sour receptors are muted and the sour flavors are interpreted as sweet instead. It can also be helpful to have them describe color, texture, temperature, etc., just so they are practicing their observation skills. I have the students make notes in a chart, either on their laptops or in a notebook. While they are doing this, I will also pass out crackers or bread and water. If your class is just after lunch, you could skip the bread. Basically, I don't want them doing the lab on an empty stomach.
In this step, we talk about how language can be very descriptive. I don't allow simple statements like "It will taste sour." Instead, we give examples of different kinds of sour, different kinds of sweet, etc. I find that by asking for examples, the quality of the room increases.
One of our humanities instructors invites a sommelier to class to talk about adjectives and how food/drink can be described. I have the students think back to that experience, but you could also bring one in to the class if your students need some inspiration with descriptions.
Step 4: Tasting Without Modification
Once the hypotheses are written out, the students will try each of the foods that they wish and make notes. This part is pretty straightforward, but it gives us a standard to compare the modified taste to. While they are making notes, we discuss why it is important to have a control in a science experiment.
I have learned to expect some extreme responses to these foods.
Step 5: Modifying the Taste Buds
I pass out the berries/tablets to the students and we all consume them together. The freeze dried berries dissolve rather quickly. The tablets take a few minutes. Either way, encourage the students to move them around their entire mouth, coating their tongue entirely. If they keep it in one place, they may not affect all the taste buds. I also allow them to go back to their hypotheses and make additional notes if needed (add, don't change). This is a useful step for students who have never tasted a particular food or might not have had it in a while.
Then, the big reveal...
Step 6: Tasting With Modification
We go through the same procedure of tasting each item. This does not need to be done quickly - the miracle berry will last for 30 minutes or so. I try to give the students a few minutes to really discover the changes and make all those notes.
After the tasting portion of the lab, I give the students time to make sure they have all their thoughts written down. There is usually some leftover food, so I will allow them to sample things again, if they like. Keep an eye out, though. These should be samples and not more. The lemon juice tastes like lemonade, but it is still acidic.
Step 7: Wrapup
After the tasting portion, all that is left is to write up the analysis and conclusion portions of the lab report. I walk through the difference between the two as follows:
- Analysis is not a summary of results. It is, however, a noticing of trends that pop up from the results. Were there any sort of foods that had similar changes? Did ALL items change in a certain way? Make those observations here.
- Conclusion is where you refer back to the hypothesis. Were you correct (fully or partially) or not? What did you learn about your question? If you were to conduct the experiment or one like it again, what would you want to further explore? What modifications, additions, or omissions would you make?
I usually conduct the lab on Wednesday and have the lab report due on Friday. By giving a few days, I can make sure they know I am looking for thoughtful responses and grammatically correct work. The project could be done in pairs or groups with one common lab report being turned in summarizing all the work, if that is more appropriate to your classroom.
Step 8: Teacher Stuff
Some things that you might want as the instructor, as an administrator, or the like.
First, my lesson plan with full times can be found here.
Secondly, I have identified some standards that this lab addresses. They are organized based on the standards system they are pulled from.
Common Core Literacy:
- RST.11-12.1 Cite specific textual evidence to support analysis of science and technical texts, attending to important distinctions the author makes and to any gaps or inconsistencies in the account. (HS-PS1-5)
- WHST.9-12.2 Write informative/explanatory texts, including the narration of historical events, scientific procedures/ experiments, or technical processes. (HS-PS1-2),(HS-PS1-5)
- WHST.9-12.5 Develop and strengthen writing as needed by planning, revising, editing, rewriting, or trying a new approach, focusing on addressing what is most significant for a specific purpose and audience. (HS-PS1-2)
- WHST.9-12.7 Conduct short as well as more sustained research projects to answer a question (including a self-generated question) or solve a problem; narrow or broaden the inquiry when appropriate; synthesize multiple sources on the subject, demonstrating understanding of the subject under investigation. (HS-PS1-6)
Next Generation Science Standards:
- HS-LS1-2.Develop and use a model to illustrate the hierarchical organization of interacting systems that provide specific functions within multicellular organisms.
- HS-LS4-4.Construct an explanation based on evidence for how natural selection leads to adaptation of populations.
If you have any suggestions or questions, either leave them here as a comment, direct message me, or send me an email. I am always trying to improve my work, so I would love to share what I have learned and grow based on what you have learned. Thanks for reading!

Participated in the
Classroom Science Contest


