Introduction: Computational Sculpture Project: Drug Arrests in Chicago
This is my Computational Sculpture Project for my Physical Computing Class. I (Nina Glick) was responsible for the computational aspects, and my partner (Alex Maya) made the sculpture. The theme for this project was "poison". We decided that while drugs are poison to the human body, the presence of drugs in communities is just as much of a poison. In order to illustrate this, we created a sculpture of a pill bottle full of pills that would light up with each additional drug arrest made in Chicago. Data was collected from the Chicago Data Portal.
Supplies
Led Strips (20 pixels)
Servo Motor
Proto Board
4-Digit Digital Display
Particle Argon
Step 1: Wiring
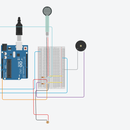
When making this, I divided the wiring into three steps: The LEDs, the Servo, and the 4-Digit Display.
LEDs:
I used a total of 20 LED pixels, cut into 4 strips of 5 pixels. I then soldered the 4 strips together, connecting them with ~3-4 inches of solidcore wire. I then soldered them to a proto board attaching them to the power, ground, and a digital pin.
Servo:
I attached a servo to ~15 inches of solidcore wire so it could wrap from behind the box to the side of the box. I attached a small pill bottle to the servo that would go off while the Argon was gathering the data from thee Chicago Data Portal. I soldered the servo to a proto board, connecting it to the power, ground, and a digital pin.
4-Digit Display:
I attached the 4-digit display to two digital pins, as well as the power and ground. I then soldered the display to the proto board.
Step 2: Code
Below is my code. You can use a different API if you want, but I chose to use the Chicago Data Potral.
// This #include statement was automatically added by the Particle IDE.
#include <neopixel.h>


// This #include statement was automatically added by the Particle IDE.
#include <ArduinoJson.h>


// This #include statement was automatically added by the Particle IDE.
#include <Grove_4Digit_Display.h>


#define PIXEL1_PIN D4
#define PIXEL1_COUNT 20
#define PIXEL1_TYPE WS2812B


Adafruit_NeoPixel strip(PIXEL1_COUNT, PIXEL1_PIN, PIXEL1_TYPE);
StaticJsonDocument<800> doc;
Servo myServo;


int counter=0;
int CLK=6;
int DIO= 7;
bool isDone=false;


TM1637 tm(CLK,DIO);
unsigned long publishTime = 0;


void setup()
{


    myServo.attach(3);
    myServo.write(40);

    tm.init();
    tm.set(7);

    Particle.subscribe("hook-response/drugData", myHandler);
    Serial.begin(9600);
    Time.zone(-6);
    Time.beginDST();


/*comment out everything below when running loop*/
    // strip.clear();
    // strip.show();

    // myServo.write(170);
    // delay(100);
    // myServo.write(10);
    // delay(100);
    // myServo.write(170);
    // delay(100);
    // myServo.write(10);
    // delay(100);
    // myServo.write(170);
    // delay(100);
    // myServo.write(10);

    // //data is updated everyday, but is a week late
    // time_t weekAgo= Time.now()-604800;
    // String strWeekAgo = Time.format(weekAgo, TIME_FORMAT_ISO8601_FULL);
    // strWeekAgo = strWeekAgo.substring(0, strWeekAgo.length()-15);
    // String min=strWeekAgo+"T00:00:00.000";
    // String max=strWeekAgo+"T23:59:00.000";
    // String minT = "{\"minTime\":\"" + min + "\",";
    // String maxT = "\"maxTime\":\"" + max + "\"}";
    // String data= minT+maxT;


    // Particle.publish("drugData", data);
    // publishTime = millis();

}


void loop()
{
     if(isDone)
    {
        whenDoneCounting();
    }


    /*comment if statement below out if running in setup*/
    if(Time.hour()==12 && Time.minute()==0 && Time.second()==0)
    {
        strip.clear();
        strip.show();
        myServo.write(170);
        delay(100);
        myServo.write(10);
        delay(100);
        myServo.write(170);
        delay(100);
        myServo.write(10);
        delay(100);
        myServo.write(170);
        delay(100);
        myServo.write(10);

        //data is updated everyday, but is a week late
        time_t weekAgo= Time.now()-604800;
        String strWeekAgo = Time.format(weekAgo, TIME_FORMAT_ISO8601_FULL);
        strWeekAgo = strWeekAgo.substring(0, strWeekAgo.length()-15);
        String min=strWeekAgo+"T00:00:00.000";
        String max=strWeekAgo+"T23:59:00.000";
        String minT = "{\"minTime\":\"" + min + "\",";
        String maxT = "\"maxTime\":\"" + max + "\"}";
        String data= minT+maxT;
        Particle.publish("drugData", data);
        publishTime=millis();
    }

     if(isDone)
    {
        whenDoneCounting();

    }


}


void myHandler(const char *event, const char *data)
{


    const char* json = data;
    String dataString=String(data);
    for(int i=0; i<dataString.length()-3; i++)
    {

        if(dataString.substring(i,i+4).equals("DRUG"))
        {
            counter+=1;
        }
    }

    if (dataString.length()<=300 || millis()-publishTime>=9000)
    {
        isDone=true;
    }

   // Particle.publish(String(counter));


}


void whenDoneCounting()
{

    Particle.publish("counter is " + String(counter));

    if(counter>9)
    {
        tm.display(0,(counter/10));
        tm.display(1,(counter%10));
        tm.point(0);
    }
    else
    {
        tm.display(0,counter);
        tm.point(0);
    }

    if(counter>=1)
    {
        strip.setBrightness(255);   // Set brightness to full
        strip.setPixelColor(0, strip.Color(255, 255, 255));     //Red
        strip.setPixelColor(1, strip.Color(255, 255, 255));
        strip.setPixelColor(2, strip.Color(255, 255, 255));
        strip.setPixelColor(3, strip.Color(255, 255, 255));
        strip.setPixelColor(4, strip.Color(255, 255, 255));
        strip.show();
        Particle.publish("1st light");
    }
    if(counter>=2)
    {
        strip.setBrightness(225);
        strip.setPixelColor(5, strip.Color(255, 255, 255));
        strip.setPixelColor(6, strip.Color(255, 255, 255));
        strip.setPixelColor(7, strip.Color(255, 255, 255));
        strip.setPixelColor(8, strip.Color(255, 255, 255));
        strip.setPixelColor(9, strip.Color(255, 255, 255));
        strip.show();
        Particle.publish("2nd light");
    }
    if(counter>=3)
    {
        strip.setBrightness(225);
        strip.setPixelColor(10, strip.Color(255, 255, 255));
        strip.setPixelColor(11, strip.Color(255, 255, 255));
        strip.setPixelColor(12, strip.Color(255, 255, 255));
        strip.setPixelColor(13, strip.Color(255, 255, 255));
        strip.setPixelColor(14, strip.Color(255, 255, 255));
        strip.show();
        Particle.publish("3rd light");
    }
     if(counter>=4)
    {
        strip.setBrightness(225);
        strip.setPixelColor(15, strip.Color(255, 255, 255));
        strip.setPixelColor(16, strip.Color(255, 255, 255));
        strip.setPixelColor(17, strip.Color(255, 255, 255));
        strip.setPixelColor(18, strip.Color(255, 255, 255));
        strip.setPixelColor(19, strip.Color(255, 255, 255));
        strip.show();
        Particle.publish("4th light");
    }


}
Step 3: Putting It Together
- We placed the LED strips inside the plastic pills.
- We cut a whole in the back of the box so that the wires could flow through the back.
- We placed the plastic pills in the large pill bottles, cutting slits in the back wall of the bottle so the wires could slip through. We also cut a whole in the front of the bottle for the 4-digit display, and s;lid the wires through the slits in the bottle.
- The proto board was hidden behind the pill bottle, and the servo was pulled through the hole in the back of the box, and brought through a hole in the side wall.
- We decorated the box with smaller pills.


![Tim's Mechanical Spider Leg [LU9685-20CU]](https://content.instructables.com/FFB/5R4I/LVKZ6G6R/FFB5R4ILVKZ6G6R.png?auto=webp&crop=1.2%3A1&frame=1&width=306)


