Introduction: Creating a 2D Animation Using Microsoft PowerPoint and IMovie.


![[ Paper Origami ] Dinosaurs](https://content.instructables.com/FMP/TI7G/JS5C8HGN/FMPTI7GJS5C8HGN.jpg?auto=webp&crop=1%3A1&frame=1&width=130)
What you'll need:
- a regular laptop or desktop
- Microsoft PowerPoint
- iMovie or alternative movie maker
Step 1: Start a New PowerPoint Presentation.

1. Start a New Presentation on PowerPoint.
(File -> New Presentation / ⌘N)
Step 2: Remove Preset Text Boxes.
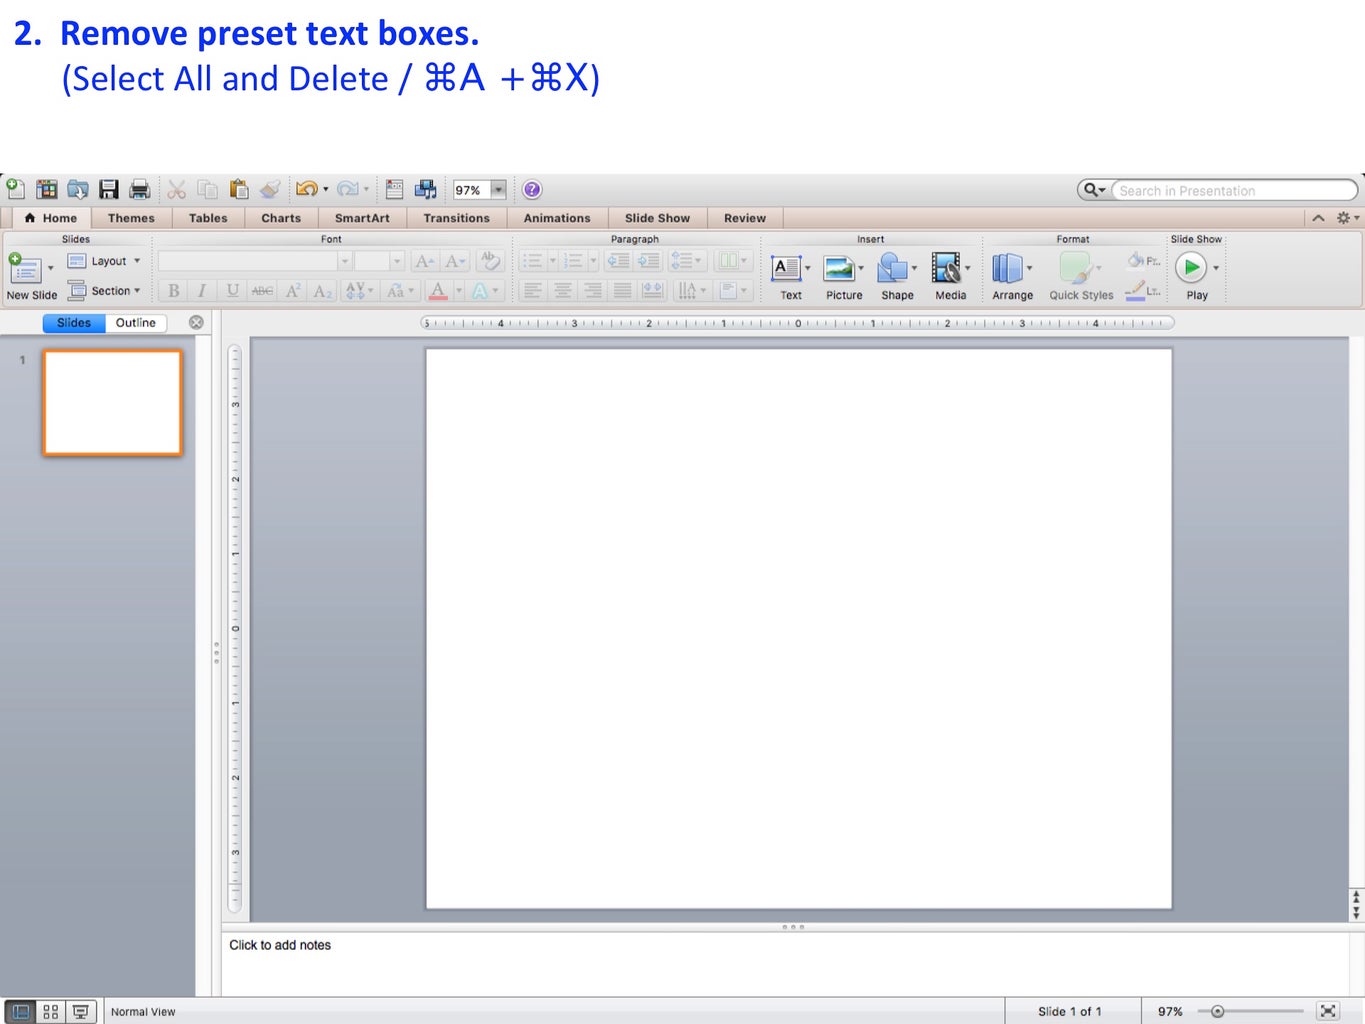
2. Remove preset text boxes.
(Select All and Delete / ⌘A +⌘X)
Step 3: Go to Slide Master.
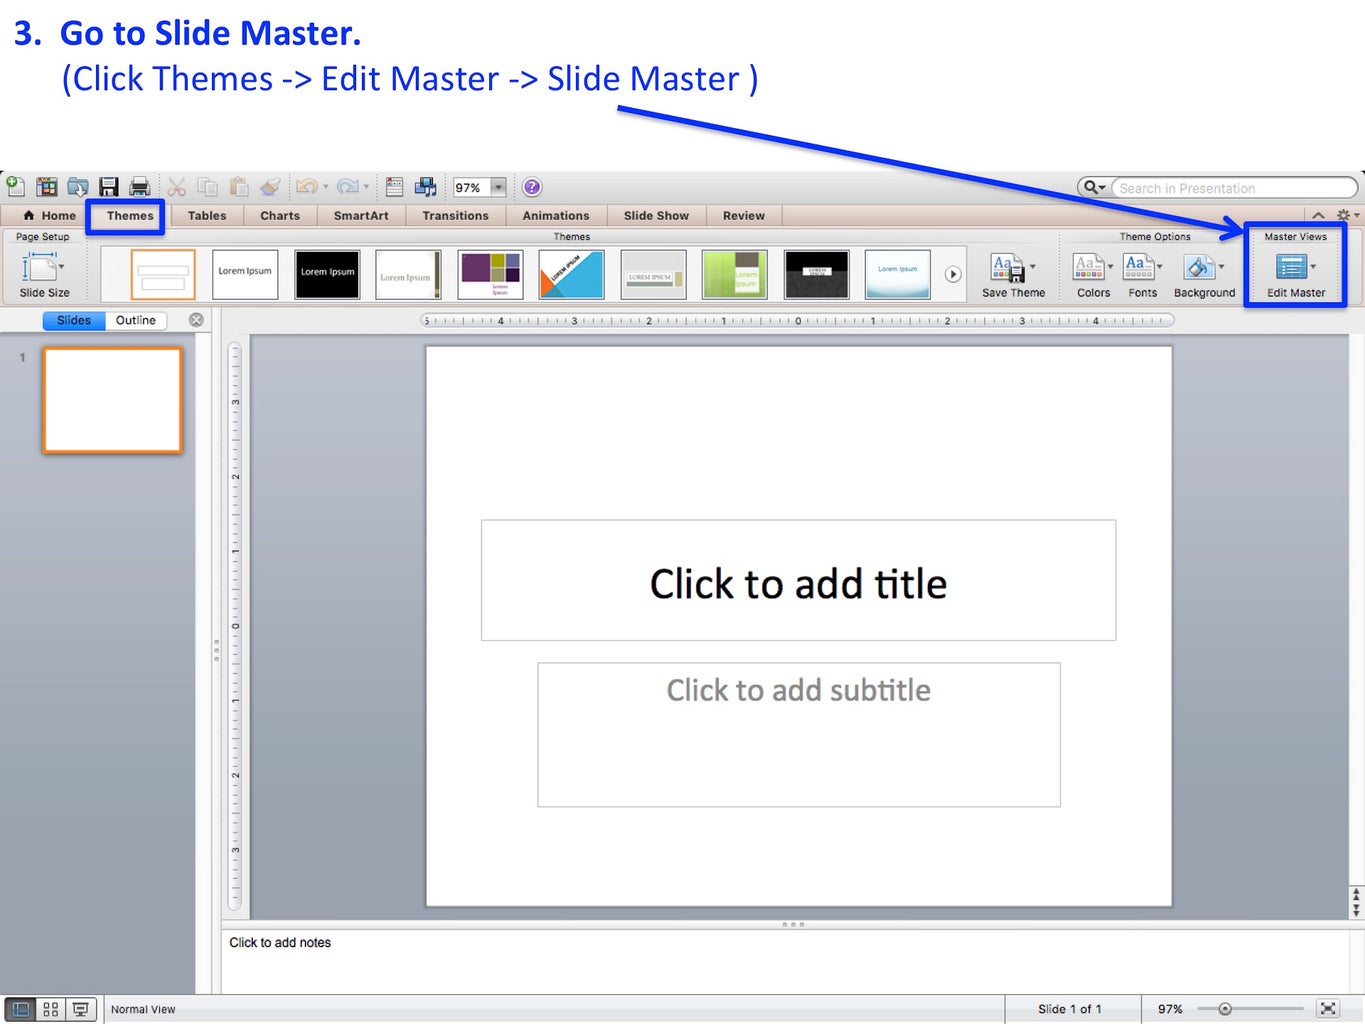
3. Go to Slide Master.
(Click Themes -> Edit Master -> Slide Master
Step 4: Clear Preset Master Slides.
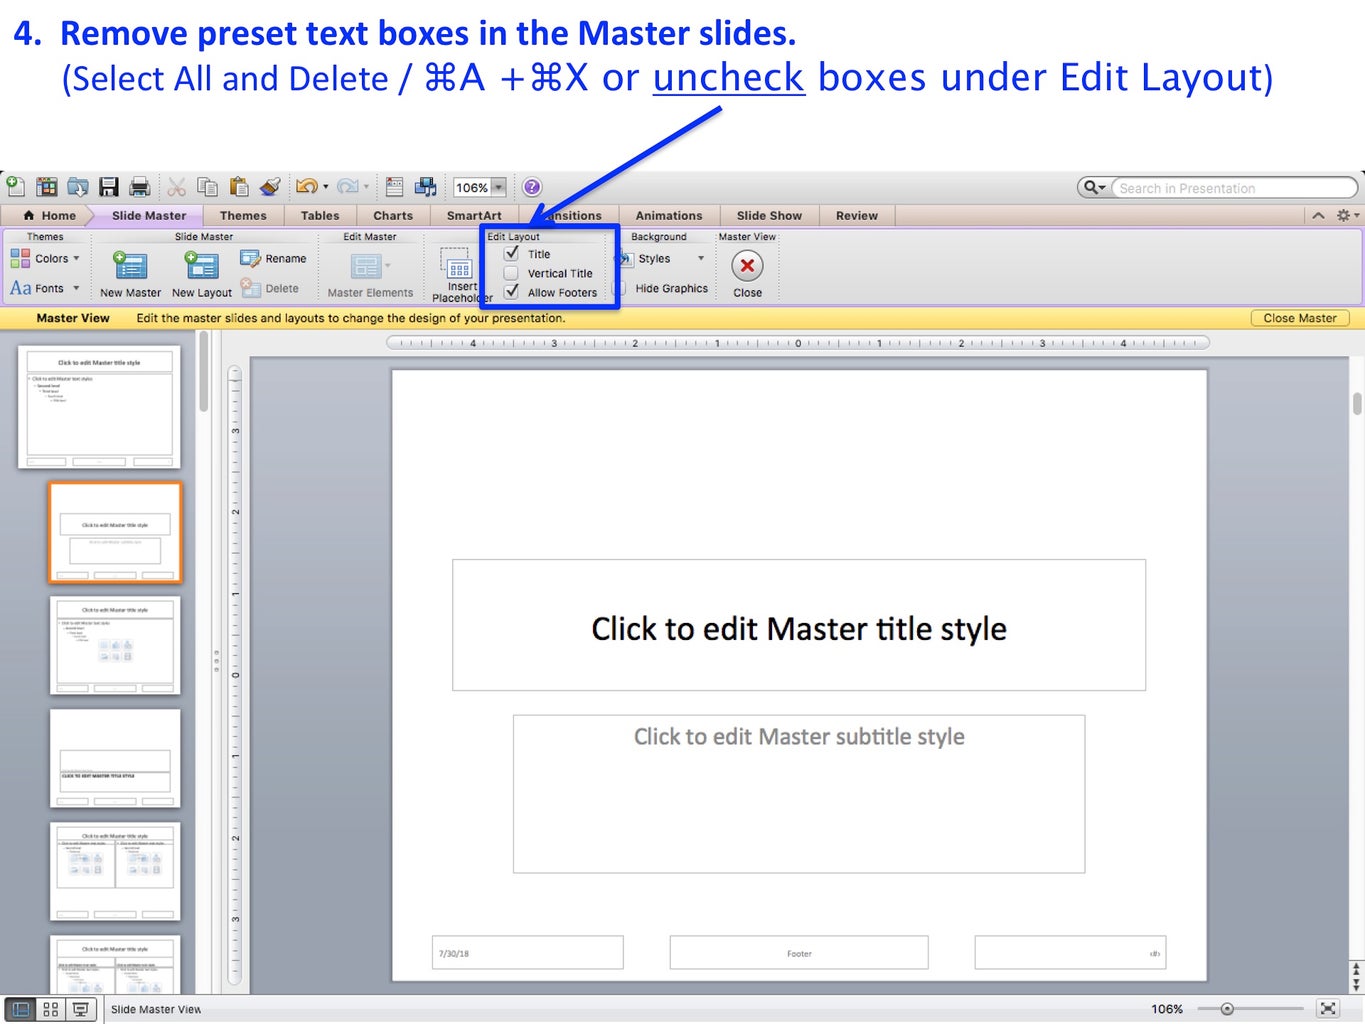
4. Remove preset text boxes in the Master slides.
(Select All and Delete / ⌘A +⌘X or uncheckboxes under Edit Layout)
Step 5: Design a Background.

5. Design a background by using “Shape” and “Table”.
Step 6: Opt to Insert a Picture, If Preferred.

6. You can also insert a background picture from your own Files or Clip Art Gallery.
Step 7: Create More Backgrounds.

7. Copy & Paste a background design and apply different colors.
(This step would be unnecessary if your animation requires only 1 background.)
Step 8: Create Moving Items.

8. Duplicate a background and insert Shapes (e.g. clouds) to create moving items.
Copy & Paste Shapes forwards to create horizontal movements.
Copy & Paste the background slides to create a movement sequence.
Step 9: Close the Slide Master.

9. Close the Slide Master after creating backgrounds.
Step 10: Create Content.

10. Create content.
Tip: I find it easier to start with the final slide and work backwards.
Duplicate the final slide and remove a letter or shape in reverse order.
Step 11: Save As Pictures.
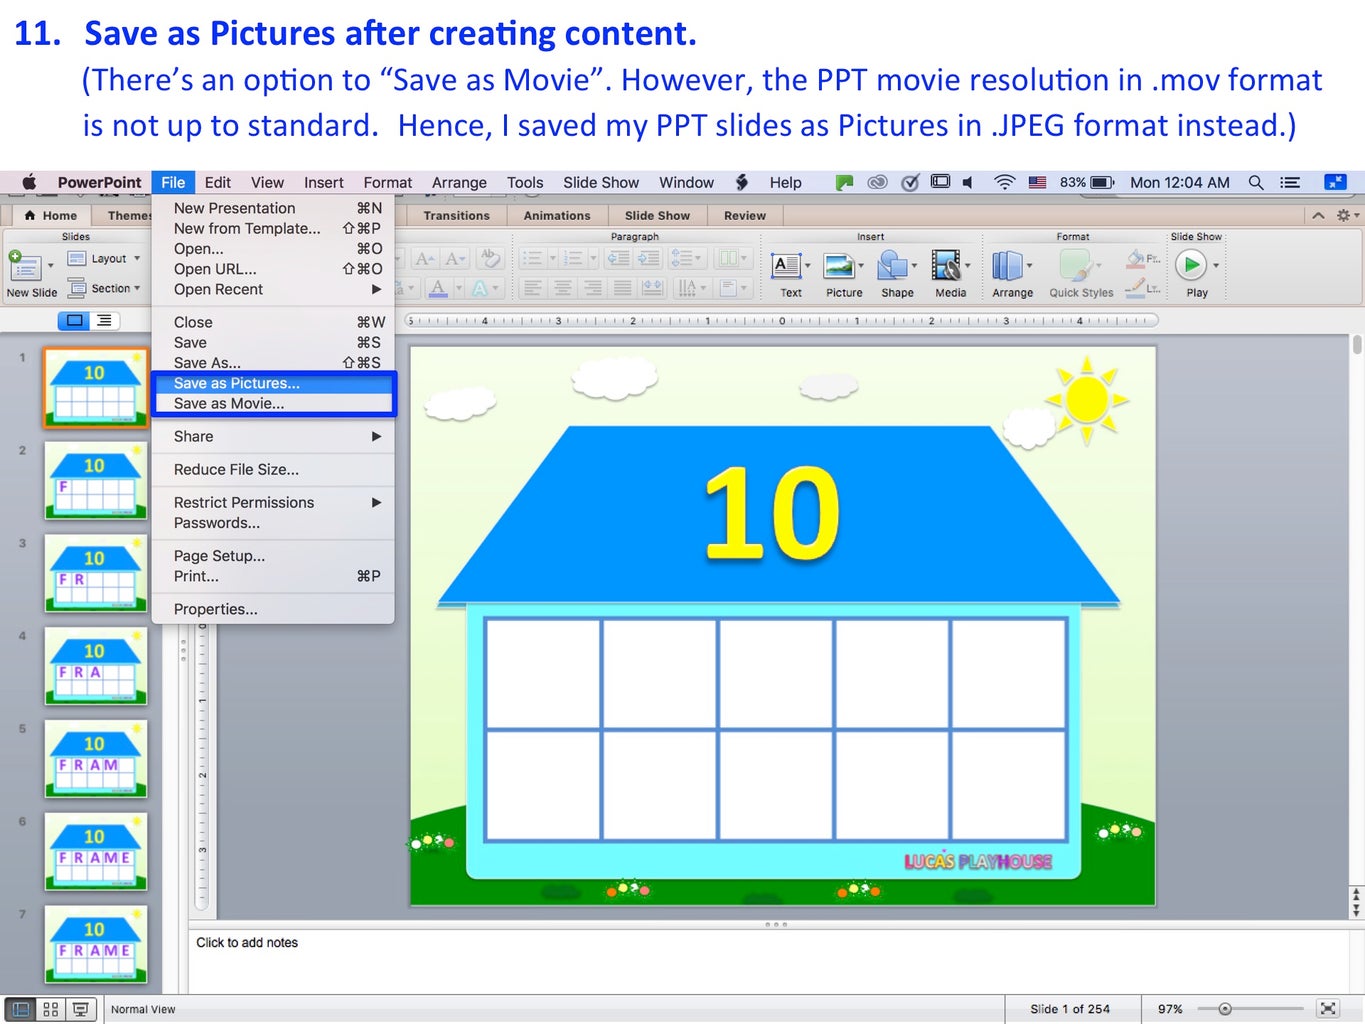
11. Save as Pictures after creating content.
(There’s an option to “Save as Movie”. However, the PPT movie resolution in .mov format
is not up to standard. Hence,I saved my PPT slides as Pictures in .JPEG format instead.)
Step 12: Open IMovie and Import Files.

12. Open iMovie and Import PowerPoint slides in .JPEG format.
Step 13: Set the Clips Duration.
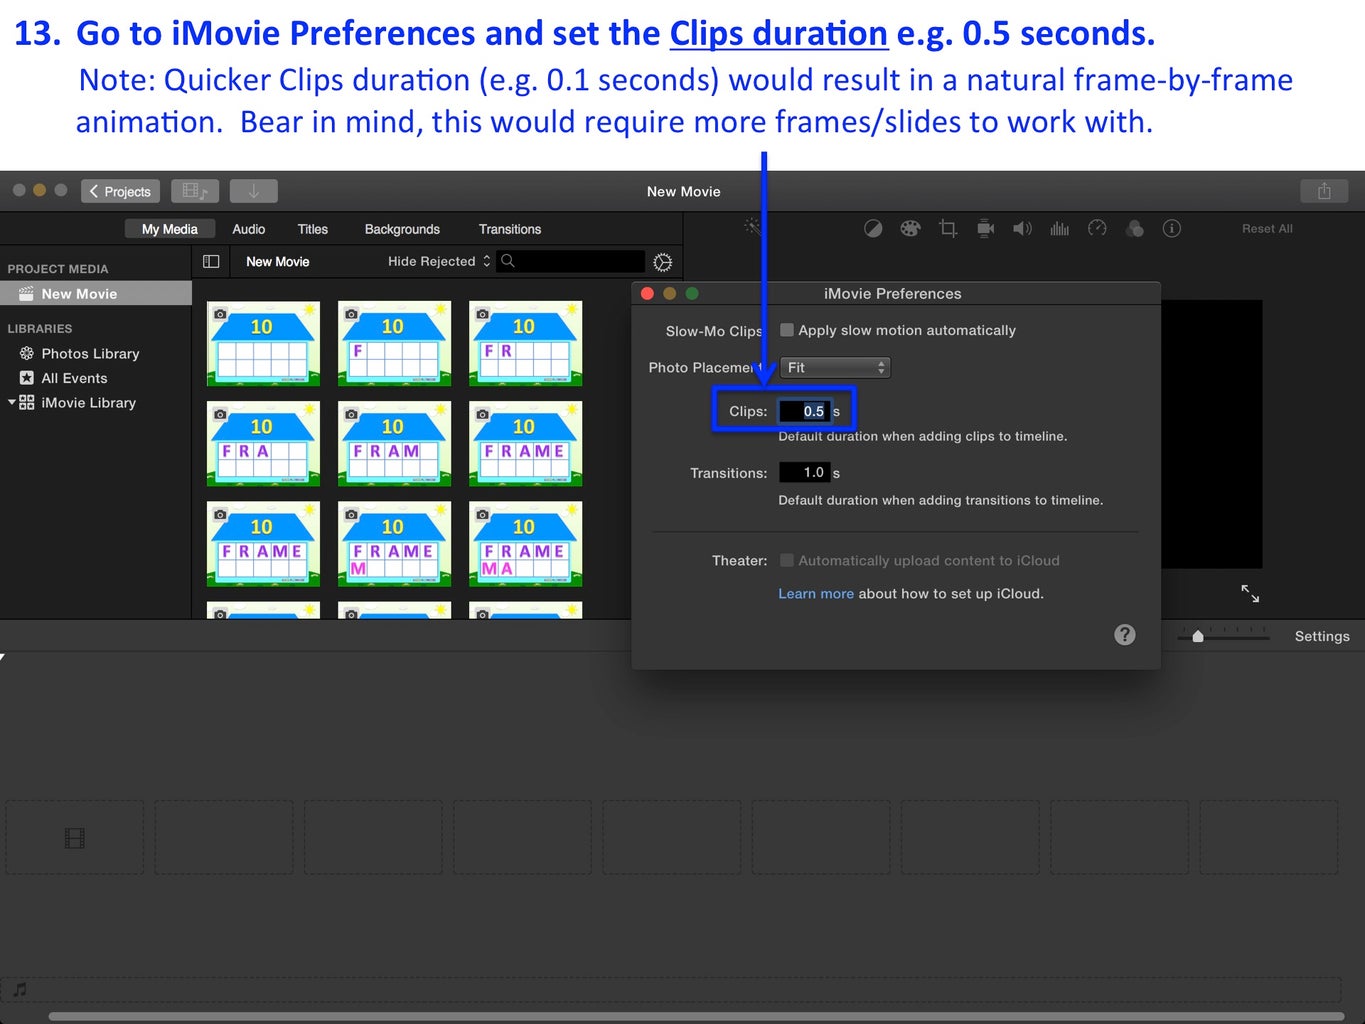
13. Go to iMovie Preferences and set the Clips duration e.g. 0.5 seconds.
Note: Quicker Clips duration (e.g. 0.1 seconds) would result in a natural frame-by-frame animation.
Bear in mind, this would require more frames/slides to work with.
Step 14: Start Creating a Movie.
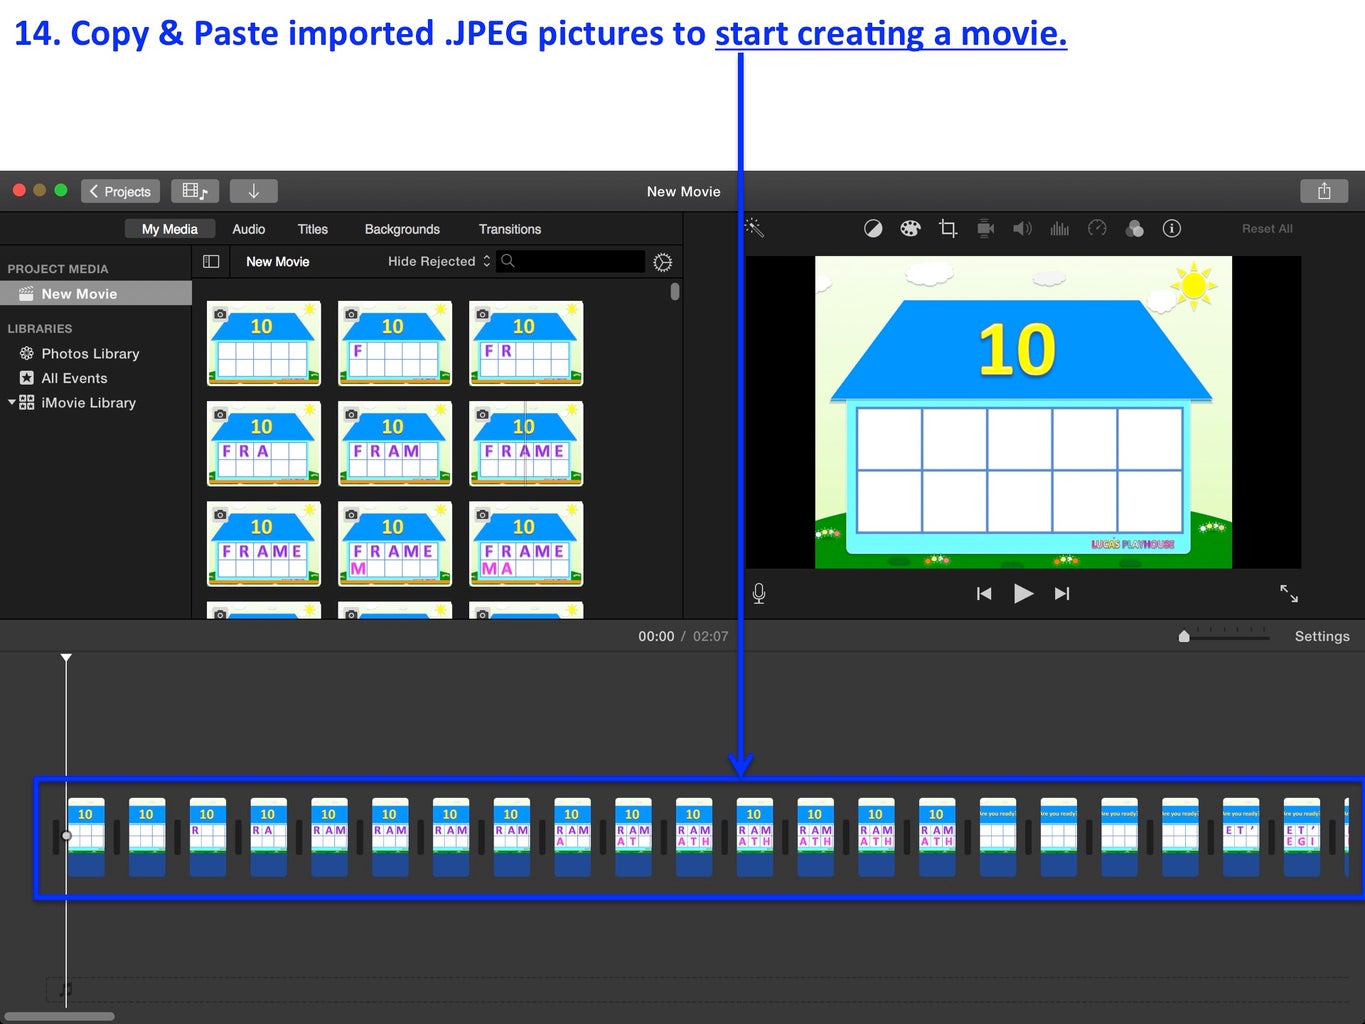
14. Copy & Paste imported .JPEG pictures to the working panel and start creating a movie.
Step 15: Insert Titles.

15. Insert Titles, if required.
Step 16: Insert Titles

16. Insert Titles, if required.
Step 17: Insert Background Music.
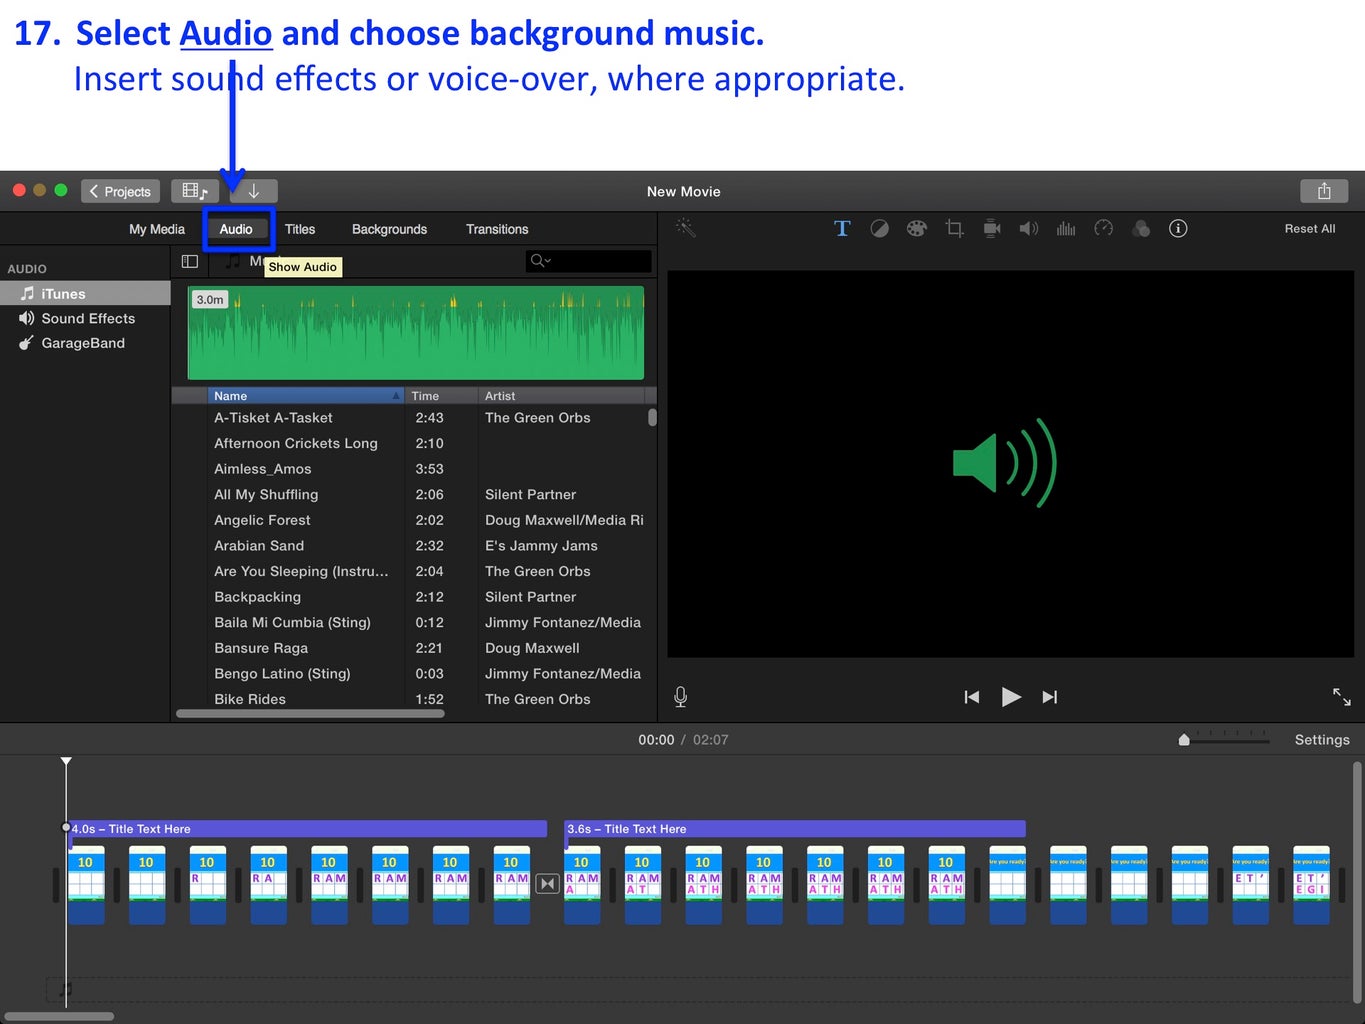
17. Select Audio and choose background music.
Insert sound effects or voice-over, if needed.
Step 18: Free Audio Library

18. Free music available at https://www.youtube.com/audiolibrary.
Select free music, preferably from “Attribution not required”.
Step 19: Preview Before Finalization.

19. Preview and check the animation before finalization.
Step 20: Save and Export File.

20. Go to File -> Share to save the final animation as a file or export to Social Media. Great job!

Participated in the
Creative Misuse Contest


