

Introduction: DIY Robot With Wheels

The DIY Robot with wheels is a device that is designed to move, make sounds, and light up utilizing the adafruit CPX device. The device has been coded to spin the servo motors allowing for the wheels to function and move the robot around. The CPX has also been coded to light up and drive forward for 2 seconds once button A is pressed, once the robot stops moving forward the device will sleep for 2 seconds, then play two different tones. Once button B is pressed, the CPX device will light up a different color then when button A was pressed, then the robot will move backwards for two seconds and then sleep for two seconds. Once the sleep time is done, the CPX will produce 3 different tones produced at different hertz levels. After, the CPX device will acknowledge a flashlight with the light sensor, once the light hits the sensor it will light up a third different color, and then spin the robot in one direction for 3 seconds.
This Project is Remixed From:
Supplies


Materials:
- Adafruit Circuit Playground Express Basekit
- Continuous Rotation Micro Servos (2) or Standard Micro Servos (2)
- Battery Pack
- Alligator Clips (6)
- Micro Servo Arm and Horn Set (may be included with servo) (2)
- Nuts M3 (2)
- Screws M3x12mm (2)
- Googly eyes (optional)
Tools:
- 3D Printer
- Small Phillips head Screwdriver
- Hot Glue Gun & Sticks
- Metal File (If using continuous servo motors)
Step 1: 3D Printing

- Download the zip file
- Extract the following files from the zip file
- Body (we need to edit, make it just a box)
- Head
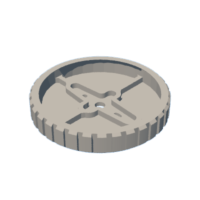
- Wheels (figure out where/what file)
- Support
- 3D Print Each Structure individually, using best practice for specific device
- Device pictured was printed on a Makerbot sketch


Step 2: Assemble Body


- Place servo motors on the bottom of the body with their gears sticking out of the allocated holes
- Holes may need to be filed in order for servos to fit
- Attach servo horns to wheels using hot glue
- Attach support to the back of the body using screws.
- Attach each wheel to body by placing the servo gear within each horn
Step 3: Connect Servos to CPX


- Each wire on the servos has a corresponding port it should be connected to, they are as follows:
- Servo 1
- A1 ⇄ Servo 1 Signal (Orange)
- VOUT ⇄ Servo 1 Power (Red)
- GND ⇄ Servo 1 Ground (Brown)
- Servo 2
- A2 ⇄ Servo 2 Signal (Orange)
- 3.3V ⇄ Servo 2 Power (Red)
- GND ⇄ Servo 2 Ground (Brown)
Step 4: Set Up CPX to Run CircuitPython

Follow Adafruit's instructions for installing CircuitPython on a CPX: Installing CircuitPython
This project can also be coded using Adafruit Makecode, however this version is coded in CircuitPython
Step 5: Program CPX

This project uses Adafruit's CPX and Servo libraries. An example program is attached below.
The Example Code Includes:
- Light up and drive forward for 2 seconds once button A is pressed
- once the robot stops moving forward the device will sleep for 2 seconds, then play two different tones.
- When Button B is pressed, the CPX device will light up a different color
- Next, the robot will move backwards for two seconds and then pause for two seconds.
- Then, the CPX will produce 3 different tones at different hertz levels.
- Device will acknowledge a flashlight with the light sensor, once the light hits the sensor it will light up a third different color, and then spin the robot in one direction for 3 seconds.

Step 6: Attaching Battery Pack & Final Assembly


- Attach the battery pack to the port on the CPX
- This can then be placed along with the CPX within the body of the robot.
- Finally place the head on top of the other components, it should latch into place.
Step 7: Decorate (Optional)

The robot should be fully operational at this point, but the addition of googly eyes, stickers, or other fun decorations is a great way to add some character.


![Tim's Mechanical Spider Leg [LU9685-20CU]](https://content.instructables.com/FFB/5R4I/LVKZ6G6R/FFB5R4ILVKZ6G6R.png?auto=webp&crop=1.2%3A1&frame=1&width=306)


