Introduction: Design a Space Satellite in Tinkercad
Moon base to rover, do you copy?
Even daily communication changes when living on the moon. Without air to carry our voices, we'll have to rely on technology to communicate. We might even have to use lasers to beam a message home!
Before any rockets blast off into space, scientists need to be sure of where to send brave space explorers. One of the ways they do that is by using satellites to look at star systems and the surface of planets to determine what to focus on. Satellites stay in space for a long time, constantly sending information to earth for scientists to research. To keep satellites powered up they use large solar arrays to capture sunlight and turn it into electricity.
In this tutorial we'll make a solar satellite with a radio dish to transmit signals to and from earth.
Below is the satellite design we will be making together. Take a moment to interact with the model below and see it from all angles before we get started.
The moon is closer than ever with new advancements in space technology. The next breakthrough in space design could come from a designer such as yourself. Let's get making this satellite!
Step 1: Shapes to Get Started
To get started go to Tinkercad.com and start a new design.
Making a satellite can be started by placing a few simple shapes onto the workplane. Take a look at the library of shapes on the right side of the screen.
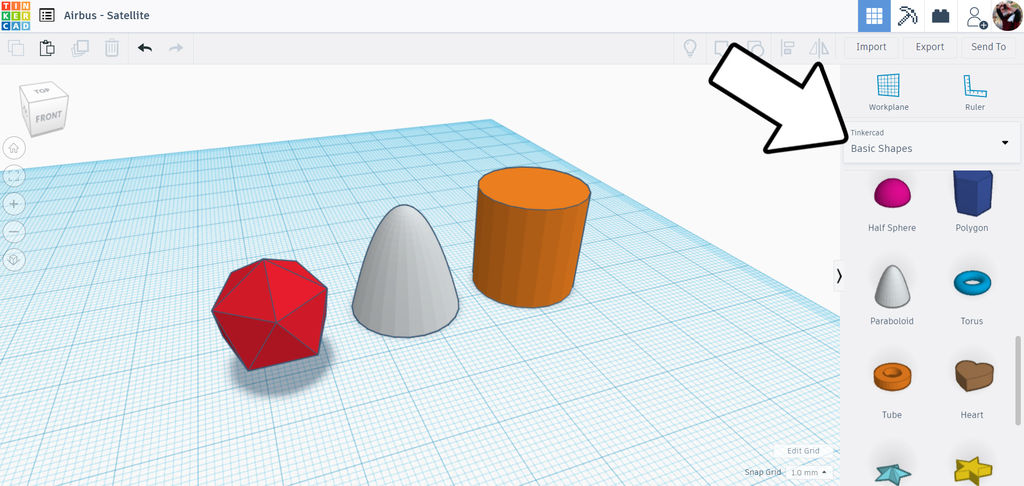
I dropped an isohedron, a paraboliod, and a cylinder onto the workplane; all found in the basic shapes tab.
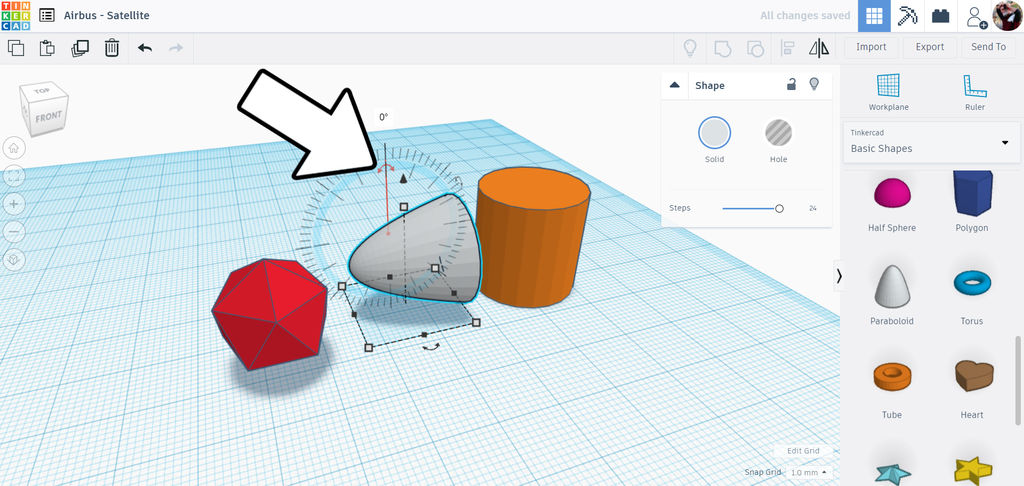
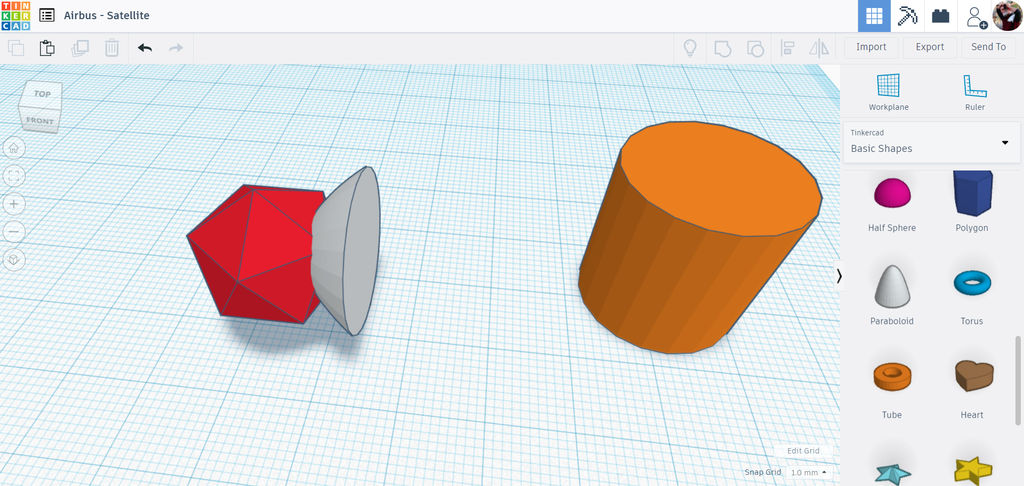
Rotate the paraboloid 90° and move close to the isohedron. This will be the base of the satellite design. We'll use the cylinder to make the boom that holds the solar panels.
Step 2: Solar Boom
I;veThe cylinder will now be stretched to make a boom that will hold the solar array.
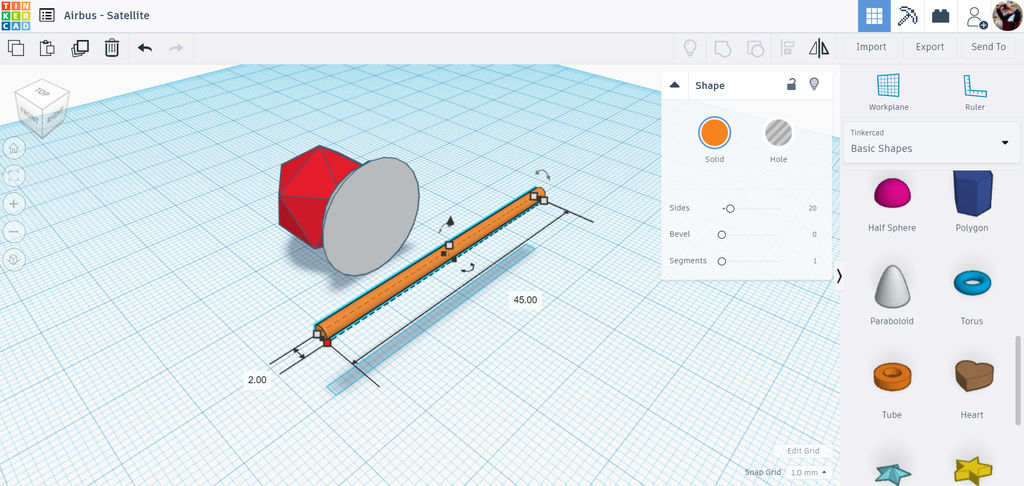
Resize the cylinder by holding the shift key and dragging on the white handles on the corner. rotate the cylinder and stretch the shape lengthwise to make a long stick-like shape.
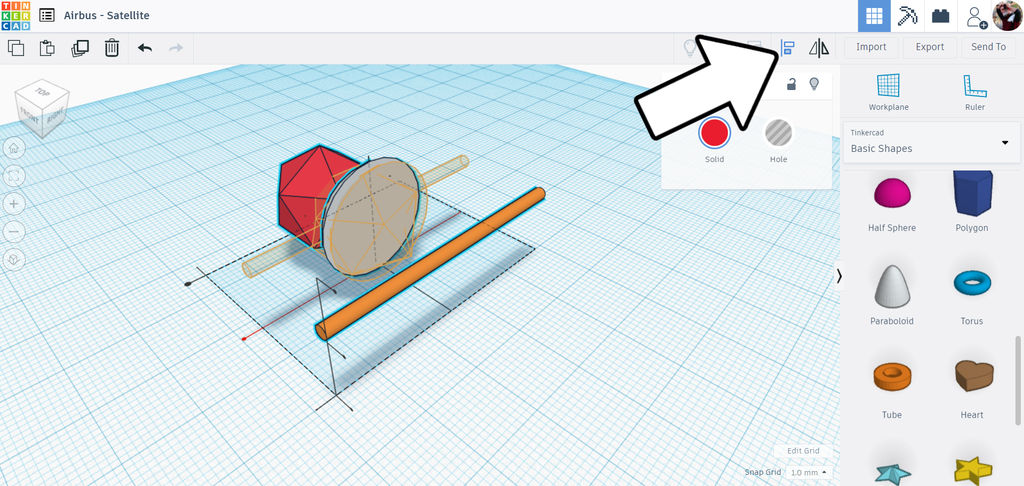
use the align tool to align the shapes along a central axis, then use the same tool again to bring the cylinder into the center of the isohedron.
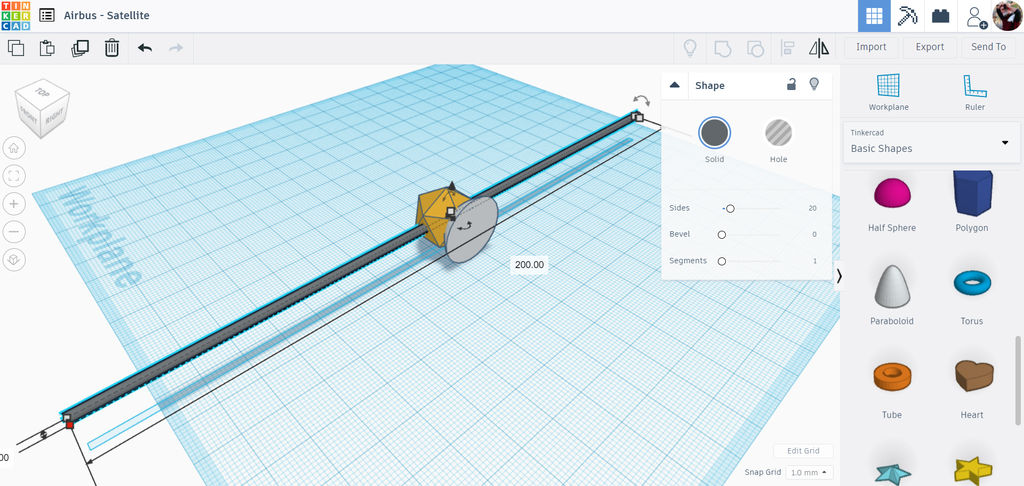
With the cylinder centered, select the cylinder shape and grab the small black handle in between the white corner handles. Holding the alt key drag the black handle outwards to lengthen the cylinder shape. Holding the alt key locks the stretching symmetrically outwards from the center.
I've also changed the color of the isohedron to a gold color, just like a real satellite.
Step 3: Solar Panel
With the basic satellite shape done we can move onto the solar panels.
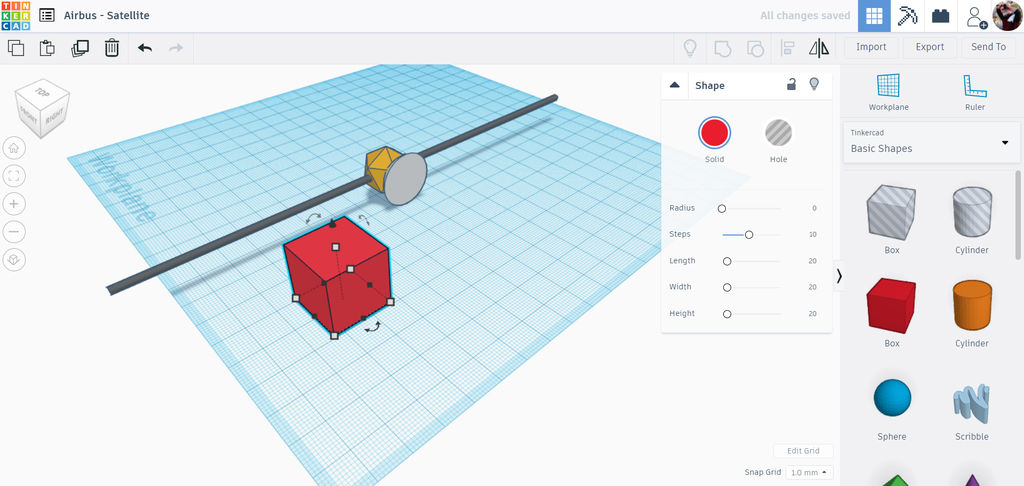
Drop a box onto the workplane.
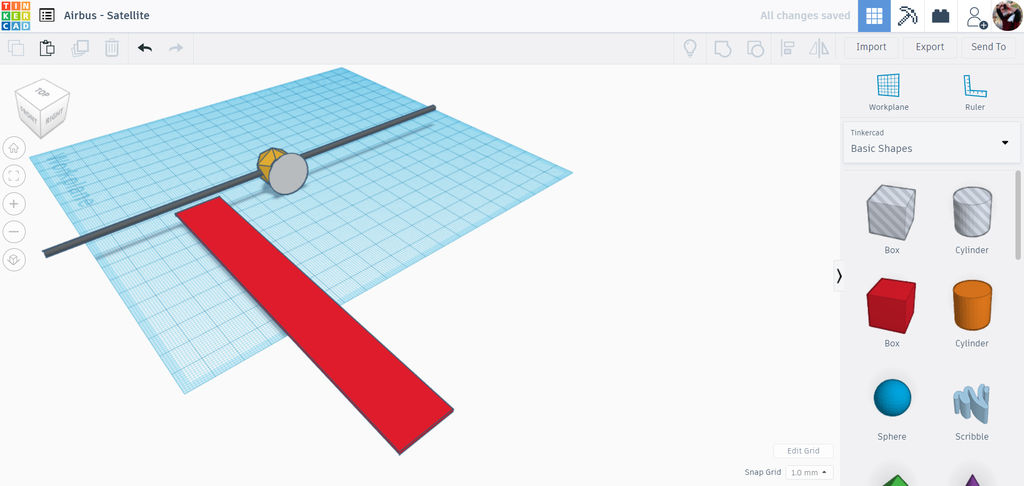
With the shape selected, use the white handles on the corner to stretch out the shape into a long rectangle. use the white handle on the top of the shape to flatten it down to make it thin.
Step 4: Solar Cells
The basic shape of the solar panel is easy enough, but now to add some cells to really give the effect some depth. We could drag more box shapes on top and make a bunch of duplicates, but there's a much easier way.
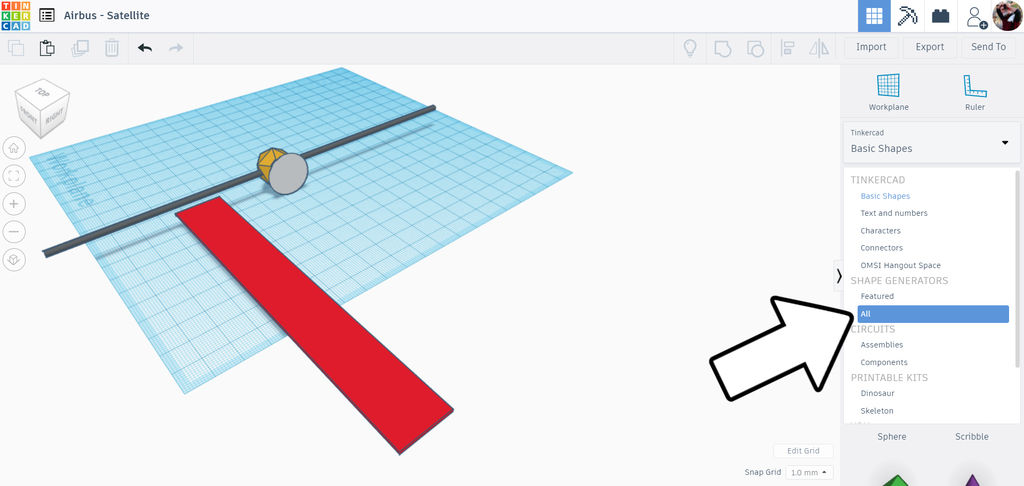
Switch the library on the right side of the screen from basic shapes to shape generator > all. Scroll to page 13 and find breadboard. Drag this shape onto the workplane.
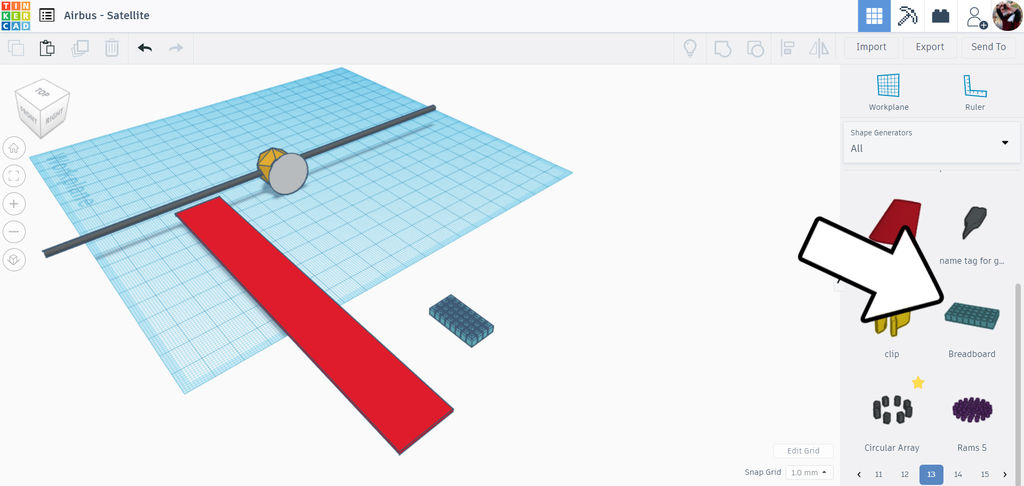
The breadboard is an array of small boxes that can be stretched and resized to fit inside the solar panel. Perfect for our needs.
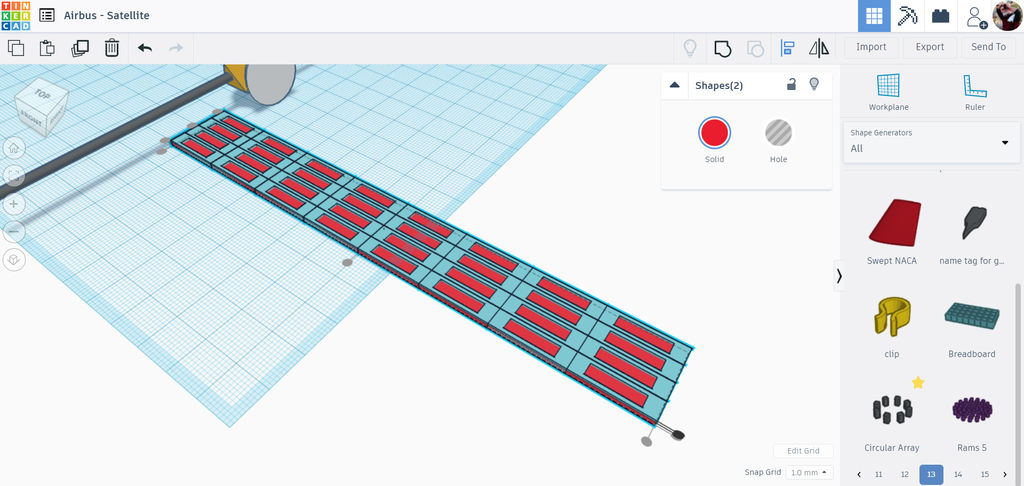
First, select the long flat rectangle shape made in the previous step and take note of the length and width dimensions. Now, select the breadboard shape and make this shape the same as the rectangle. Use the align tool to align the breadboard with the rectangle. Change the height of the breadboard to be slightly thicker than the rectangle, that way it shows up while the two shapes are stacked on top of each other.
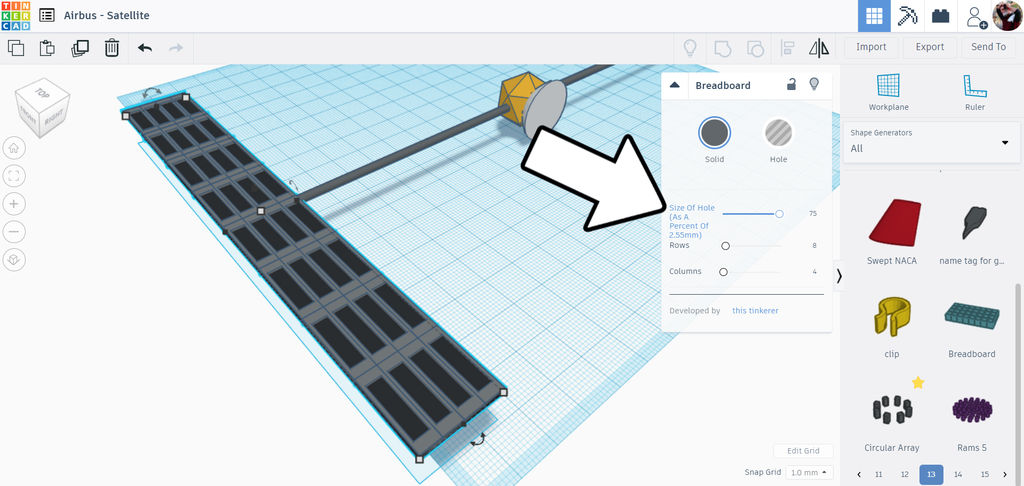
With the breadboard selected, use the slider on the pop-up menu to change the size of hole to the minimum.
While we're here change the color of the solar panel and cells.
Step 5: Copy Solar Array
Move the solar array on to the stretched out cylinder, use the arrow on the top of the selected shapes to bring the height of the shapes to just above the boom.
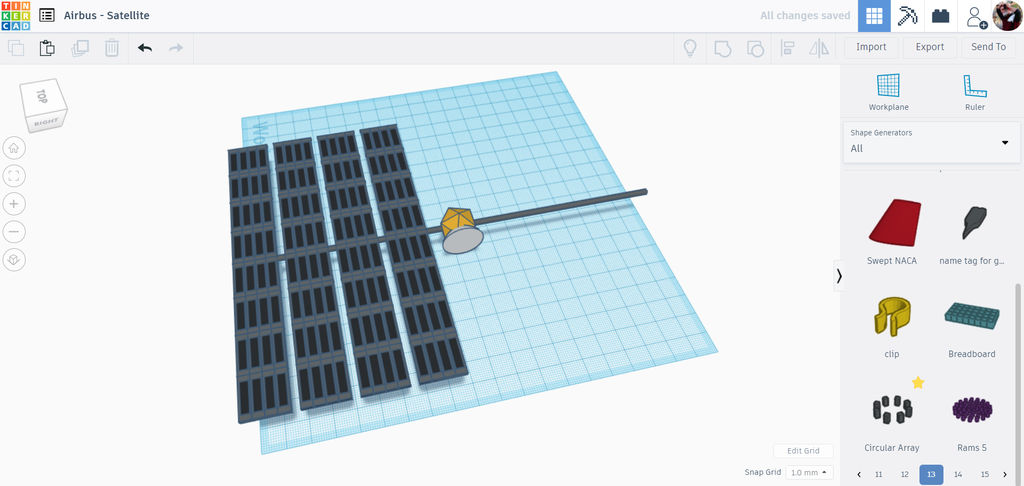
With both the long rectangle and the breadboard shapes selected, use the duplicate (ctrl + D) command to make a copy. Move the copy along the boom. Use the duplicate command again to create another copy.
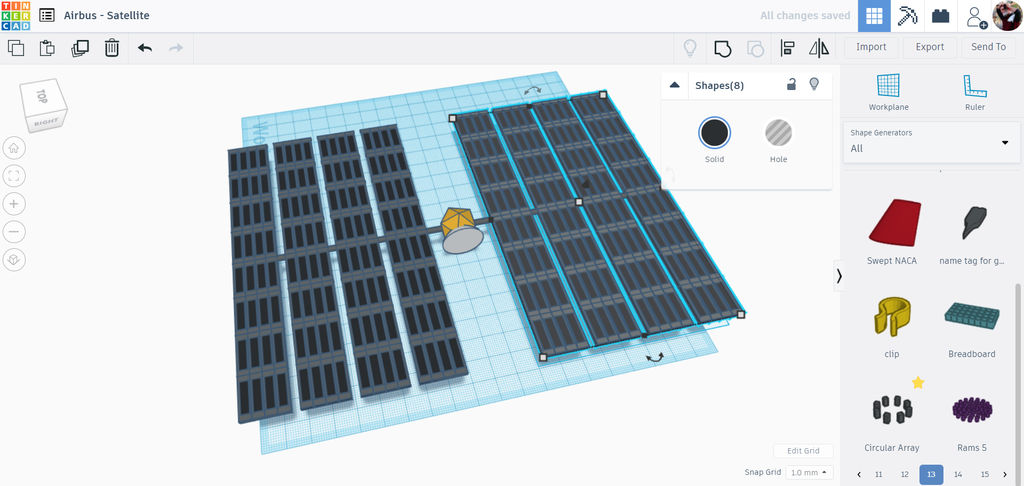
Now, select all the copies from one side of the satellite and use duplicate again. Move this duplication from one side of the boom to the other, completing the solar array on both sides of the satellite.
Select all the solar panels and use the rotational arrows to tilt the solar array.
Step 6: Radio Dish
With the solar array complete we can turn our attention to some of the details.
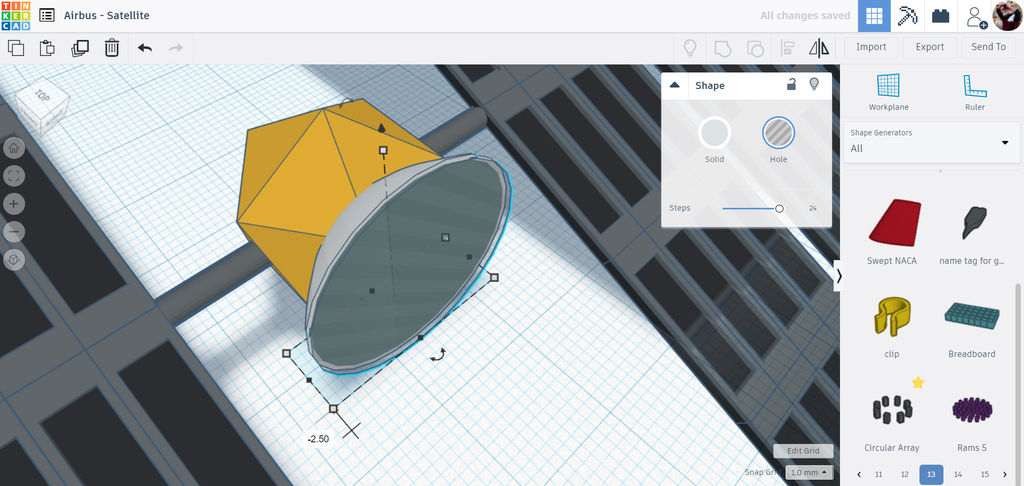
Select the paraboilid shape and duplicate. Move the copy slightly so that the two paraboloids nest, then change the copy to a hole. We'll use the copy to carve out the inside of the original paraboloid and make a dish shape.
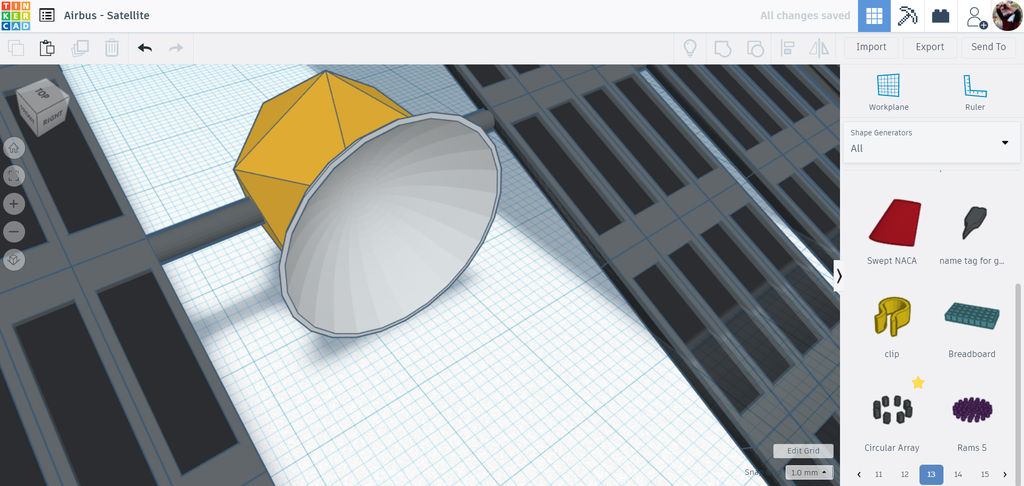
Select both paraboloids and group together, making a dish shape with will be the radio receiver.
Step 7: Details
To give more visual interest to this satellite more shapes were added to the body of the satellite.
I added a few cylinders to the top, one stretched out to be an antenna and another to be some kind of component. Another paraboloid was placed inside the radio dish, too. Keep adding small shapes to build up your satellite to match your design intent.
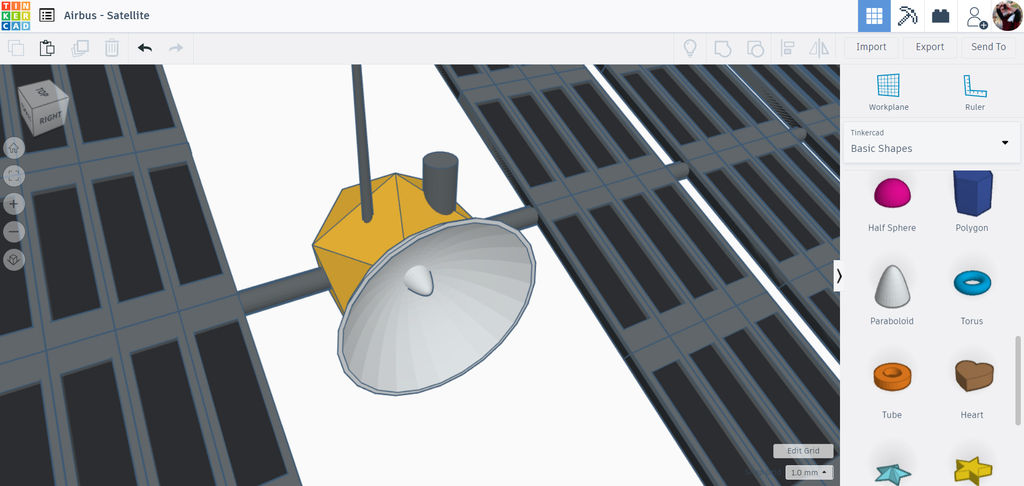
This satellite is ready to send and receive transmissions from mission control, and explore the solar system for signs of life or scientific discoveries. What does your satellite look like?
Step 8:
This tutorial was created as part of the Moon Camp Challenge, a yearly 3D design competition by the European Space Agency and the Airbus Foundation, in partnership with Autodesk.
If you're up for the challenge, head out to the competition platform here, find many other moon related 3D design tutorials and submit them to potentially win amazing prizes!


