Introduction: Doggy Hat
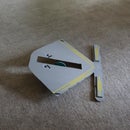
The plush toy dog has become an automated hat. A servo motor with cardboard lever arm moves the head randomly, controlled by a battery powered Arduino Uno.
No stuffed animals were injured during the construction of this project.
Supplies
Standard servo motor
Arduino Uno
(4) AA batteries
Battery container for 4 AA batteries
Cardboard
Velcro
Glue
Step 1:
In a room with no small children present, remove the stuffing from a plush dog.
Step 2:
Cut two strips of cardboard, long enough to reach from the body of the dog to the end of the dog's mouth.
Step 3:
Glue the two strips of cardboard together and fasten them to the servo motor horn.
Step 4:
Attach the cardboard lever to the servo motor.
Step 5:
Find a suitable box (this one was about 8 inches by 8 inches by 2 inches) and cut a space that corresponds to the head shape of the intended user.
Step 6:
Insert the motor/lever arm into the stuffed (well. . . not stuffed now) animal.
Step 7:
Add hook & loop tape to the bottom of the motor.
Step 8:
Using the tape, stick the dog to the top of the box. Let the head hang over the front a bit.
Step 9:
Program the Arduino with this sketch. Connect the wiring according to this schematic.
Attachments
Step 10:
Attach the Arduino and the battery box using the hook & loop tape.
Step 11:
Be certain that the battery box protrudes over the edge so that the on/off switch is reachable.
Turn the switch on, place the hat on your head and your dog will be the life of the party!

Second Prize in the
Silly Hats Speed Challenge


