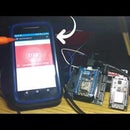
Introduction: ESP8266/Arduino SmartThings Bearded Dragon Habitat Controller/Monitor
DaVinci our Dragon was due for a software upgrade to his Vivarium's Controller. I decided to migrate from the good ole traditional 'full on' Arduino logic that has been chugging away quite reliably for the past year, to a ST_Anything SmartThings integration so I could leverage the automation and remote accessibility that environment inherently provides. The cool thing is the fact that the existing design/architecture of DaVinci's ESP8266 ESP12 NodeMCU 0.9 controller was 100% portable to the new ST_Anything with regards to pin mappings, etc...And....OTA is supported which made it even easier since I had implemented that on his existing rig already. Read on to learn how to get started with ST_Anything and see how this project became a great solution for DaVinci's Den.
Step 1: What You'll Need - Hardware
- ESP8266 ESP12E NodeMCU
- NodeMCU Base ver 1.0
- Dual Channel Relay
- DS18B20 Temperature Sensor
- Jumpers
- Generic household extension cords (or dual terminated)
- Container to hold components
- Samsung SmartThings 2.0 Hub
Step 2: What You'll Need - Software
ASSUMPTIONS: Comfortable working with Arduino IDE, Libraries, SmartThings IDE and GITHub.
Step 3: Hardware Setup and Electrical
Extension Cord Modification:
- Split the 2 wires of the cord apart with a utility knife or similar. Choose a location along the length that makes sense for your setup/configuration
- Look at your extension cord’s plug: one prong is larger than the other. Cut the wire that runs to the smaller prong, and strip 1" off each side. For dual channel relay, repeat process on 2nd extension cord.
CUT TIP: The correct wire is the one without ridges running along its length. For more detailed steps on this step, take a look here. It got me on the right track with using relays in such a manner.
Controller/Relay Connections:
ESP8266----------------------Relay--------------------Cord------------------------------Appliance
5V--------------------------------5V
Grd-------------------------------Grd
D6--------------------------------Data1
D7--------------------------------Data2
D3/3.3V/GRD---------------------------------------------------------------------------------DS18B20
D5/5v/GRD------------------------------------------------------------------------------------DHT11
Common--------------Thin_Blade Cut_1 NC or NO-------------Thin_Blade Cut_2 Wide_Blade--------------------------------Plug
Step 4: Software Setup - All of It - Final Step
ASSUMPTIONS: Comfortable working with Arduino IDE, Libraries, SmartThings IDE and GITHub.
Login to your respective SmartThings IDE and GITHub accounts.
Follow ALL steps shown here by Daniel Ogorchock. AKA Ogiewon.
The pic attached shows some of the devices added when using his included sketch ST_Anything_Multiples_ESP8266WiFi The Arduino sketch that I have loaded for DaVinci's controller is also attached for reference. I know there is a lot of information and configuration but it is worth it. PLEASE feel free to ask any questions you may have along the way. In addition, the SmartThings Forum for this project is a GREAT place for tips and advice.


