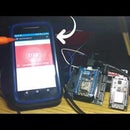
Introduction: ESP8266/ESP12 Witty Cloud - Arduino Powered SmartThings Illuminance Sensor
Having your Smart Lighting react to some of the default times like sunset and sunrise, or a specific time... doesn't always match what your eyes are seeing while you're inside your home. Maybe it's time to add a sensor that can fire up all of those fancy bulbs for you, based on the fading afternoon sunlight that is departing your abode at different times each day. Enter the ESP8266 & SmartThings Solution. Check out this Vid and read on to learn how you can build your own in no time flat!
Step 1: Hardware - What You'll Need - EASIEST EVER!
I DO NOT endorse, represent, or receive anything at all for the examples below. Caveat Emptor.
Substitute as needed for your individual requirements/parameters. Links to products are only for examples and not promotion.
1. ESP8266 Witty Cloud MC
Step 2: Software - What You'll Need
ASSUMPTIONS: Comfortable working with Arduino IDE, Libraries, SmartThings IDE and GITHub.
Step 3: Hardware Setup
For this section, the steps explained are based on my setup. Adjust as needed.
- Yeah...I got nothing. Connect your ESP8266 to your computer with the USB cable. That is all! Haaaa
Step 4: Software Setup
ASSUMPTIONS: Comfortable working with Arduino IDE, Libraries, SmartThings IDE and GITHub.
- Login to your respective SmartThings IDE and GITHub accounts.
- Follow ALL steps shown here by Daniel Ogorchock. AKA Ogiewon.
I know there is a lot of initial information and configuration if this is your first time setting up the ST_Anything configurations, but it is worth it. PLEASE feel free to ask any questions you may have along the way. In addition, the SmartThings Forum for this project is a GREAT place for tips and advice.
Modify the attached Arduino sketch, adding your WiFi/SmartThings environment specifics. The sketch calls out where to make the changes, as do the steps on the GITHub Page.
NOTE: As of this Instructables creation (26Dec17), the Illuminance device type code is not present in the defaultST_Anything_Multiples_ESP8266WiFi Arduino sketch that is included in the GitHUB Repo. All other required SmartThings IDE specific details are current.You ONLY need to change the Arduino sketch. The attached sketch has the necessary changes.
See Attached Screen Shots for changes that were made. There are only 2, aside from your WiFi Creds.
That's a wrap! Connect it to some of your FANCY lights and HAVE FUN!


