Introduction: FUN WITH CIRCUITS USING MODELING CLAY


Making modeling clay structures is fun, but making them with light-up eyes and moving parts is even more fun. Clay modeling is one of the favorite activities of kids because kids like being messy. I thought it would be icing on the cake if they will see glowing light, running motor and sound of a buzzer on Clay. This hands-on learning can be easily done at home by using few materials. Clay has a playful nature, so kids can explore Electronic Circuits in a playful way. They will learn about Closed Circuit, Open Circuit, and Short Circuit. This hands on learning can be done by kids above 4 years.
You can initiate or encourage curiosity just by asking this question :
Do you know you can make creatures or things using modeling Clay that can light up, move and make a sound? Watch their ZEAL for the learning !!
Attachments

Step 1: Materials Required in Making Circuit

1) A power source with a current value of 5 volts. I have used a battery of 9 Volts.
2) Two wire leads with alligator clips on each end.
2) Modeling Clay.
3) Some finely grinded salt.
4) LED's as required for your project.
5) Additional Components like Buzzer, Motor, etc to extend your circuit.
5) Tap water, which form an ion-rich electrolyte (electricity passes or is conducted from ion to ion)
And of course some creativity too to make exciting models (:
Step 2: Concept Behind the Magic on Clay


What is a Circuit?
A closed path through which an electric current flow is called a Circuit. Well, a circuit is formed when it provides a closed path for the current to flow. And for the current to flow, we require materials that allow current to pass through it. Most clay from the craft store is non conducting. The non-conducting or Insulating clay resists the flow of current flowing through it. But we need a way to make it conducting. So, we used salt to make it conducting.
PATH FLOW: The current will move from the positive end of the battery(red wire) to one roll/ball of the clay to LED, to another roll of clay, to the negative end of the battery(black wire). This way it will be a closed circuit. If any of the wire is not connected, it will be an open circuit.
This is the basic step in learning a Closed and Open circuit. In place of LED, Motor and Buzzer can be used as per project requirements.
Step 3: Make Your Clay Conducting


Take one piece of the clay and mix it with approximately one spoon of very finely grinded salt so that it can mix well with the clay. Take tap water if required in between. After mixing, make two balls of conducting clay.
Attachments
Step 4: Light Up Your Clay


*Place the two conducting balls of clay on a table.
*Take one LED and insert long leg i.e positive terminal of the LED into one ball and short leg i.e negative terminal of the LED into another ball.
*Connect the red i.e positive wire from the battery to the ball having positive terminal of LED and the black wire to another ball having negative terminal of the LED.
HERE WE GO...... The LED lights up. Yayy !!!
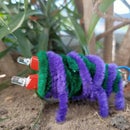
Step 5: Make Your Own Model

After learning how a circuit is formed using playing dough, kids can make any creature or structure of their own. They will use their creativity to glow light on cars, dragons, cake, Train and what not.
Here is the model of train after the learning of simple circuit.

Second Prize in the
After School Challenge


