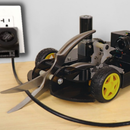
Introduction: Flex Sensor Glove
This is a fun project that can be adapted to control anything from robotic arms to virtual reality interfaces.
Step 1: Materials and Parts
For the glove:
- A cheap gardening glove
- Arduino Lilypad
- Lilypad battery cell holder
- Conductive sewing thread
- Normal sewing thread
- Velostat
- Stick tape
- Super glue
- Elastic
- Five 4.7Kohm resistors
For the arm:
- Five SG90 servos
- Electrical wire
- PLA or ABS filament
- Ninjaflex (or other flexible filament)
- Fishing line
- 5V power supply
- Small bread board (optional but useful for wiring the servos in parallel)
Note: if you do not have flexible 3D printing filament it is possible to use a different robotic arm to the Flexy Hand
Step 2: Making the Flex Sensors
The material I used, velostat, is a piezoresistive material. This means that it is pressure sensitive and when you press, bend or deform it the resistance will change. It is this property we shall utilize to measure how much each finger bends.
Start by cutting 5 strips of velostat, approximately 0.7cm x 8cm, the exact dimensions are irrelevant as we are interested in a qualitative reading of the resistance and not a quantitative one.
Next place 2 long pieces of sticky tape face up on a flat surface and cut two lengths of conductive sewing thread, I would say at least 40cm long, it is always better to have excess. Optionally apply a small drop of super glue on the sticky tape, near the base. This is not required but I found that it prevents the sewing thread from accidentally getting pulled out. If you do not have conductive sewing thread it might be possible to use thin copper wire for this step like the wire you find in headphone cables (I say "might" as I have not tested this idea).
Lay the 2 lengths of sewing thread on top of the sticky tape along the centre, with the tail of the sewing thread sticking out the end of the sticky tape. It is important to go to almost the full length of the sticky tape because if you don't the flex sensor will only collect readings near the base of your finger and not the tip.
Lay the velostat on top of one piece of sewing thread such that it covers the end of it (you do not want the 2 pieces of sewing thread touching). Then lift the other piece of sticky tape onto the uncovered side of the velostat, pressing down hard to remove air bubbles. At the base of the sensor ensure that the 2 pieces of sewing thread are not creating a short circuit, to prevent this have them exit the sticky tape on opposite sides (similar to a "Y" shaped junction, see picture).
Trim the excess sticky tape as desired. Lastly super glue a small piece of elastic on the end of the sensor. Repeat this 5 times adjusting the size of each sensor to optimally fit your finger.
Step 3: Make the Glove
I will give an overview of the steps I personally took but how you do it will vary on a case by case basis, largely dependent on the glove you use.
One key point I cannot stress enough is that conductive sewing thread is NOT like normal hobby wire, there is no insulating sheath. Additionally since the glove is flexible and can bend back on itself it is very easy to create a short circuit, resulting in destroyed components and large holes melted in your glove.
If you do not have conductive sewing thread it is possible to use normal wires and solder your connections.
I started by wiring the battery pack to the glove and connecting 5V and GND to the Arduino Lilypad. Do not fully sew the Lilypad on yet as we will need to bend it backwards and sew underneath it (see pictures above).
I would also recommend lining the underside of the Lilypad board with electrical tape to prevent any short circuits.
Next solder the ends of five 4.7Kohm resistors into little loops (you may need to adjust the resistance value based on the length and width of your velostat strips). Optional: use hot glue to attach them to the glove, it is trickier to sew them if they are not initially held in position.
Consult the above pictures and circuit diagram carefully before continuing, it is important to map out your route for the sewing thread before starting otherwise you will "sew yourself into a corner".
Personally I started sewing from GND on the battery pack to the 5 resistors and then from each individual resistor to the A0 thru A4 pins by going underneath the Lilypad board that we covered with insulating tape earlier. Following this I superglued the end of the first flex sensor to the thumb with one end of the sewing thread going to 5V and the other end going to A0. Repeat this for each finger, but instead of going directly to 5V each time (and creating a maze of stitches) just sew to the previous flex sensor.
To ensure each of the flex sensors remain under tension when you move your fingers stitch the elastic that we attached to the flex sensor in the last step to the finger tips on the glove. Optionally stitch some loops around the flex sensor to ensure they stay in position as you move your hand.
Lastly solder 5 wires to digital pins 5 through 9, these will be used later to tell the servos where to go.
Step 4: Build the Arm
I 3D printed the arm off files made available from the user Gyrobot on Thingiverse. You can find them here.
If you want you can 3D print a forearm too, but due to filament restraints I made a paper mache model of my own forearm. I used five SG90 servos held in a 3D printed frame, connected to each finger by fishing line. Wire all the GND and Vin connections in parallel to an external power source such as a 5V AC-DC wall transformer.
Connect the servo input pins (usually the orange wires by convention) to the corresponding digital pins on the glove.
Step 5: Upload the Code
Unless you have an FTDI cable you will need to program the Lilypad via an Arduino Uno. The steps for this are outlined in this instructable. Ensure you have the correct Arduino board type selected, to change it go to Tools/Board/Lilypad Arduino.
Following the instructions above upload the calibration code first.
Copy the output from the calibration code into line 31 of this code, then upload it.
Step 6: Comment on the Baud Rate
I had a rather frustrating bug with the baud rate (which is the speed at which data is communicated through the serial port) being a factor of two larger than what I programmed it to be. See my youtube video at around 2:54 for a demonstration of the issue. Unfortunately this prevented me from following my initial plan which was to use bluetooth and wirelessly communicate between the glove & robotic hand.
I was unable to resolve the baud rate issue but my best guess is that there is a mismatch between the software hardware thinking the oscillator on the board is either 8mHz or 16mHz. This may be because I purchased a cheap clone board and not the official product. If you use the real product you may not have this issue. Nonetheless this is purely just my own speculation and if anyone knows the real reason please let me know in the comments below.
As temporary fixes I found 2 ways around this:
- Double the baudrate using the button on the lower left of the serial monitor. For example, if the code says Serial.begin(9600); change the serial monitor output to 19200.
- Instead of choosing the Arduino Lilypad as your board choose the Arduino Pro as you board. To do this in the Arduino IDE go: Tools/Board/Arduino Pro or Pro Mini, then upload.
Step 7: Completion
I hope you found this instructable informative, if you have any questions or suggestions please leave them in the comment down below.

Third Prize in the
Make It Move Contest 2017


