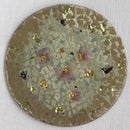
Introduction: Gilded Botanical Coasters
We’re finding inspiration in nature and in using what we have around the house. We were able to pick a few spring flowers and leaves from the yard. You can also find beautiful images @romanceofbooks if your interests lie in the historical, cheery options @houselarsbuilt, and mesmerizing images @rizzolibooks (they have fantastic free kids’ projects too). Also try clipping images from magazines, newspapers, even food (like boxes of tea) or cosmetic packaging. Right now it’s all about using what you have, and this is a wonderful way to give some otherwise ho-hum décor a brilliant lift of gold.
Supplies
Coasters – can be ceramic, plastic, glass, wood or stone (as we used for this project)
A colored pencil or marker (check what makes a visible line on your coaster)
Small artist’s brush or two for applying the primer and the gold “size” (adhesive) Soft brush for brushing down and removing excess leaf Sepp Gilding Workshop Yellow Primeror acrylic paint Sepp Gilding Workshop water-based Gilding Size Sepp Gilding Workshop Imitation Gold Leafbook of 25 leaves – or a book of Genuine Gold Leaf Sepp Gilding Workshop Acrylic Clear Coat, or clear varnish. You can find the gold leaf where Sepp Gilding Workshop products are sold.
Step 1: Apply Your Botanical Pattern
Lay your flowers and leaves on the surface of the coasters till you have a pleasing image. Trace around the edges of each piece. You can also trace around cut pictures of flowers you’ve found, or even just free-hand draw as suits you.
Step 2: Apply Primer
Paint primer within the lines of your tracing – if you go over here or there, no worries, the aim is to give it liveliness, not stiffness. A second coat may be needed to provide solid covering, non-porous areas to be gilded.
Step 3: Applying the Size
Load your artist’s brush with the water-based Gilding Size and use even strokes to draw the size across each shape. You want an even, thin layer of size, not fat puddles, which can skin over and dry in ridges. As the size reaches tack, it will turn from milky-white to clear. The image above right shows various stages of drying.
Step 4: Gilding With Leaf
When the size has turned clear and glossy, you are ready to gild! Open your book of leaf and slide the Imitation Gold Leaf to cover the coaster. If you’re using genuine gold, you can flip the leaf from the book over the size, as shown.
Step 5: Complete the Gilding
You can gently tear the extra page of tissue that’s left after removing the leaf out of the book and use it to press the leaf down by rubbing your fingers over the tissue. Or, you can also use your soft brush directly on the leaf to press it. Once you’re sure all the leaf has made contact with the size, you can gently brush away the excess to reveal your image.
Step 6: Protect Your Artwork and Display
Allow your coasters to dry for a couple of days, then topcoat just the gilded portions or the whole surface of the coaster. Serve in style!


