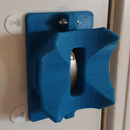
Introduction: Hands-free Toilet Flush Foot Pedal
A commercially available kit for converting your home toilet to hands-free flushing will cost you $25 or more. If you have a 3D printer, the hack I detail in this log will cost you less than $10. This design was developed in response to the Covid-19 pandemic. Any opportunity to avoid touching shared surfaces with your hands in public spaces is an opportunity to prevent the spread of the disease.
The mechanical connection to the toilet handle is a 3D printed hook plate attached with a wall hook adhesive strip.
The foot pedal is simply two 3D printed plates mounted on a hinge using M4 screws. Adhesive picture frame mounting strips are used to secure the bottom plate to the floor. A 3D printed loop on the backside of the top pedal plate is used to connect the rope to the pedal.
All three parts 3D print in less than two and a half hours.
Supplies
- a 3D printer capable of printing a part of size 120x75x80mm (LxWxH)
- 1m of rope, 6mm diameter or less
- four M4x10mm flat head screws
- four M4 nylock nuts
- one 1x2.5in (WxL) hinge
- two large 19x92.7mm (WxL) damage-free wall hanging adhesive strips, rated to hold 5lb
- one 15x50mm (WxL) damage-free wall hanging adhesive strip, rated to 2 to 3lb
Step 1: 3D Print the Handle Plate and Foot Pedal Parts
STL files for 3D printing the handle plate and foot pedal parts are attached to this step. Use 0.2mm layer height, 30% infill, 0.6mm wall thickness, and enable support material. Orient the parts on the print bed according to the images of this step. Total print time for all three parts is just under two and a half hours.
Use a knife to remove any support material and to deburr any sharp edges on the 3D printed parts.
Step 2: Handle Plate Assembly
Attach the 15x50mm adhesive strip to the bottom of the handle plate. While anticipating where the foot pedal will be mounted on the floor, secure the hand plate to the toilet handle using the adhesive strip. Tie the rope around the loop of the handle plate using a square knot.
Step 3: Foot Pedal Assembly
Connect the hinge base and hinge lever plate to the hinge using the M4 flat head screws and nylock nuts. Install the nylock nuts from the sides of each plate that have hexagonal holes. If assembled correctly, the nylock nuts should sit inside the thickness of the plates. Attach the two 19x92.7mm adhesive strips to the bottom of the hinge base plate as shown in the picture. Find the optimal downward direction towards the front of the toilet that the rope should be pulled from to rotate the handle enough to flush the toilet. Secure the foot pedal to the floor inline with the optimal downward direction. Rotate the foot pedal up from the floor and tie the rope to the 3D printed loop using a square knot. When pressed with your foot, the foot pedal will pull down on the string, rotate the handle, and flush the toilet.
Step 4: Hands-free Toilet Flushing Achieved!!
Never flush the toilet with your hands again!

Participated in the
3D Printed Contest


