

Introduction: How to Design Penrose Stairs With SelfCAD


Learn how to design penrose stairs with SelfCAD
Step 1:
How to Design Penrose Stairs with SelfCAD
Welcome to this tutorial on designing Penrose stairs using SelfCAD. Penrose stairs, also known as the impossible staircase, are a fascinating optical illusion where a flight of stairs appears to loop endlessly, creating a perplexing visual effect. In this tutorial, we'll explore how to create this mind-bending structure using SelfCAD, a versatile 3D modeling software.
SelfCAD offers powerful tools and features that empower users to bring their creative visions to life, making it an excellent choice for designing complex geometries like Penrose stairs. Whether you're a seasoned designer or a curious beginner, SelfCAD provides an intuitive platform for unleashing your imagination.
To access the interactive tutorial to this article, check out https://www.selfcad.com/tutorials/5po4652n5k05v2c2i253u3e5v1x5zo5m4t52
Once you’ve launched the editor;
From the 3D Shapes category on the Toolbar choose Cube. Set Width to 20, Height to 40, Depth to 20
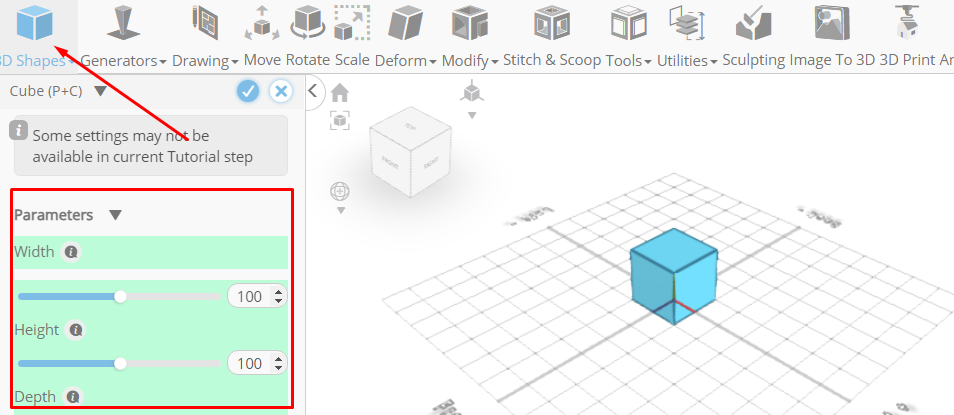
Click to finalize Cube
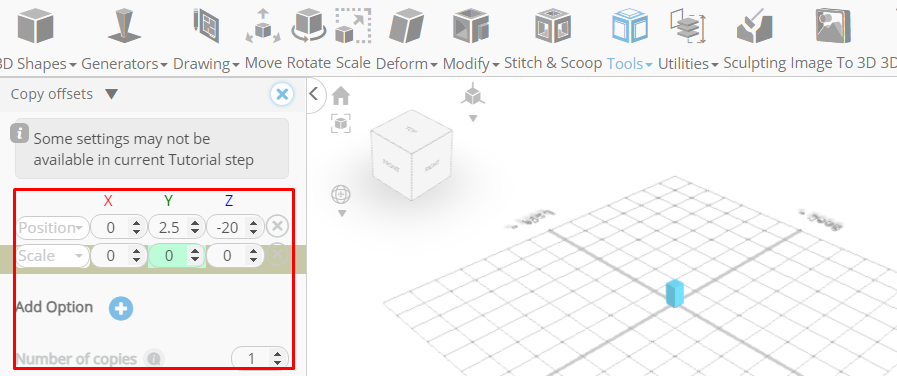
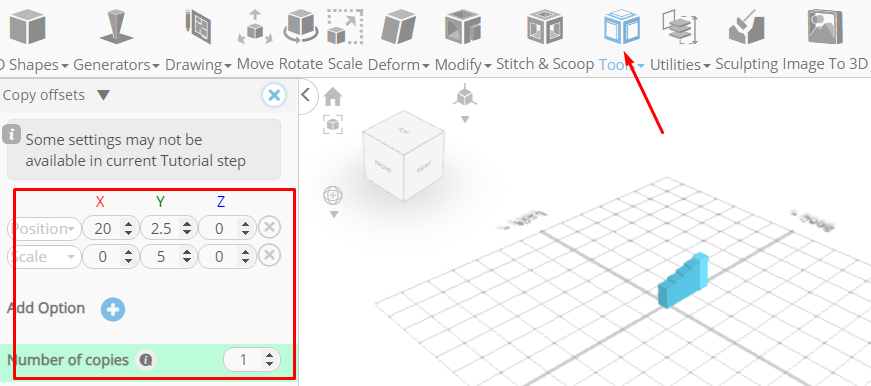
From the Tools category on the Toolbar choose Copy offsets. Set y to 2.5, z to -20
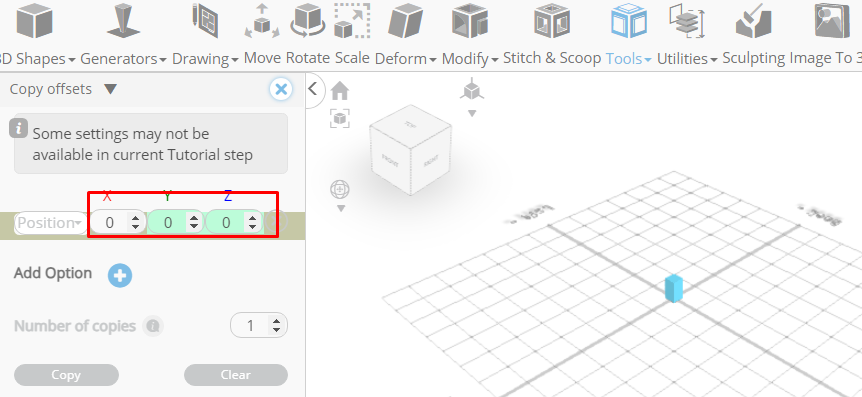
Click Add Option to add next macro step
Set Operation to scale. Set y to 5. Set Amount of copies to 4
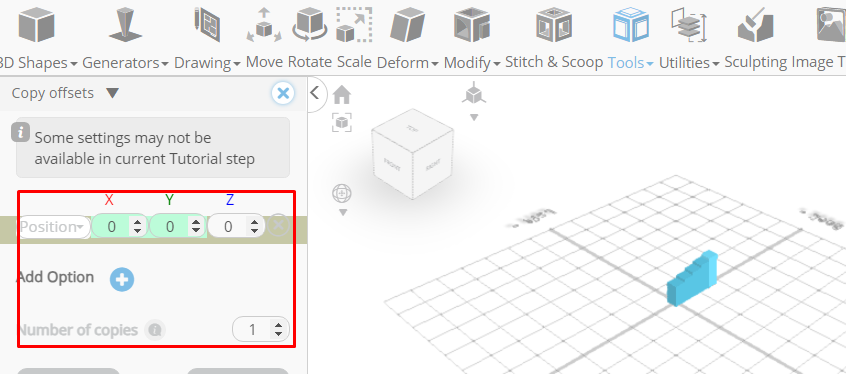
Click Copy button to create copies
Click ‘x’ to close copy offsets panel
Click on mesh 4, mesh 4(1), mesh 4(2), mesh 4(3) to deselect it
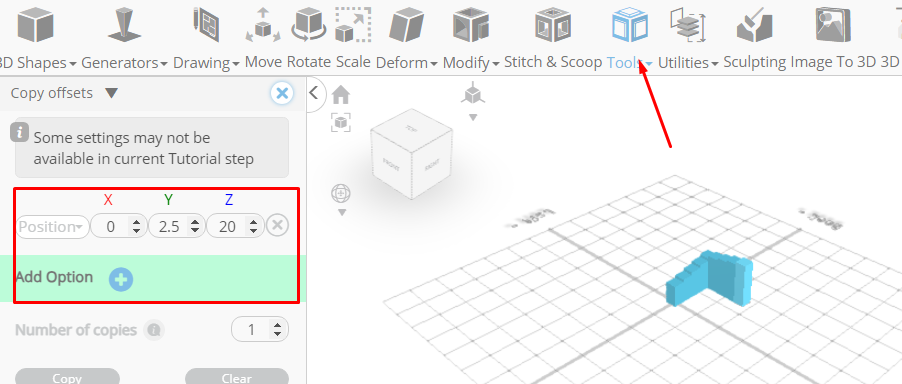
From the Tools category on the Toolbar choose Copy offsets. Set x to 20, y to 2.5
Click Add option to add next macro step
Set Operation to scale. Set y to 5. Set Amount of copies to 4
Click Copy button to create copies
Click ‘x’ to close copy offsets panel
Click on mesh 4(4), mesh 4(5),mesh 4(6),mesh 4(7) to deselect it
From the Tools category on the Toolbar choose Copy offsets. Set y to 2.5, z to 20
Click Add option to add next macro step
Set Operation to scale. Set y to 5. Set Amount of copies to 3

Click Copy button to create copies
Click ‘x’ to close copy offsets panel
Click on mesh 4(8), mesh 4(9), mesh 4(10) to deselect it
From the Tools category on the Toolbar choose Copy offsets. Set x to -20, y to 2.5
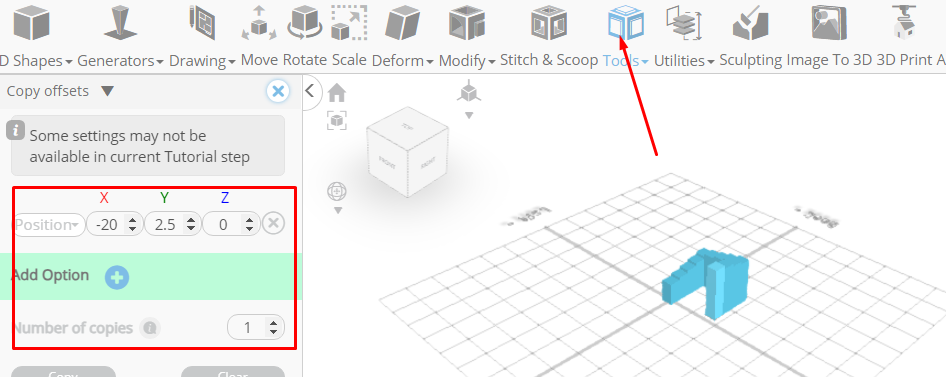
Click Add option to add next macro step
Set Operation to scale. Set y to 5. Click Copy button to create copies
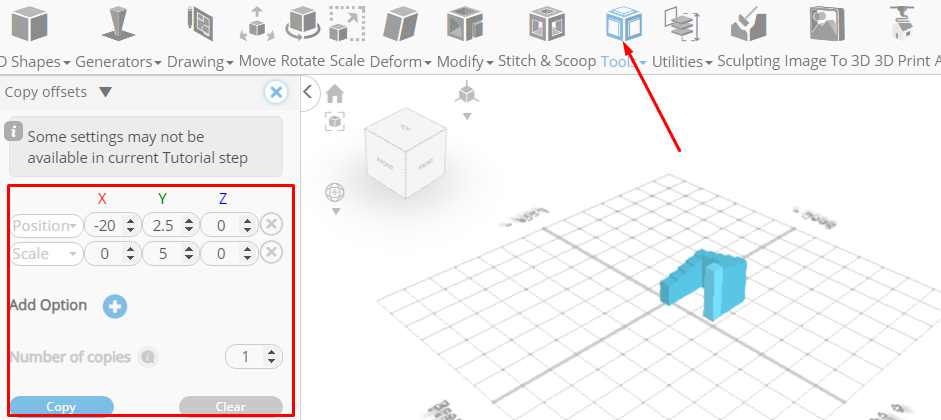
Click ‘x’ to close copy offsets panel
From the Edit Menu on the Top Toolbar choose Select All
Click Stitch & Scoop on the Toolbar. From the Tool panel choose Union
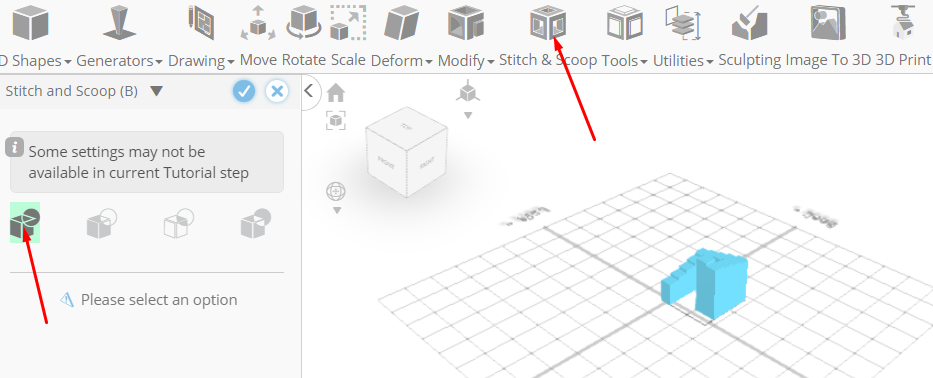
Click to finalize Union
Click Color picker button to change color of selected object
Click Black button
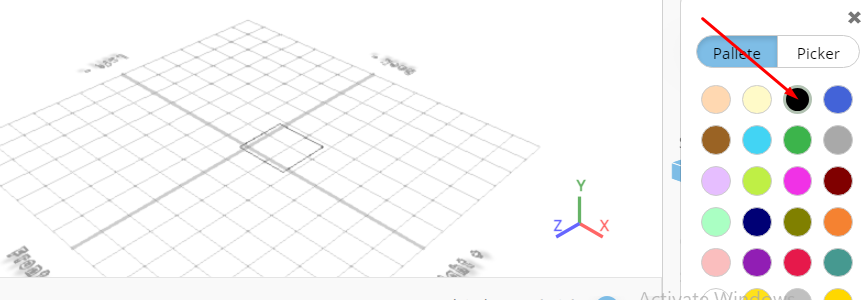
Click OK button to confirm color change

As you continue honing your design skills, remember that SelfCAD offers a wealth of resources to support your learning journey. To deepen your understanding and explore more advanced features, consider checking out the interactive tutorials (https://www.selfcad.com/tutorials) available on the SelfCAD website. The tutorials page provides a treasure trove of guides, tips, and tricks that cater to designers of all levels.
More structured learning experience can also be accessed at the SelfCAD Academy (https://www.selfcad.com/academy/curriculum/), https://www.youtube.com/@3dmodeling101, and 3D Modeling 101 series (https://www.youtube.com/playlist?list=PL74nFNT8yS9DcE1UlUUdiR1wFGv9DDfTB). This comprehensive resource offers in-depth courses taught by industry experts, allowing you to master the intricacies of SelfCAD at your own pace.


