

Introduction: How to Design a Baseball Bat Using SelfCAD


Learn How to Design a Baseball Bat Using SelfCAD with the help of this video
Step 1:
How to Design a Baseball Bat Using SelfCAD
Welcome to this tutorial on crafting a baseball bat using SelfCAD. In this tutorial, we'll guide you through the process of harnessing the creative potential of SelfCAD, a versatile 3D modeling software, to design your very own custom baseball bat. If you're a budding designer with a passion for sports or a seasoned veteran looking to explore new avenues of creativity, this tutorial is tailored to suit your needs. With SelfCAD's user-friendly interface and powerful tools at your disposal, you'll learn how to conceptualize, refine, and perfect your baseball bat design from concept to completion.
From selecting the optimal dimensions and weight distribution to adding personalized details and textures, this tutorial will equip you with the skills and knowledge to bring your vision to life in stunning detail.
To access the interactive tutorial to this article, visit https://www.selfcad.com/tutorials/4cz6x214sp5m4w731q3c6y3to4y1h342t2h2
Once you’ve launched the editor;
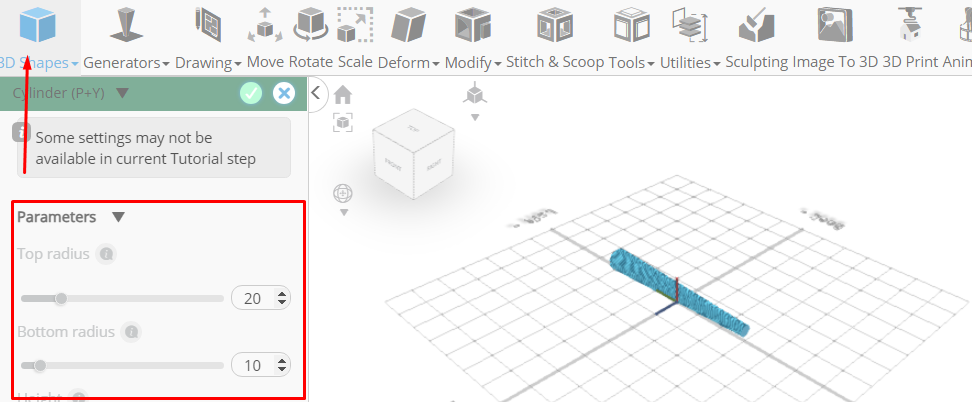
From the 3D Shapes Category on the Toolbar choose Cylinder
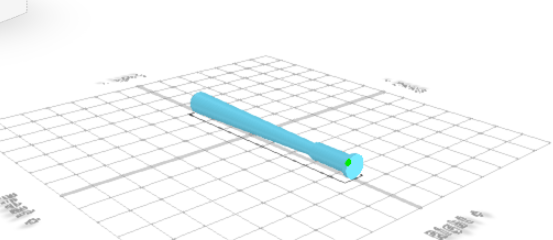
Set Top Radius to 20, Bottom Radius to 10, Height to 300, Vertical segments to 45, Rotation z to 90
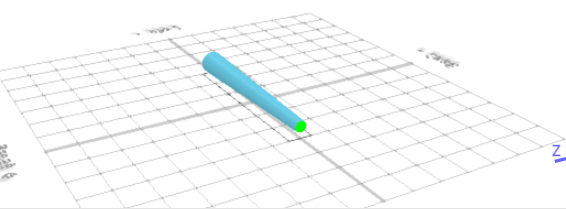
Click to finalize Cylinder
Click to activate Polygon selection
Click on highlighted region to select it
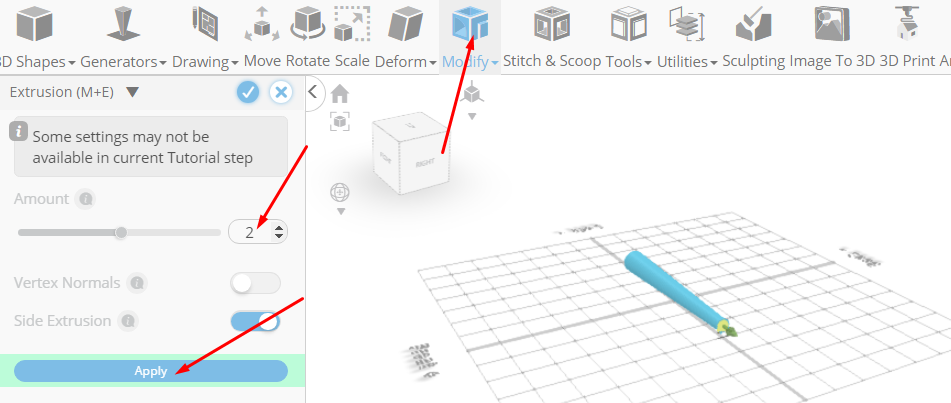
From the Modify Category choose Extrusion
Set Use Side Extrusion to true, Extrusion Amount to 2
Click Apply button
Set Use Side Extrusion to False
Click Apply button

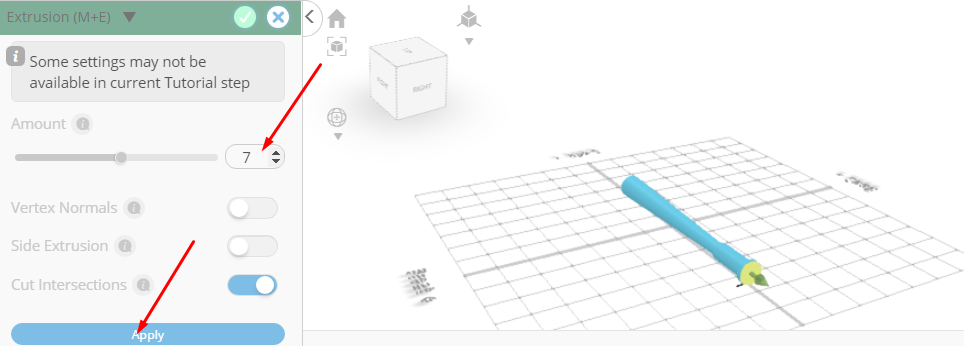
Set Extrusion Amount to 70
Click Apply button

Set Use Side Extrusion to False, Extrusion Amount to 7
Click to finalize Extrusion
Click on highlighted region to deselect it
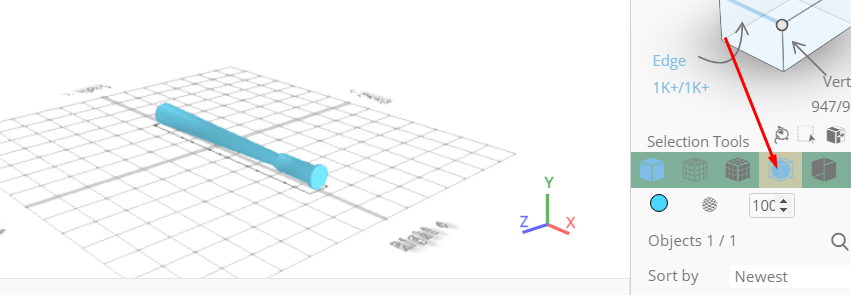
Click to activate Edge Selection
Click Selection Settings button to change selection settings. Set Loop selection to true
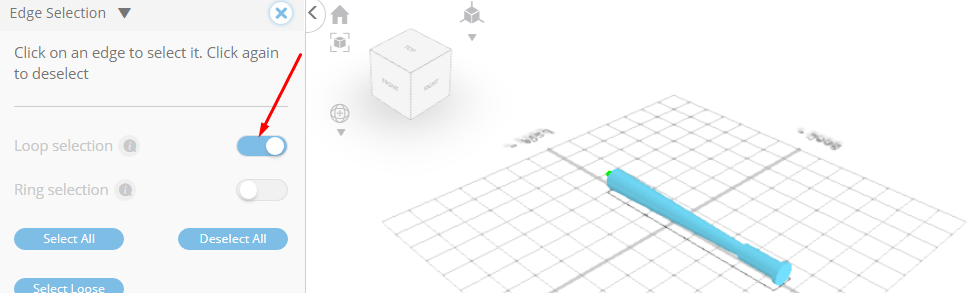
Click on highlighted edge to select loop from the object
Click ‘x’ to close selection settings panel
From the Modify Category choose Fillet. Set Level to 7
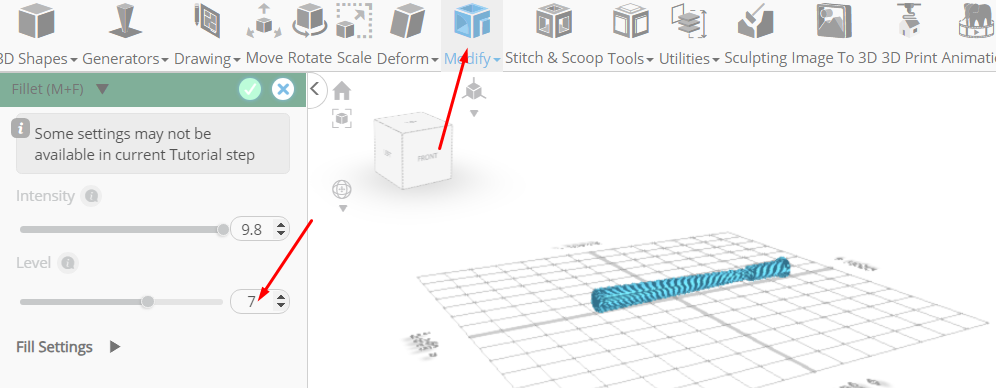
Click to finalize Fillet
Click Solid button to set rendering mode
Click Selection Settings button to change selection settings. Set Loop selection to true
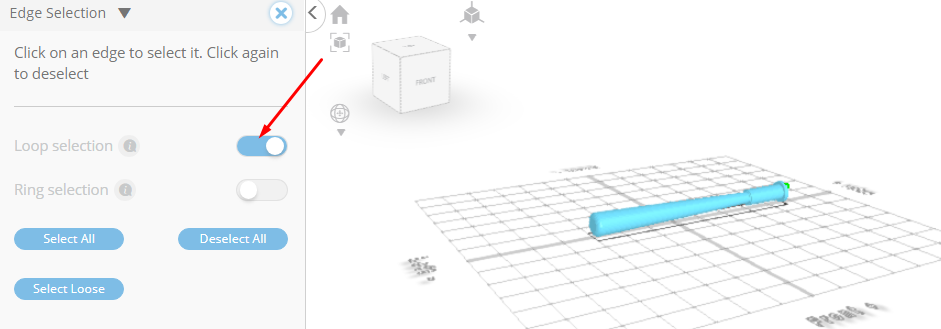
Click on highlighted edge to select loop from the object
Click ‘x’ to close selection settings panel
From the Modify Category choose Fillet. Set Intensity to 3, Level to 5
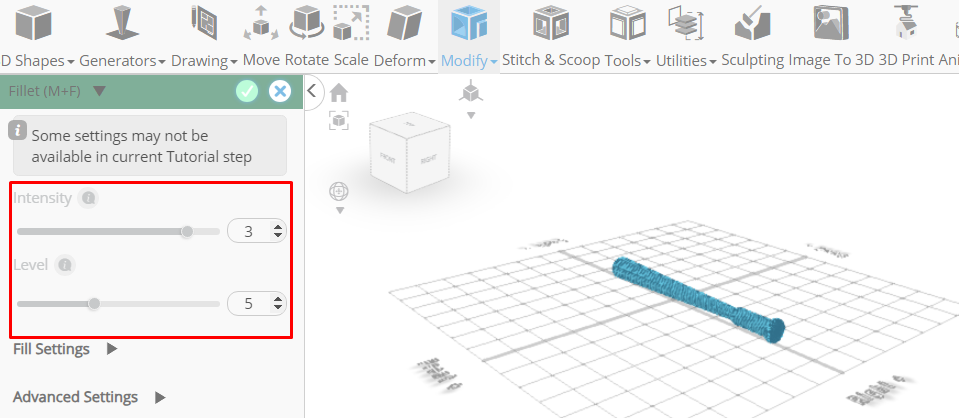
Click to finalize Fillet
Click Smooth button to enable Smooth rendering
As you continue honing your design skills, remember that SelfCAD offers a wealth of resources to support your learning journey. To deepen your understanding and explore more advanced features, consider checking out the interactive tutorials (https://www.selfcad.com/tutorials) available on the SelfCAD website. The tutorials page provides a treasure trove of guides, tips, and tricks that cater to designers of all levels.
More structured learning experience can also be accessed at the SelfCAD Academy (https://www.selfcad.com/academy/curriculum/), https://www.youtube.com/@3dmodeling101, and 3D Modeling 101 series (https://www.youtube.com/playlist?list=PL74nFNT8yS9DcE1UlUUdiR1wFGv9DDfTB). This comprehensive resource offers in-depth courses taught by industry experts, allowing you to master the intricacies of SelfCAD at your own pace.


