

Introduction: How to Design a Custom Cabinet With SelfCAD


Learn how to design a custom cabinet using SelfCAD with the help of this tutorial
Step 1:
How to Design a Cabinet with SelfCAD
Welcome to this tutorial on designing a custom cabinet using SelfCAD. Cabinets are essential pieces of furniture that not only provide storage solutions but also contribute to the aesthetics and organization of a space. Whether you're designing a cabinet for your kitchen, living room, bedroom, or any other area of your home or office, SelfCAD offers powerful tools to bring your vision to reality. In this tutorial, we'll walk you through the step-by-step process of designing a cabinet tailored to your specific needs and style preferences. From conceptualizing the layout to detailing the shelves and adding finishing touches, SelfCAD empowers you to create a functional and visually appealing cabinet that seamlessly integrates into your space. Let's embark on this creative journey and design the perfect cabinet for your environment using SelfCAD.
To access the interactive tutorial to this article, check out https://www.selfcad.com/tutorials/212j3x415e1c5s56u6n5y4m431d1f6b48i6r
Once you’ve launched the editor;
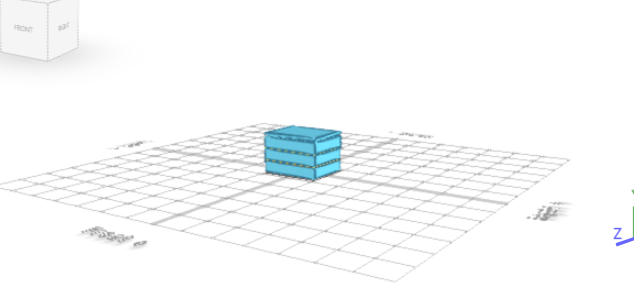
From the 3D Shapes category on the Toolbar choose Cube
Set Height to 60, Depth to 80, Height Segment to 3
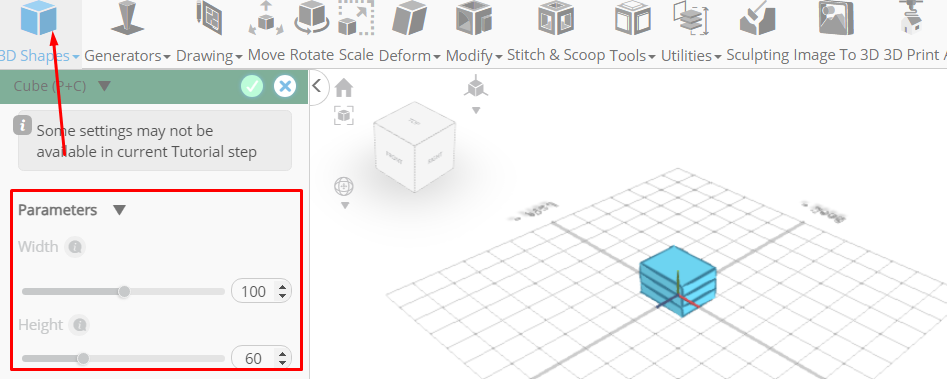
Tick the checkmark to finalize Cube
Click Solid+Wireframe button to set rendering mode
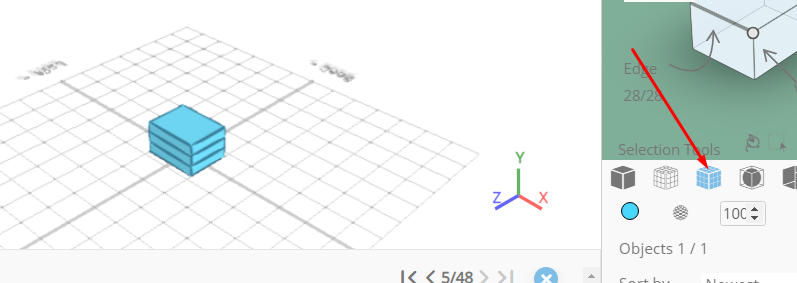
Click to activate Polygon selection
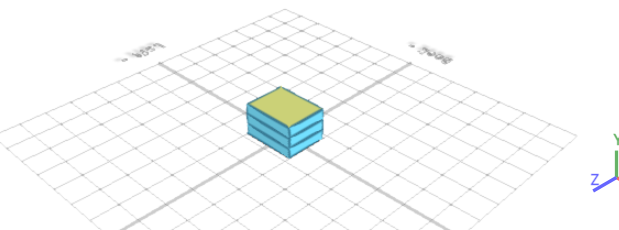
Click on highlighted region to select it
From the Modify Category on the Toolbar choose Inset
Set Inset Amount to 4
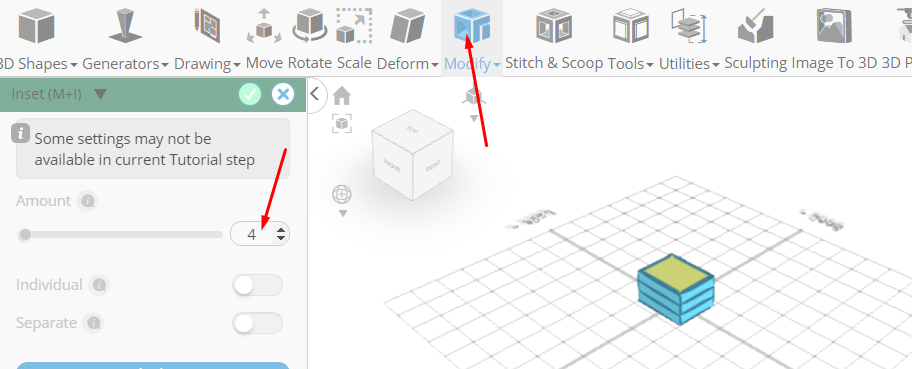
Tick the checkmark to finalize Inset
From the Modify Category on the Toolbar choose Extrusion. Set Extrusion Amount to 2
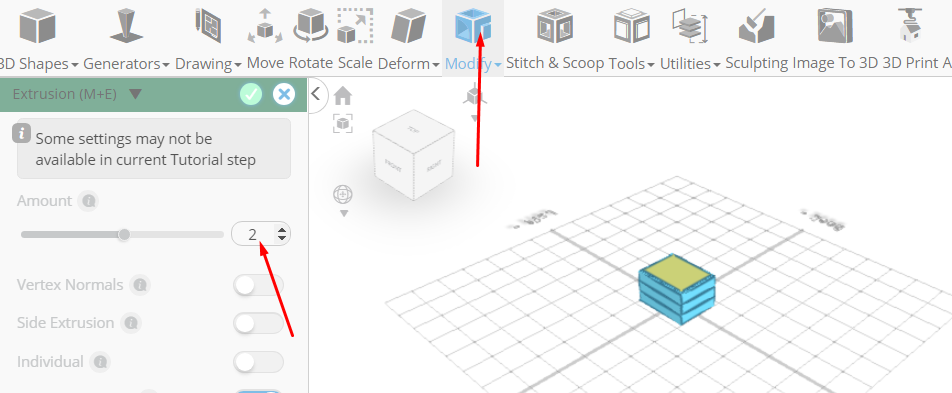
Tick the checkmark to finalize Extrusion
Click on highlighted region to deselect it
From the Modify Category on the Toolbar choose Extrusion. Set Use Side Extrusion to true, Extrusion Amount to 4
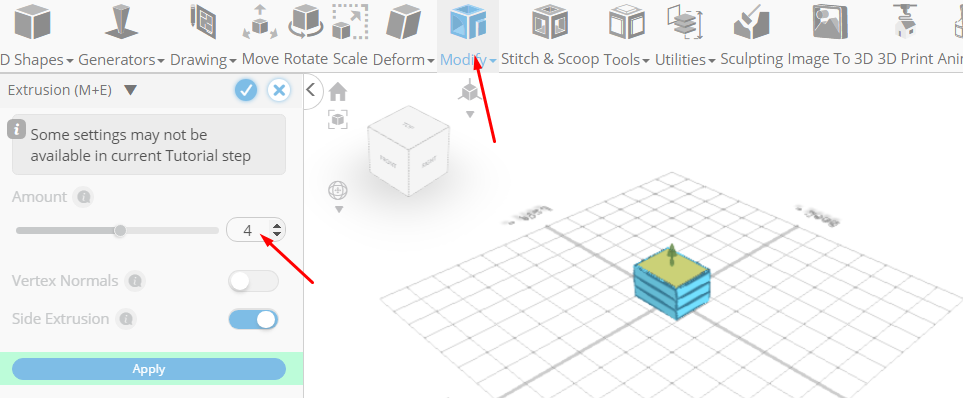
Click Apply button to apply extrusion
Set Use Side Extrusion to false, Face Normals to true, Extrusion Amount to 5
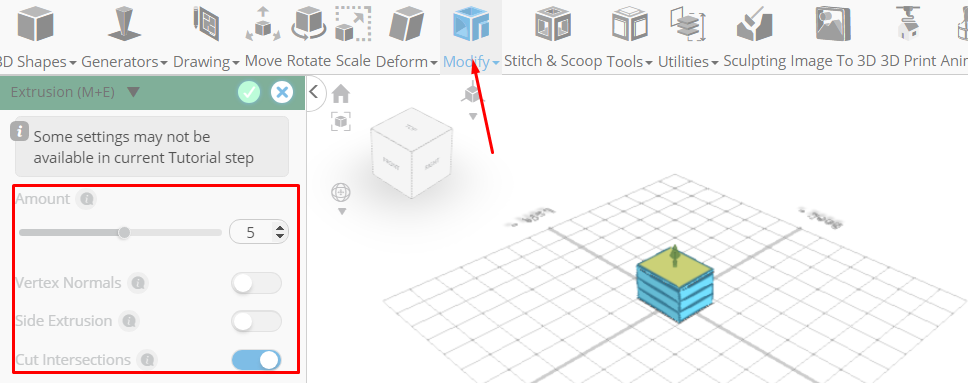
Tick the checkmark to finalize Extrusion
Click on highlighted region to deselect it
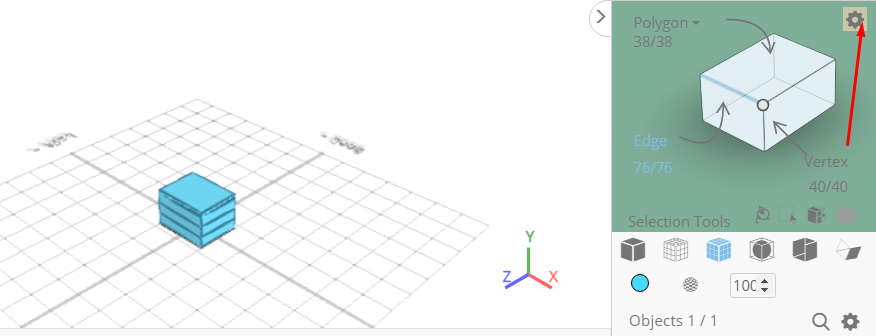
Click to activate Edge selection
Click on gear icon to open the advanced selection tools
Set Loop selection to true
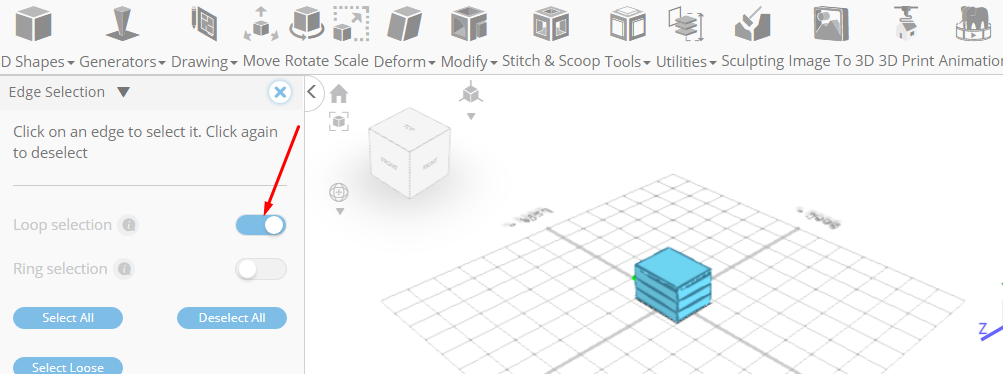
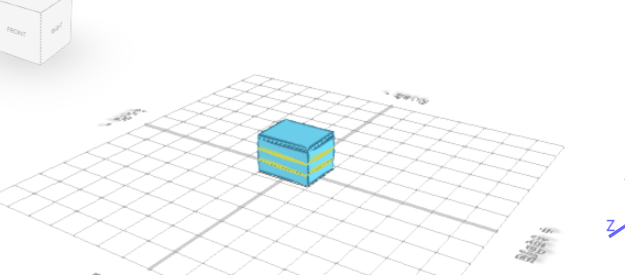
Click on highlighted edge to select loop from the object
From the Modify Category on the Toolbar choose Chamfer. Set Intensity to 1
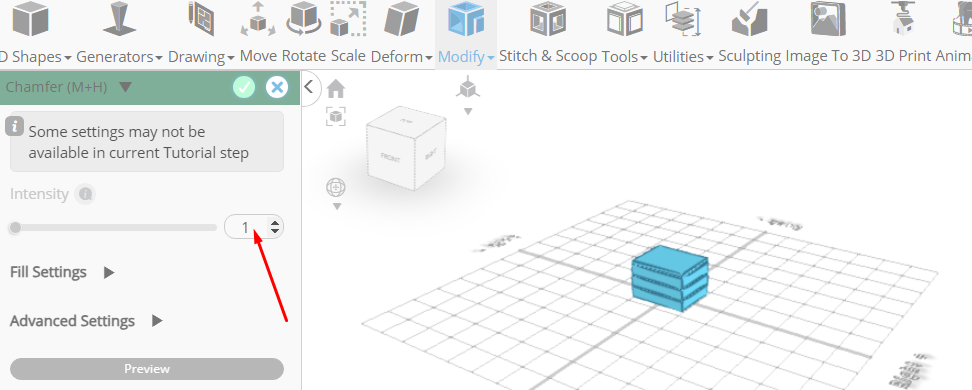
Tick the checkmark to finalize Chamfer
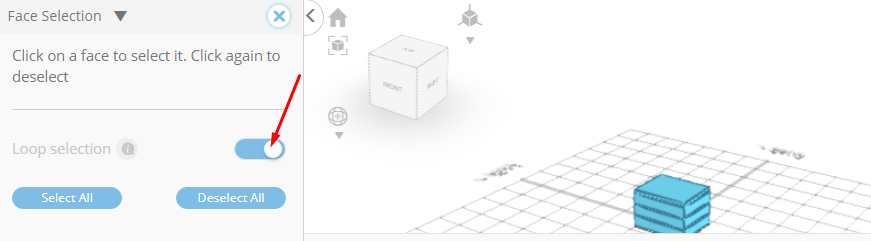
Click to activate Face selection
Click on gear icon to open the advanced selection tools

Set Loop selection to true
Click on highlighted Face to select loop from the object
From the Modify Category on the Toolbar choose Extrusion. Set Extrusion Amount to -4
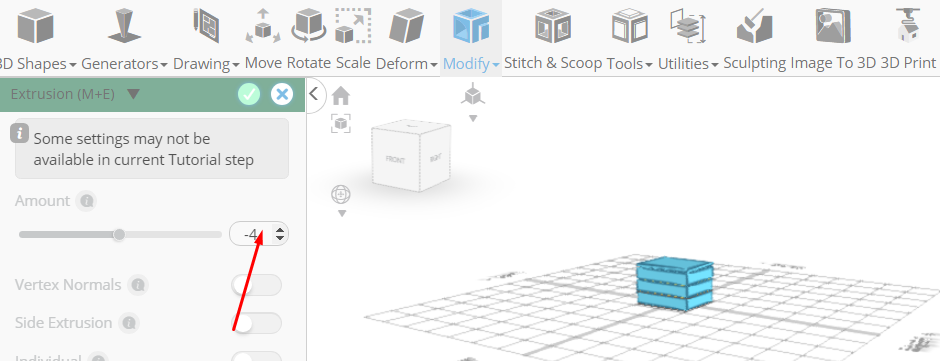
Tick the checkmark to finalize Extrusion
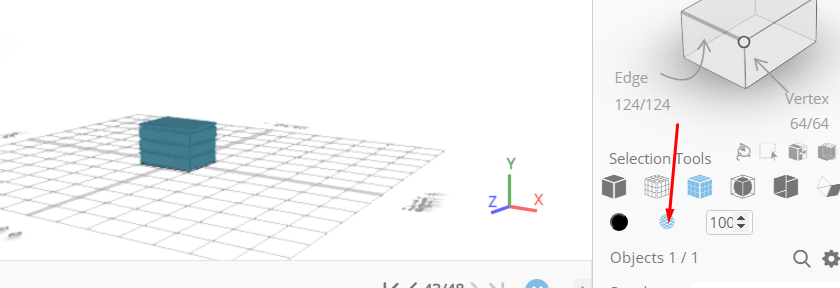
Click highlighted part on selection cube to turn off region selection
From the Right panel choose Materials
Set Material type to physical material
Click color button to change material color
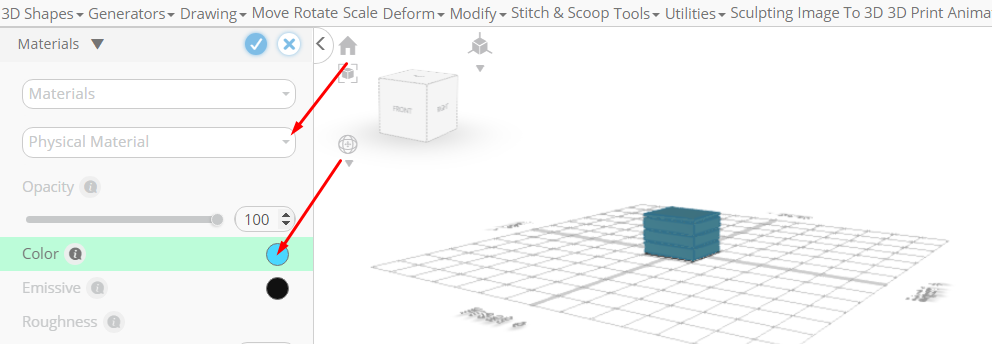
Click picker button to use custom color
Type in #8b7c6b value into the color picker input
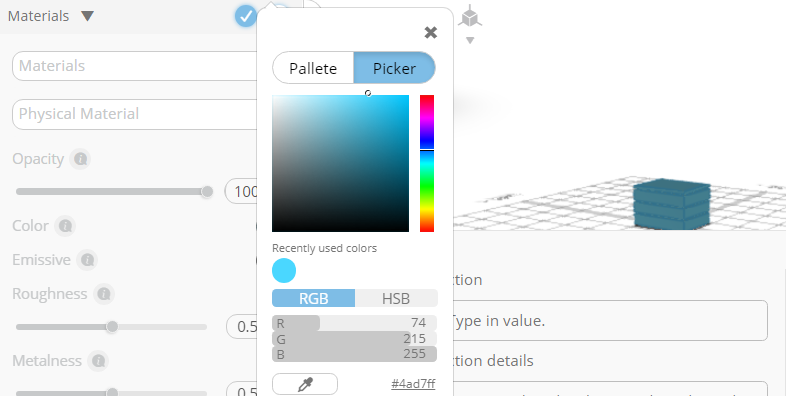
Click ok to confirm color change
Tick the check to finalize Materials
As you continue honing your design skills, remember that SelfCAD offers a wealth of resources to support your learning journey. To deepen your understanding and explore more advanced features, consider checking out the interactive tutorials (https://www.selfcad.com/tutorials) available on the SelfCAD website. The tutorials page provides a treasure trove of guides, tips, and tricks that cater to designers of all levels.
More structured learning experience can also be accessed at the SelfCAD Academy (https://www.selfcad.com/academy/curriculum/), https://www.youtube.com/@3dmodeling101, and 3D Modeling 101 series (https://www.youtube.com/playlist?list=PL74nFNT8yS9DcE1UlUUdiR1wFGv9DDfTB). This comprehensive resource offers in-depth courses taught by industry experts, allowing you to master the intricacies of SelfCAD at your own pace.


