Introduction: DIY Futuristic Earrings Using Spray Paint & Dog Collars
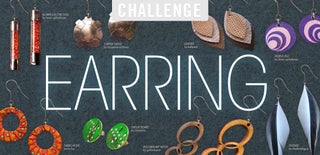
If you don't know, I'm a fashion photographer and I have a shoot coming up with a great model and I've created this cool futuristic concept for her. I've already created a headpiece, necklace, and now I'm creating EARRINGS! I also heard about the Earring Challenge on Instructables so I thought it would be a great idea to document the earring making process, share it with you guys, and enter it into the Instructables contest. I'll be sharing the shoot photos on my Instagram @smudgedbyrbell.
Website - http://www.smudgedprntz.com
Blog - http://www.smudgedbyrbell.com Instagram - http://www.instagram.com/smudgedbyrbell Twitter - http://www.twitter.com/smudgedbyrbell Facebook - https://www.facebook.com/smudgedbyrbell Pinterest - http://www.pinterest.com/smudgedprntz Tumblr - http://smudgedrbell.tumblr.com/ Google+ - http://plus.google.com/+SMUDGEDbyRBell
This royalty free music is courtesy of www.audiomicro.com
Step 1: Supplies You Need
Step 2: Connect the Jump Ring to the Crimp Bead
Take your wire wrapping tool and open your jump ring. Then put the jump ring through the loop on the end of your crimp bead.
Step 3: Attach the Crimp Bead to the Collar Buckle
Just an FYI...
I referred the buckle as a dog collar clasp in the video.
Take the jump ring that you attached to the crimp bead and attach it to the collar buckle. You should do this 3 times on each end. When you have completed this step, you should have 6 crimp beads attached to your dog collar buckle in total.
Step 4: Make a U-shape With the Wire Ends
This is where things start to get a little complex. First take some jewelry wire and cut a piece between 1 to 2 inches long. Take the wire and loop it through the left crimp bead and the right crimp bead leaving the middle crimp bead empty. You essentially will be making a "U" shape with the bottom of the "U" pointing toward the buckle.
Step 5: Twist the Two Wire Ends Together
Use your wire wrapping tool and pull the ends of the "U" taunt. Then twist the ends together.
Step 6: Make a Loop for Your Coned Earring Stud
Next you should take the twisted wire ends and, using your wire wrapping tool, you will shove them into the center crimp bead. By doing so, you will create a loop suitable to attach your coned earring stud to.
Step 7: Attach the Coned Earring Stud to the Crimp Beads
The coned earring studs I'm using came from www.bornprettystore.com. They have a little hole on either side of the earring which is perfect for stringing. We will take a piece of wire around 3 inches long and push it through the holes in the coned earring stud. Take the wire ends that are hanging from the coned earring stud and push them through the right and left crimp bead that are attached the dog collar buckle. Pull the wire ends taunt, twist them together, then wrap them around the base of the 3 crimp beads. For clarification, the base is the side of the crimp beads that are touching the dog collar buckle. The coned earring stud should be sitting at the top of the crimp beads above the buckle.
Step 8: Attach the Hoops to Your Futuristic Earring
Attach a jump ring to your hoop by prying it open with the wire wrapping tool and by sliding the hoop inside. Close the jump ring. Cut another piece of wire between 1 to 2 inches long. String the wire through the the jump ring then twist the wire ends together. Take the twisted wire that has the hoop attached and slide it through the middle crimp bead at the bottom of the earring (which is the end opposite where you placed the coned earring stud). Pull the wire taunt with the wire wrapping tool and wrap the excess wire around the top of the middle crimp bead. To clarify, wrap the wire around the side of the crimp bead that is touching the dog collar buckle. The right and left crimp bead should be left hanging free and clear to dangle...like any good earring should :)!
Step 9: Make the Second Earring
Simply repeat steps #2 through #8 to make your second futuristic earring.
Step 10: Protect Your Ears From Irritation
Place tape on the back of the earring to cover the post. I have very sensitive skin and I'd like to protect anyone who wears these earrings from any kind of possible irritation. The next step calls for spray paint so I thought it would be best to avoid having the spay paint touching the skin directly.
Step 11: Spray Paint You Futuristic Earrings
Simply spray paint your futuristic earrings with Krylon Colormaster Metallic Spray Paint in Silver, let dry, and then you're done!

Runner Up in the
Earring Challenge


