Introduction: How to Make Your Own Game Console
Have you ever wanted to do your own video game console? A console that is cheap, small, powerful, and even fits perfectly in your pocket? So in this project, I will show you guys how to make a game console using a Raspberry Pi.
But what is a Raspberry Pi?
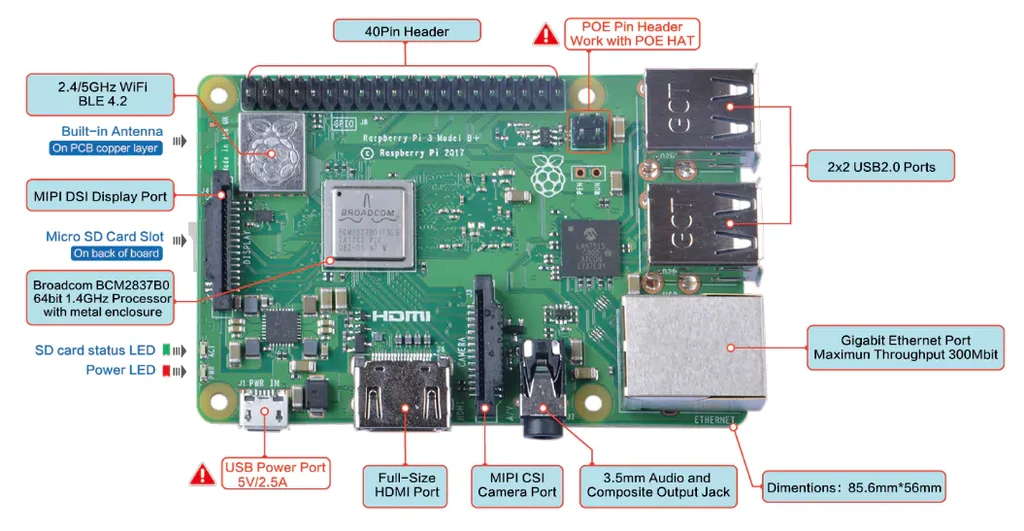
So basically, a Raspberry Pi is a low-cost, credit-card-sized computer. With this little computer, you can do a lot of things: robots, home automation, learning to program, and even video game consoles. The image below shows the components and some specifications of the Raspberry Pi 3 Model B+.
The History behind the project
The first and only game console that I had in my childhood was a Mega Drive 3 from Tectoy, I had a lot of fun with it, but one day it fell down and stopped working, my parents didn't have the financial conditions to buy a new video game for me. So now at 17 years old, I decided to do my own video game console using a Raspberry Pi, I was surprised how such a small board can be so powerful to be able to run games. Video games are cool but doing your own game console is even cooler because you learn how it works and you can customize it your way. So let's begin.
Step 1: Materials
These are the materials you're going to need to do this project:
- Raspberry Pi 3 Model B+ or Model B.
- A case for your Raspberry Pi ( I recommend the Flirc case).
- 64GB Class 10 Micro SD card.
- 5V 3A Raspberry Pi 3 power supply.
- HDMI cable.
- Nintendo Wii U Pro controller (you can use other Bluetooth or USB controllers).
- USB Keyboard (you'll only need the keyboard temporarily to make some settings).
Step 2: Place the Raspberry Pi Into the Case
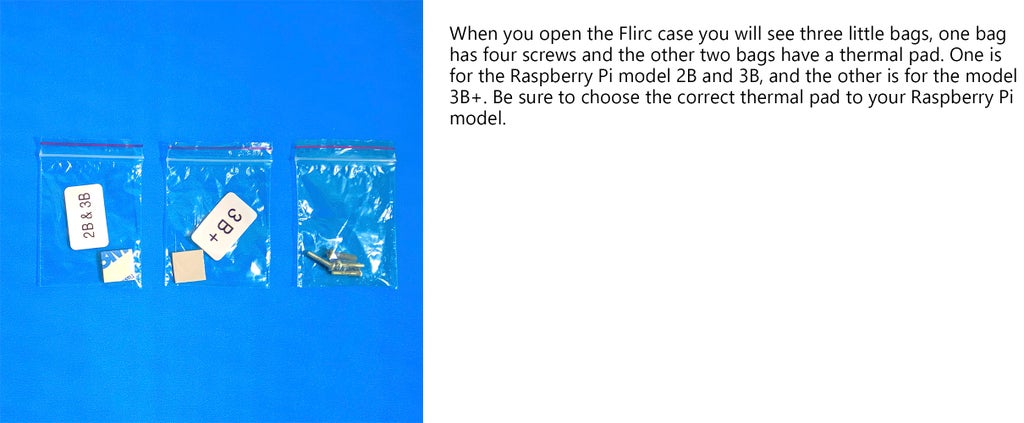
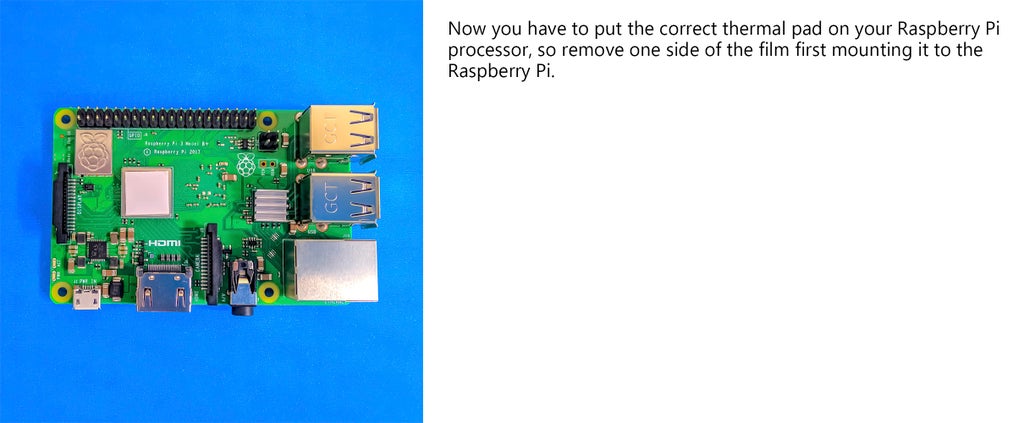
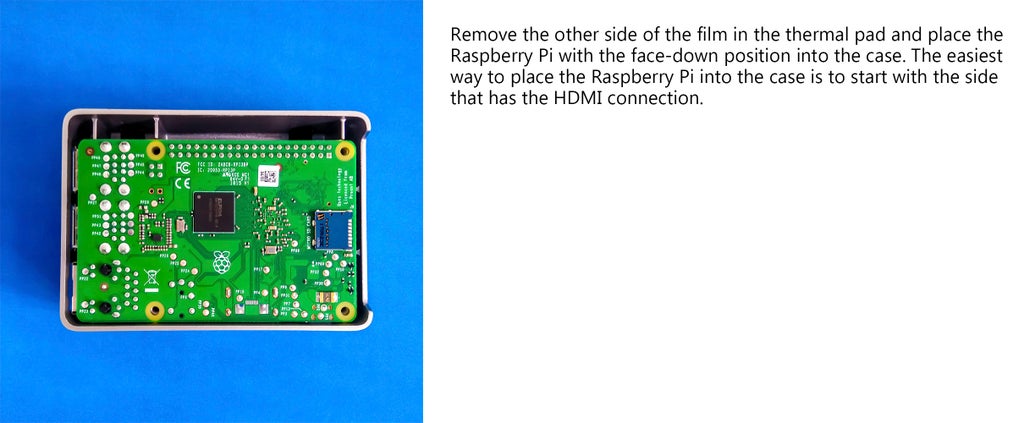
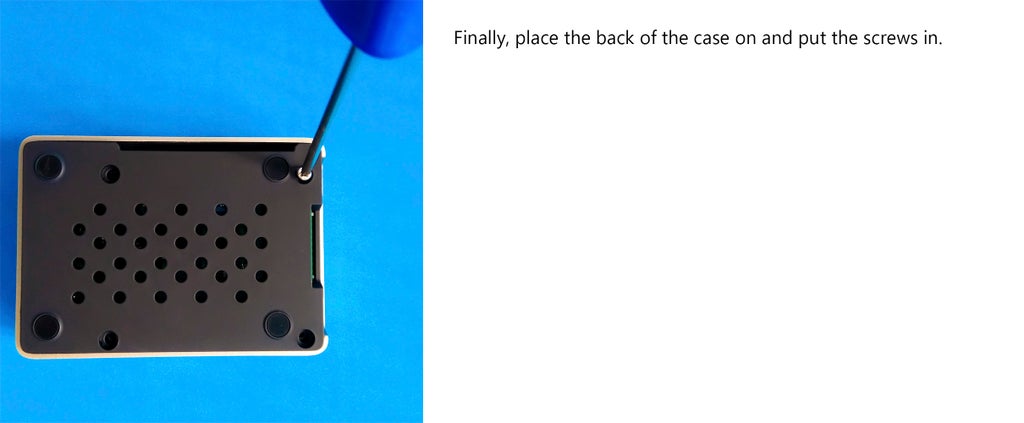
The first thing that you have to do is to assemble the console. For that you have to basically put your Raspberry Pi into the case and screw it; if you're using the Flirc case follow the images below.
Step 3: Download and Install RetroPie
Once you have assembled the Raspberry Pi into the case, you'll have to install an emulation system to play games on the Raspberry Pi. In this project, we'll be using the RetroPie as the emulation system.
About RetroPie
RetroPie is a software library used to emulate retro video games on the Raspberry Pi. It's also one of the most popular emulation systems for the Raspberry Pi featuring a user-friendly interface and can run both on top of an existing operating system (for example Raspbian) and boot as an operating system from a pre-made SD card image. The main feature of RetroPie is that it includes almost all the previous experience of console gaming emulation on Raspberry Pi. It consists of the EmulationStation's interface with themes for emulators, Kodi media player, Retroarch, and more than 50 systems pre-installed by default. Any Raspberry Pi model can run RetroPie, but I recommend using the Raspberry Pi 3 Model B+ since its more powerful GPU, CPU, and Ram capabilities will maximize the range of games that you can play.
Now that you know a little bit about RetroPie let's download the software. So go to the RetroPie site and download it.
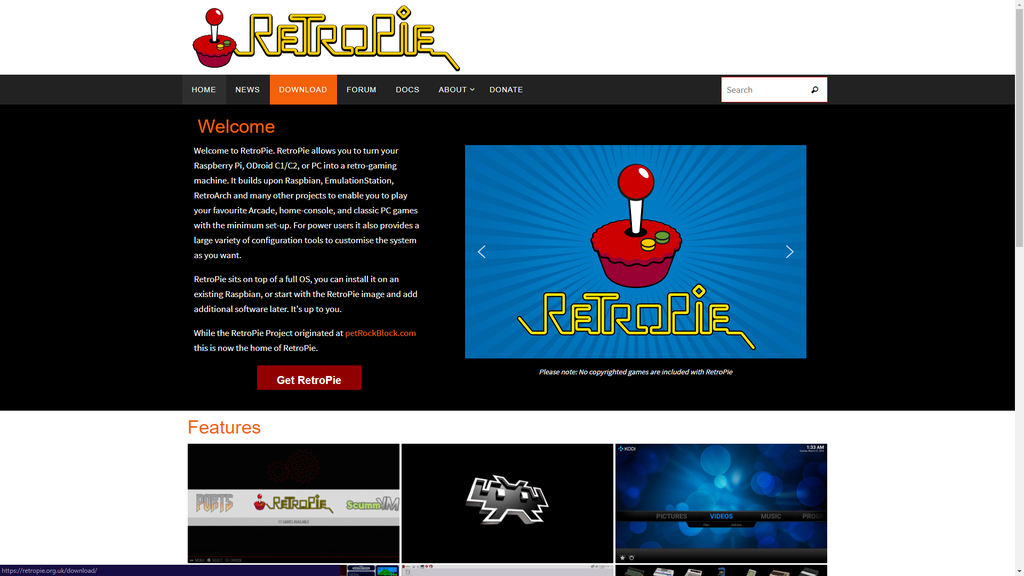
Note: Click on the Raspberry Pi 2/3 option in the Download section to download the RetroPie to any model of the Raspberry Pi 2 and 3.
Now it's time to install the RetroPie on your microSD card. First of all, you'll have to download two softwares: the SD Card Formatter, and the balenaEtcher.
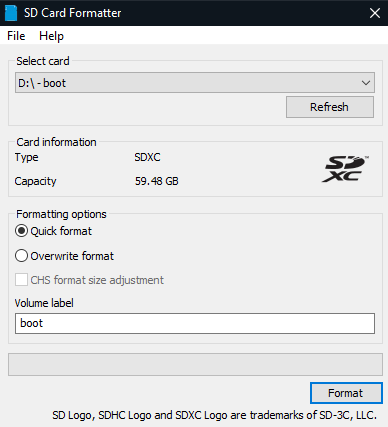
The first step to install RetroPie is formatting your microSD card. So insert it in your computer (you can use an adapter), open the SD Card Formatter, select the microSD card that will be used for RetroPie, and format it.
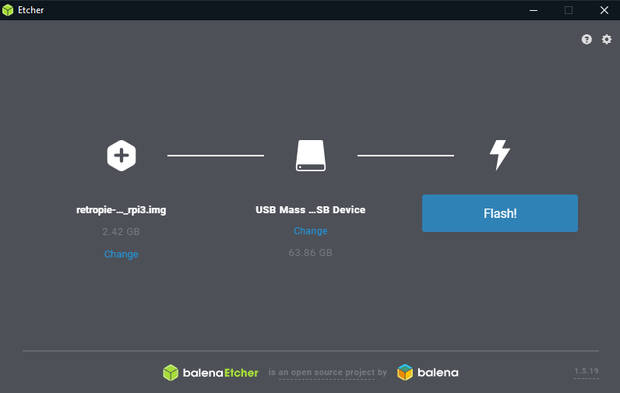
Once you've done that, unzip the RetroPie file that you downloaded and open balenaEtcher. In this program select the RetroPie image in your computer, select the microSD card and flash it.
Wait until the process finishes and RetroPie will be installed in your microSD card.
Step 4: Configure the RetroPie
In this step, we'll be doing some configurations in RetroPie. So first, insert the microSD card in your Raspberry Pi; connect the HDMI cable, one side in the Raspberry Pi and the other side in a TV or monitor; connect the power supply in the micro USB connection and then boot the Raspberry Pi.
1. First Boot
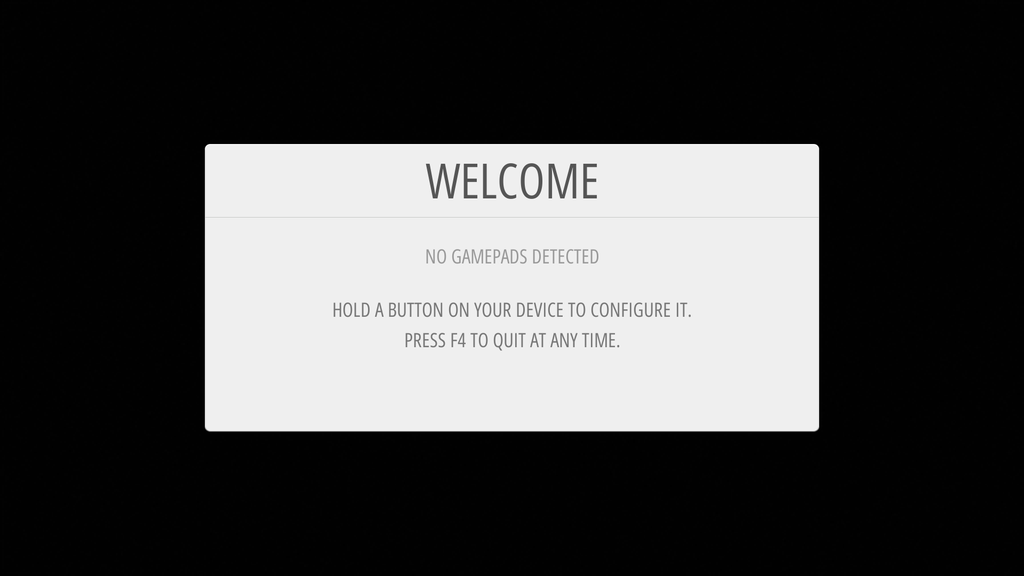
That is the first image that you'll see in the first boot. It will ask you to hold a button on your device to configure it. If you're using a Bluetooth controller (for example the Nintendo Wii U Pro controller), you'll have first to configure a USB keyboard and later configure the controller. If you're using a USB controller, hold any button and start to configure it.
2. Configuring a Bluetooth Controller
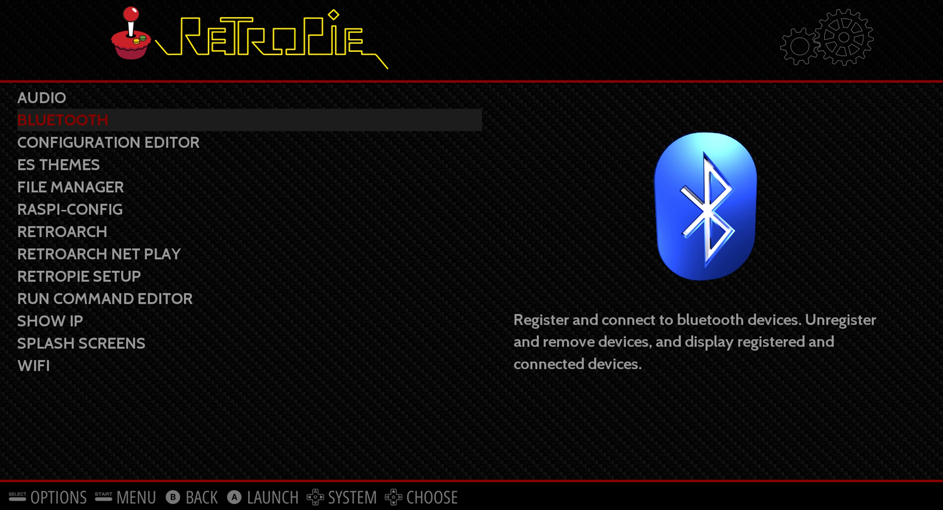
To configure a Bluetooth controller go to the configuration menu with the keyboard and select Bluetooth.
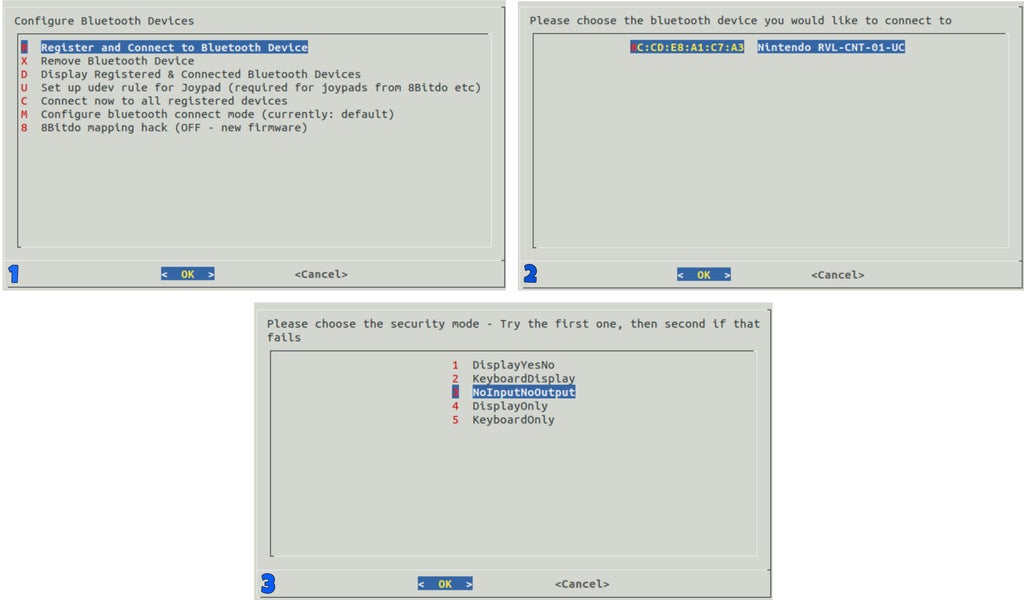
Now select Register and Connect to Bluetooth Device, it'll search for your Bluetooth controller, at this moment you have to press the Sync button to synchronize your controller with the Raspberry Pi, (this button in the Nintendo Wii U Pro Controller is the red button located on the back). Then select your controller and select the NoInputNoOutput option in the next screen. Follow the images below.
After that, go to the main screen in RetroPie, press the start button to open the main menu and select Configure Input, then hold any button on your Bluetooth controller to be detected and configure it. Once configured, your Bluetooth controller will be working.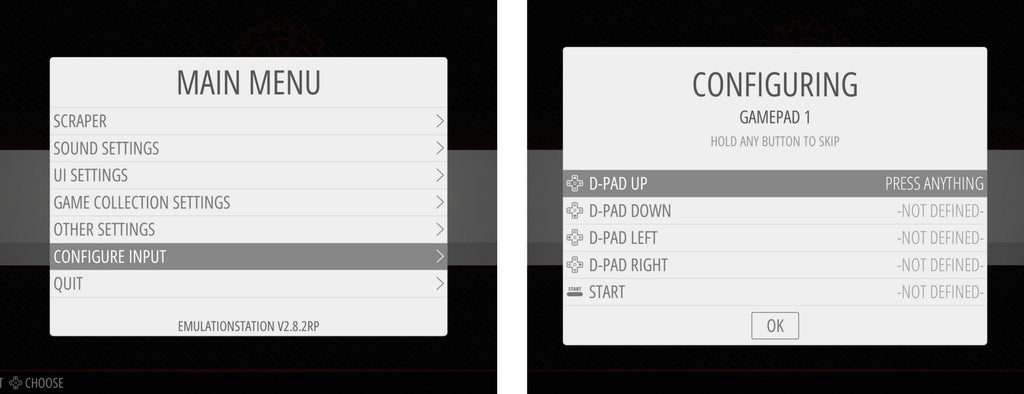
3. Configuring the Wi-Fi
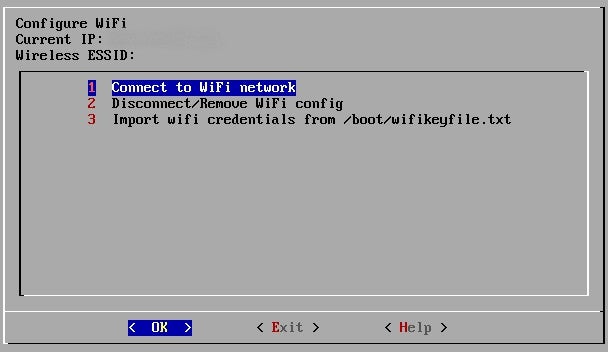
Now in this step, we'll need a USB keyboard to configure the Wi-Fi. So go to the configuration menu, select Wi-Fi, select Connect to WiFi network, then choose your Wi-Fi network and put your password.
4. Installing others emulators (need an internet connection)
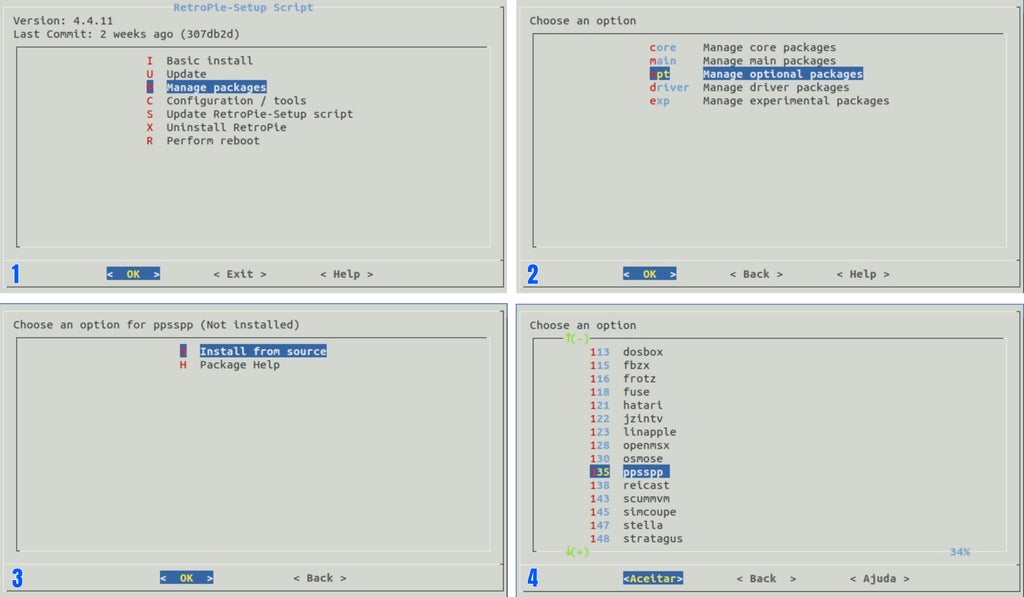
RetroPie comes with more than 50 system pre-installed by default, but there are much more emulators that you can install and isn't installed by default. To install more emulators go to RetroPie Setup in the Configuration menu, and first of all, select the option Update RetroPie-Setup script, and then go to Manage packages; in this section, select Manage optional packages, and you'll see a lot of emulators to install like PPSSPP (the emulator for PSP) and Reicast (the emulator for Dreamcast). You can also select Manage experimental packages to install some emulators that are being tested like Drastic (the emulator for Nintendo DS), and you can even install some ports like Minecraft Pi edition. After choosing the emulator that you want to install, select the option Install from source and wait a few minutes for the emulator to be installed. Follow the images below.
*These are only some basic settings in RetroPie, but you can explore and do a lot of modifications in it.
Step 5: Install the Games
Finally, this is the best part. It's time to put the games in your video game console. First, you have to download the games. Search for sites that offer Roms in accordance with copyright, in these sites, find the Roms that you want in each emulators section and download it, probably it'll come zipped, so unzip it before you transfer to RetroPie.
There are two ways to transfer games to RetroPie that I recommend, one is using a pen drive, and the other is via SFTP.
Transferring Roms using a pen drive
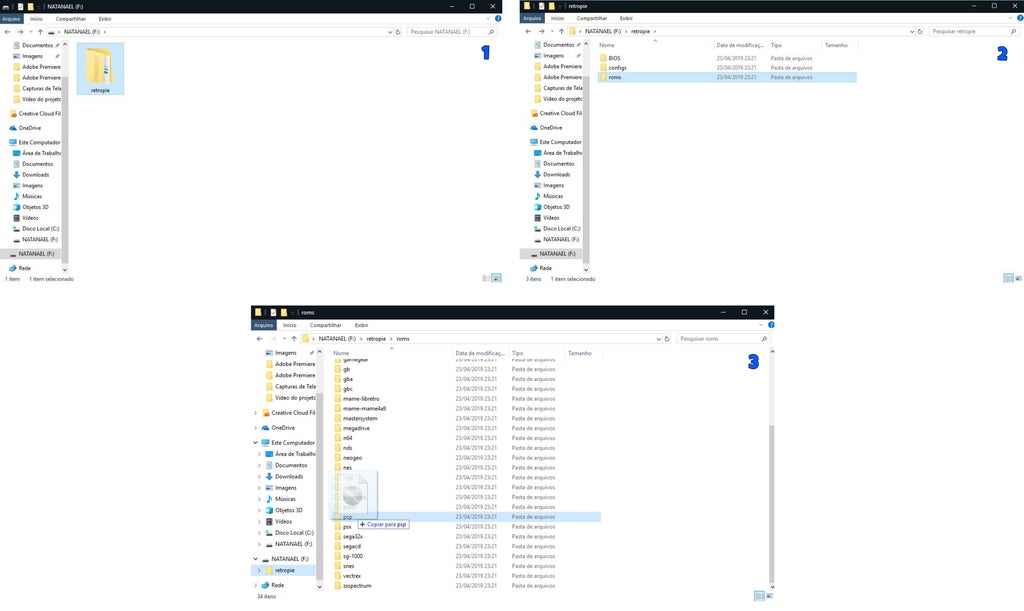
To transfer the games using a pen drive you'll have to plug the pen drive in your PC and format it to FAT32, then create a folder in your pen drive called retropie, plug it into the Pi and wait for it to finish blinking, then pull the pen drive out and plug it into a computer. Now in the retropie folder, you will find the folder roms, click on that and add the games to their respective emulators folder. Plug the pen drive back into the Raspberry Pi and wait for it finishes blinking, once you've done that you can remove the pen drive. Follow the images below.
Transferring Roms via SFTP
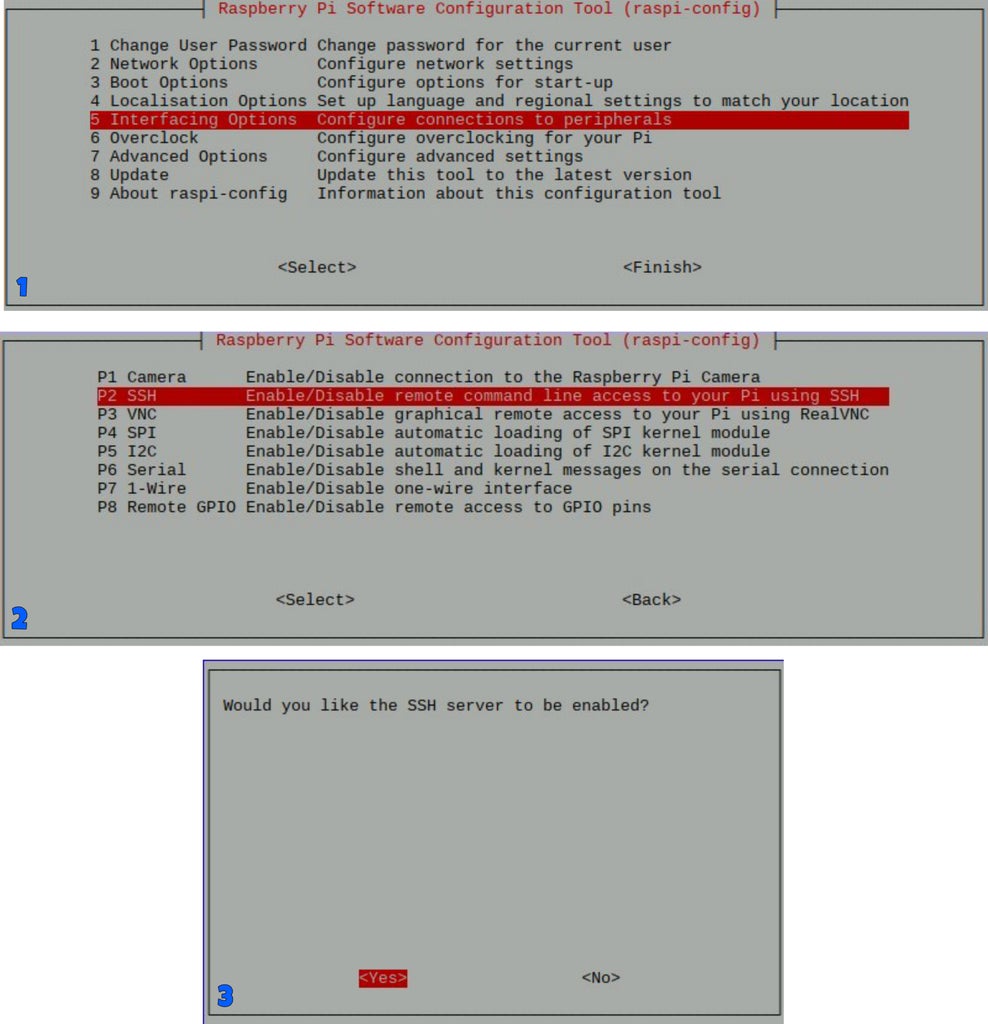
SFTP also called Secure File Transfer Protocol is a network protocol that allows you to securely transfer files over a network. Your Raspberry Pi and your PC will need to be connected to the same network via Ethernet or Wi-Fi. So first, you need to enable SSH in RetroPie, go to the configuration menu, select Raspi-Config, select Interfacing Options, then select SSH and click Yes to activate the SSH server. Follow the images below.
Now go to your computer, and you will need to download an SFTP program to transfer the games to your Raspberry Pi, I recommend WinSCP for Windows and Cyberduck for Mac. In WinSCP Login screen select SFTP in File protocol, put the IP address of your Raspberry Pi in the Host name section (to find the IP address of your Raspberry Pi, go to the Configuration menu and select Show IP); then put the User name that is pi and the Password that is raspberry by default in RetroPie. Now click on Save, select Login and your computer will be connected to the Raspberry Pi.
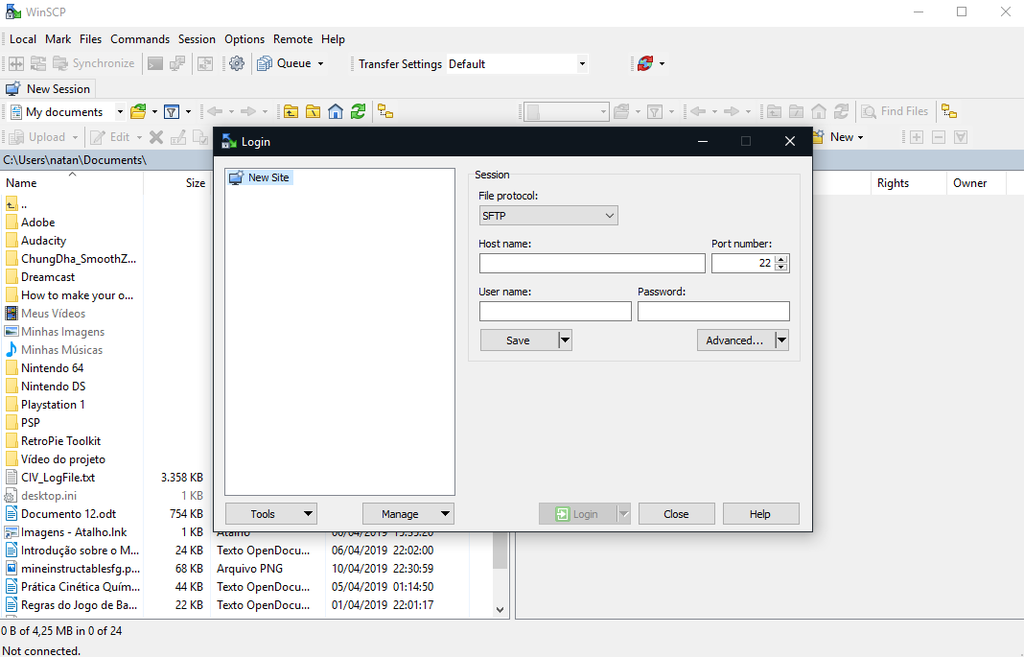
Now the only thing that you have to do is to copy the games from your computer to the corresponding emulator folder in /home/pi/RetroPie folder in your Raspberry Pi.
When you finish to Transfer the games to your Raspberry Pi go to the Main menu select Quit and then select Restart EmulationStation.
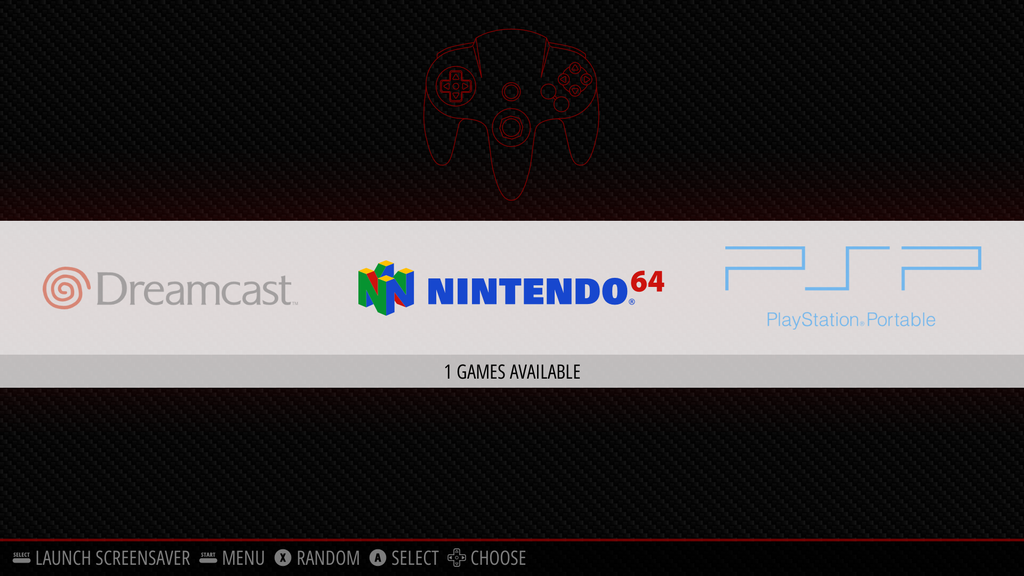
You will see that the games will appear in each emulator section in the initial screen. If so, the games are already installed in the RetroPie.
Step 6: Enjoy Your Video Game Console
Now your little video game console is ready, but RetroPie is a massive community where we're always learning and making something new, so we can continuously update our RetroPie console making it better, I recommend to visit the RetroPie Forum to learn more about RetroPie.
One of the Advantages of this console is that it's small and you can carry in your pocket wherever you want; you can go to your friend's house for example and play games there, you will only need to connect your Raspberry Pi to any TV or Monitor.
I hope you also enjoy so much this project, this is my first project on Instructables, and I'm very happy to publish it. If you have any doubts about this project, please comment in the section below, and I will do my best to answer your questions. Bye!!! ;)
Note: I've attached a pdf of this same project here in PT-BR which is my native language! :)

Participated in the
Pocket Sized Contest


