Introduction: How to Make a Digital Thermometer #1


In this article I will make a project called "Digital Thermometer". I use "DHT11" for the temperature sensor. And use the "7Segmrnt Module" as the display.
I recommend reading this article first "DHT11" and "7-Segment Module". In that article I have explained how to use DHT11 and 7Segment Module
Step 1: Required Componens


Here are the components that we need in this project:
- DHT11 Senosor
- MAX7219 7 Segment
- Arduino Nano V3
- Jumper Wire
- USBmini
- Projecct Board
Required Library:
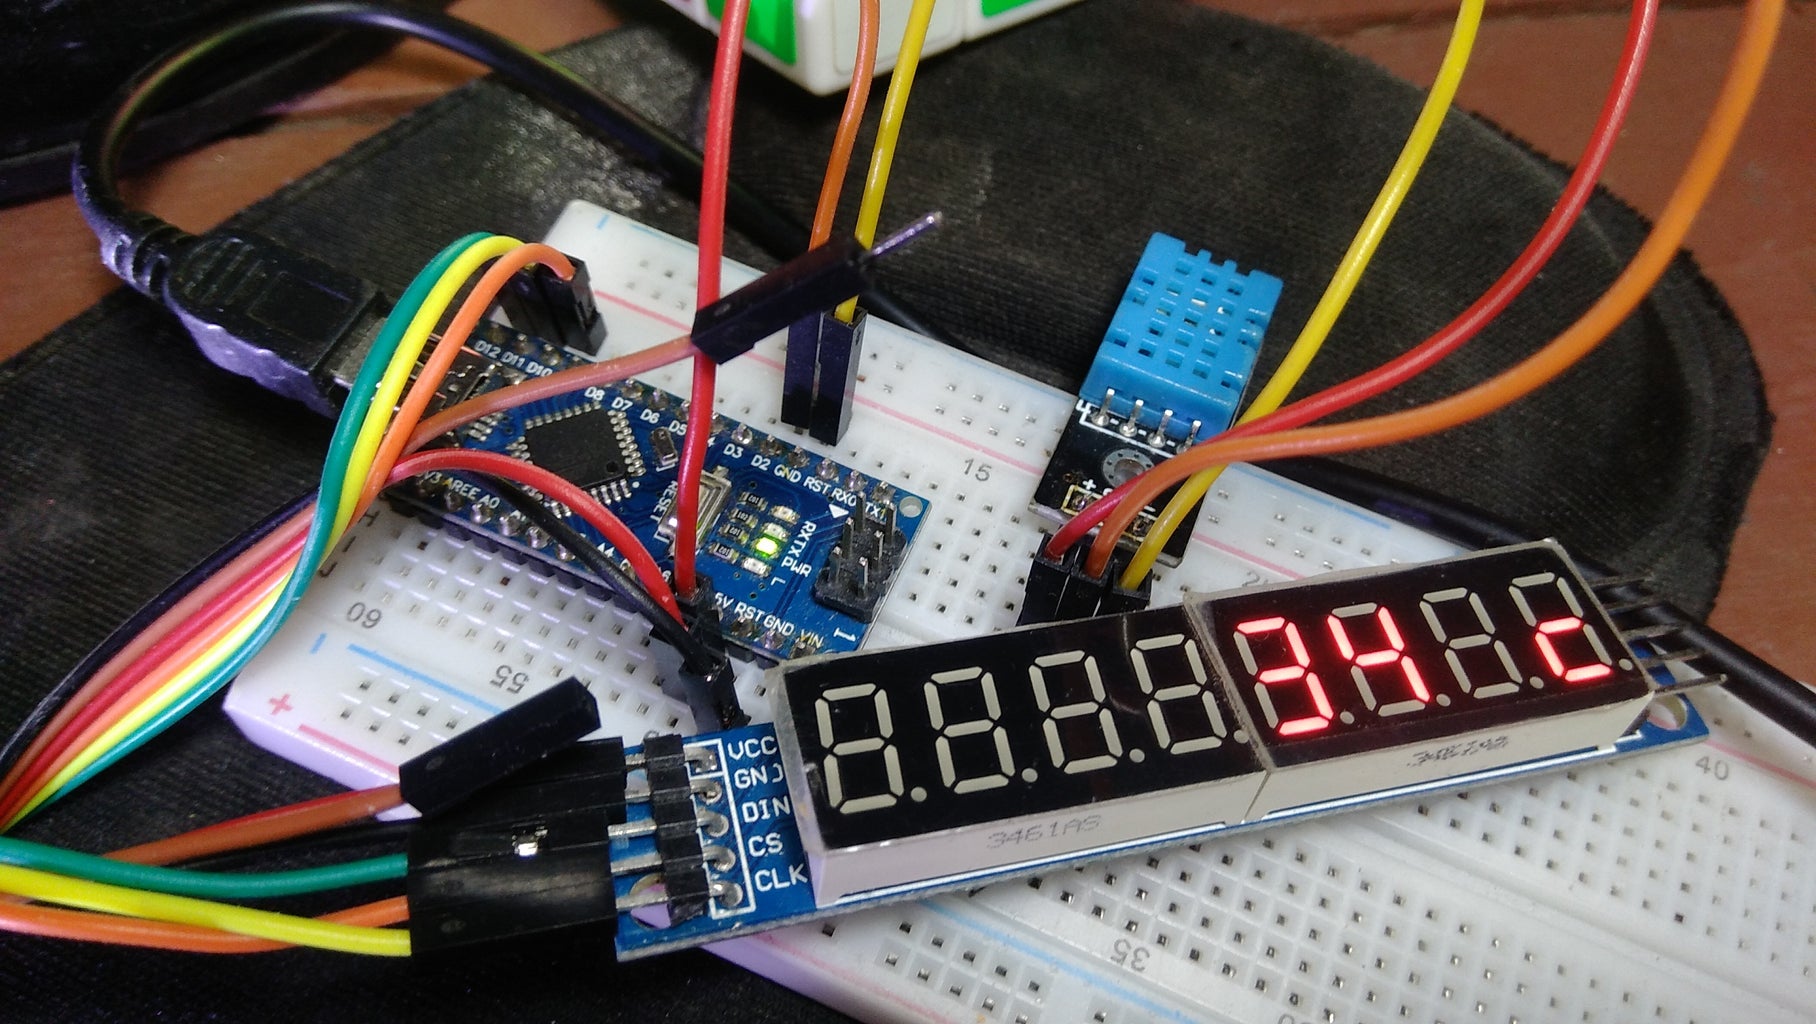
Step 2: Assemble All Components

See the picture above for guidance on assembling the components. Or see the information below:
Arduino to 7Segment Module
+5V => VCC
GND => GND
D12 => DIN
D11 => CLK
D10 => CS
Arduino to DHT11
+5V => +
GND => -
D2 => out
After all components are connected, let's proceed to the programming section
Step 3: Programming

Below is a sketch that I used in this project or tutorial. You can use this sketch for your project.
<p>#include "DHT.h"<br>#include "LedControl.h"</p><p>#define DHTPIN 2
#define DHTTYPE DHT11 </p><p>LedControl lc=LedControl(12,11,10,1);</p><p>DHT dht(DHTPIN, DHTTYPE);
void setup() {

  Serial.begin(9600);
  Serial.println(F("Digital Thermoeter"));

  dht.begin();

  lc.shutdown(0,false);
  lc.setIntensity(0,8);
  lc.clearDisplay(0);
}</p><p>void loop() {
   delay(2000);
   float h = dht.readHumidity();
   float t = dht.readTemperature();
   float f = dht.readTemperature(true);
   if (isnan(h) || isnan(t) || isnan(f)) {
    Serial.println(F("Failed to read from DHT sensor!"));
    return;
   }
   float hif = dht.computeHeatIndex(f, h);</p><p>   float hic = dht.computeHeatIndex(t, h, false);</p><p>   Serial.print(F("  Temperature: "));
   Serial.print(t);
   Serial.println(F("°C "));</p><p>   delay(1000);

  char i = t;

  lc.setDigit(0,3,t/10,false);
  lc.setDigit(0,2,i%10,false);
  lc.setChar(0,0,0b1100,false);

  delay(400);</p><p>}</p>
after the sketch is finished, click upload and wait for it to finish.
I also provide sketches in the form of ".ino" files. The file can be downloaded below.
Attachments

Step 4: Result
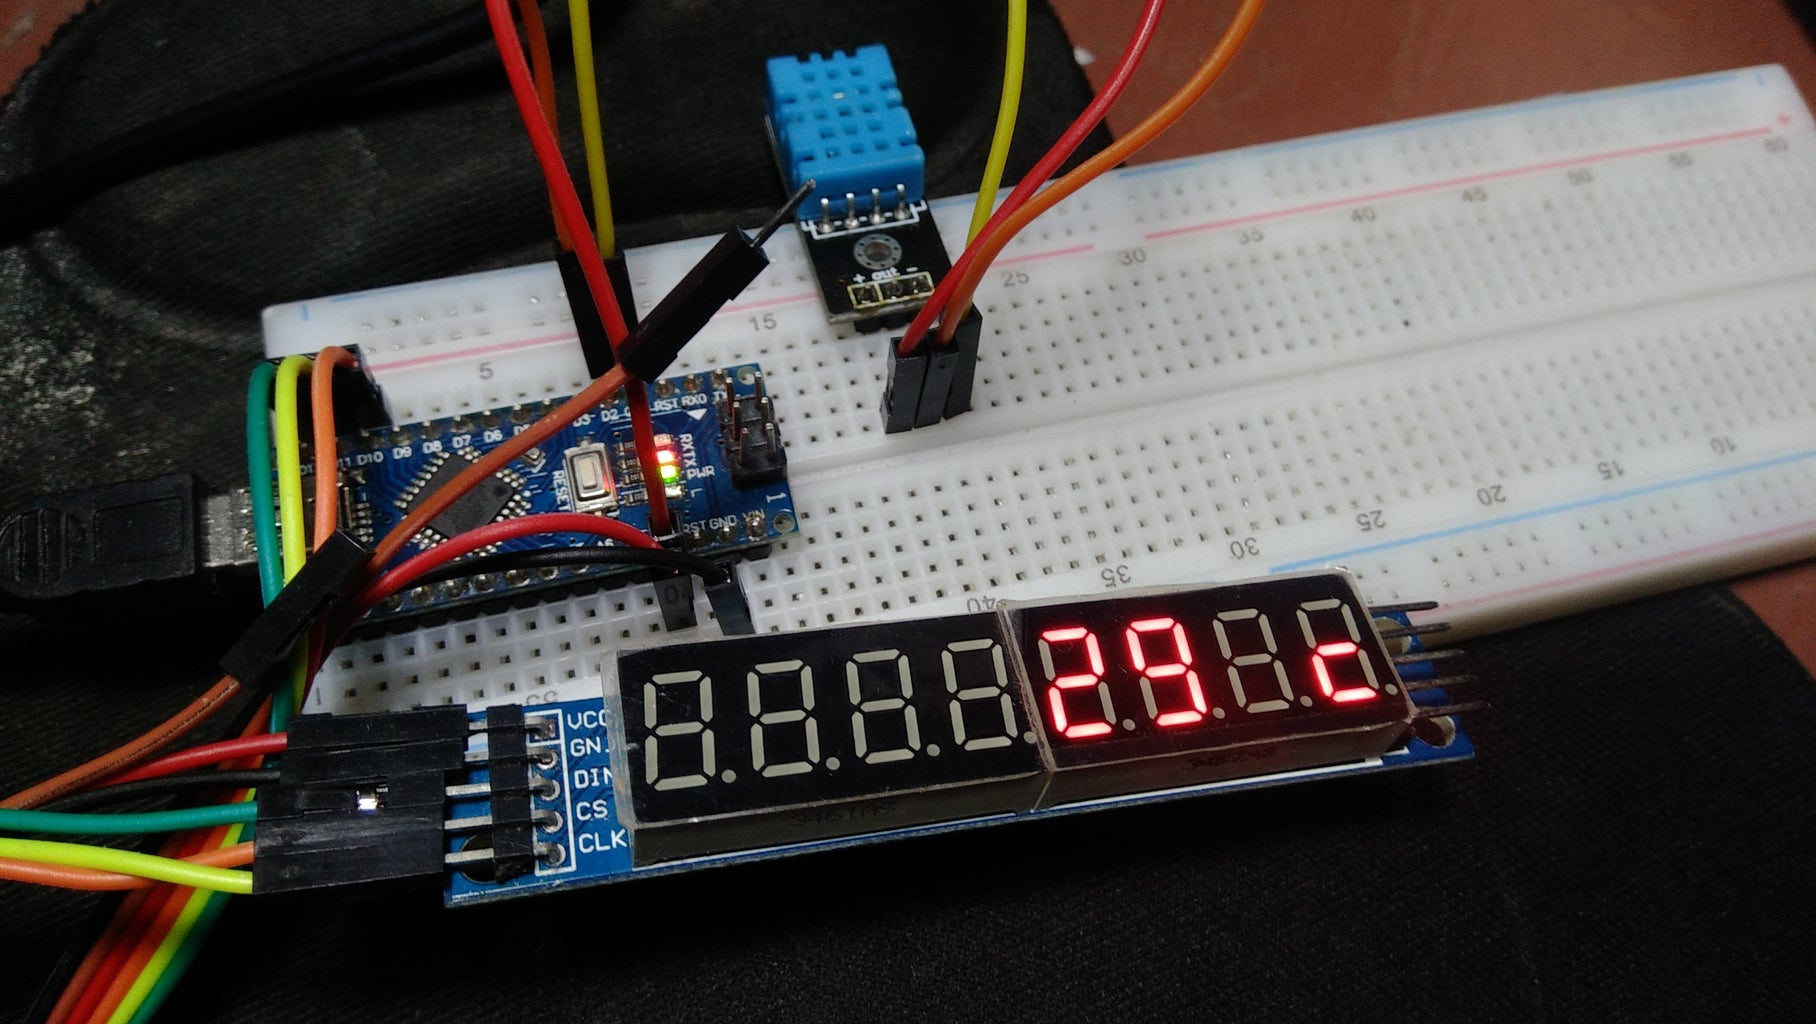


See the picture above to see the results.
for this project I only display the Celsius temperature only. For Fahrenheit temperature and humidity level, I will make the next article.
Thank you for reading this article, if you have questions, please write in the comments column.
See you in the next article.