Introduction: How to Take Photos of the Night Sky


I've been interested in astronomy for many years, and it wasn't long after I first looked through a telescope before I took the next natural step of trying to capture images of the night sky through 'astrophotography'. At the time, I only had a simple point-and-shoot digital camera which didn't even feature optical zoom. I'd never taken it out of its fully automatic shooting mode, and even if I had, the camera's software gave very limited control over any of the important settings.
My first efforts with this camera were, of course, pretty disappointing. It was impossible to see any stars in my landscape shots, and even when I pointed the camera down my telescope's eyepiece at something bright like the Moon, all my pictures came out overexposed and blurry. Knowing I had a lot to learn, I started looking through my astronomy books to try and figure out what set my technique apart from that of long-time night sky photographers. I was keen to teach myself how to replicate their glossy images of the glorious Milky Way arcing over a desert landscape, or of constellations where the red, blue and yellow colours of individual stars stood out far more vividly than even my eye could see.
Years later, I'm still learning all the nuances of preparation and processing that are needed to create a truly impressive night sky photo, but I'm now confident with my core technique and my grasp of exactly what settings to change on my camera. My progress here has taught me lots about regular photography too, and I now experiment more with my camera's buttons and dials when setting up landscape shots in daylight.
In this tutorial I hope to share this core technique, so that other beginners might be able to take their first steps into night sky photography. It's geared towards taking wide-field photos of large areas of the sky, as opposed to close-up shots of planets or galaxies using a telescope. Many of the ideas will translate across, but the equipment needed to get a picture of Saturn's rings or the arms of a distant spiral galaxy is a lot more specialised. Anyway, I find it far more satisfying to take a photo which shows a 'human' perspective of the sky, and there's more room for creativity when you're framing a shot which combines the Earth and sky on a grand scale.
Step 1: Prerequisites
Before you even pick up a camera, you need to consider your location. What can you see in the night sky when you go outside and look up with just the naked eye? If you're out in a remote area with no surrounding towns or cities, you might already have seen the impressive details that show up in the types of photos we're trying to create. However, if you live in the city or another area with a lot of light pollution, even the best camera and all the knowledge in the world won't be able to tease out the Milky Way from behind the orange glow of the streetlights. The quality of your night-time photos is directly influenced by how dark the sky is, and you can do yourself a lot of favours by finding a place where the lights don't get in the way. The photo at the top of this article was taken in the Maldives; a country in the Indian Ocean which consists entirely of tiny tropical islands. It also helped that I was very close to the equator, which meant that the core of our galaxy was high above the horizon, and was easy to frame against the trees.
Once you've found the perfect place for a secluded photo shoot, what sort of camera should you take? While I've had success in the past with cheaper compact cameras like the Panasonic Lumix, I wouldn't recommend buying one of these with astrophotography in mind. Instead, go for an entry level DSLR like the Canon 1300D. DSLRs let you control all of the camera settings manually, which is a must when it comes to balancing out all the factors that affect you in low-light photography. Furthermore, the range of things like sensitivity, noise reduction and exposure are far greater for a DSLR than any compact camera. You can also take your pick of lenses, with many out there designed specifically for taking super wide-angle photos.
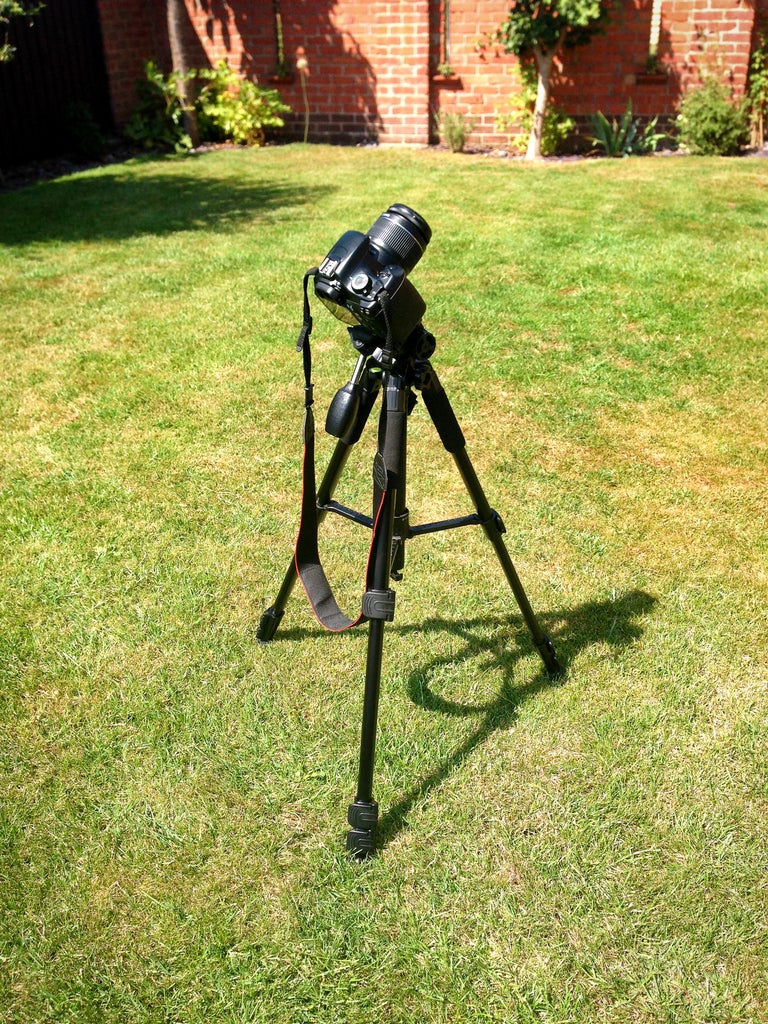
Next you'll need a tripod to keep the camera steady. It doesn't really matter what type, as long as you're able to point it in a certain direction and have it stay there for 20 or 30 seconds. I have a Manfrotto Compact Aluminium tripod, but you could get away with something less complicated if you don't mind getting low on the ground! Finally, it's a good idea to get a fairly large memory card so that you've got plenty of room for experimentation, and so you can save your photos with the highest possible quality. Oh, and sometimes a remote shutter release is useful. I don't normally use one, but it's nice to have the option for reasons I'll explain later.
[If you decide to buy any of the mentioned Amazon products, I would greatly appreciate it if you access the listings using the above links - that way, I get a tiny share of the profits at no extra cost to you!]
Step 2: Getting in Focus


When you're taking photos during the day, you don't even have to think about how your camera will get the scene in focus. All you have to do is point at your target, hold the shutter down half-way, and wait until the lens mechanically twists to the correct position. My DSLR's auto-focus seems to get it right every time. At night, however, things are different. There's nowhere near enough light to let the camera pick and focus on a target by itself; as far as it's concerned, you're shooting in pitch darkness.
This is where you need to take over by flipping your lens into Manual Focus mode. This is done by moving the switch from AF to MF on the lens itself, as seen in the first picture. Now, if you hold the shutter button to focus as you normally would, nothing will happen. It's important to leave your lens in Manual Focus throughout the whole night sky session, so that you only have to carry out the focussing process once.
In order to actually focus the lens on the distant stars, you'll need a little help from your camera's Live View mode. Most modern DSLRs should have this option, and when activated, it will flip up the mirror to show you the outside scene directly on the screen. For me, Live View is accessed by pressing the button on the back with a little camera icon, which has a red dot next to it.
Once you're in Live View, you'll need to use the digital zoom buttons to enlarge what's shown on the screen. For me, these are on the back of the camera, arranged horizontally on the top-right. Keep pressing the Zoom In button until the screen indicates you're at maximum zoom. Doing this makes it as easy as possible to find a target object which you will use to gauge your focus.
At this point, you should be in Live View mode with full digital zoom selected. The final step here is to identify and point the camera at a bright star or planet in the sky, making sure you can see it on the screen. Once you've found a target, all you need to do is twist the focus ring on your lens until the object no longer appears blurry. It can sometimes be awkward to find the sweet spot, but it's worth spending a bit of time getting it right. When you've done this, you're all set; you don't need to worry about focus again for the rest of the session. Press the Live View button once more to flip the mirror down and return to your camera's normal menu.
As a side note, you should set your optical zoom level on the lens BEFORE you start the focussing process. If you set the focus and then twist the lens to zoom in and out, chances are the sweet spot will be disturbed and your photos will appear slightly fuzzy.
This might be a lot to take in if you don't normally leave the full-auto comfort zone on your camera, so I'll summarise the steps once more:
- Flip your lens into Manual Focus mode.
- Choose your desired optical zoom level BEFORE you start focussing, so as not to disturb your efforts later.
- Put the camera into Live View mode.
- Use the digital zoom buttons to enlarge the Live View image as far as your camera will allow.
- Point the camera at a bright target object in the sky, making sure you can see it on the screen.
- Adjust the focus ring until your target appears sharp.
Step 3: Choosing the Right Settings
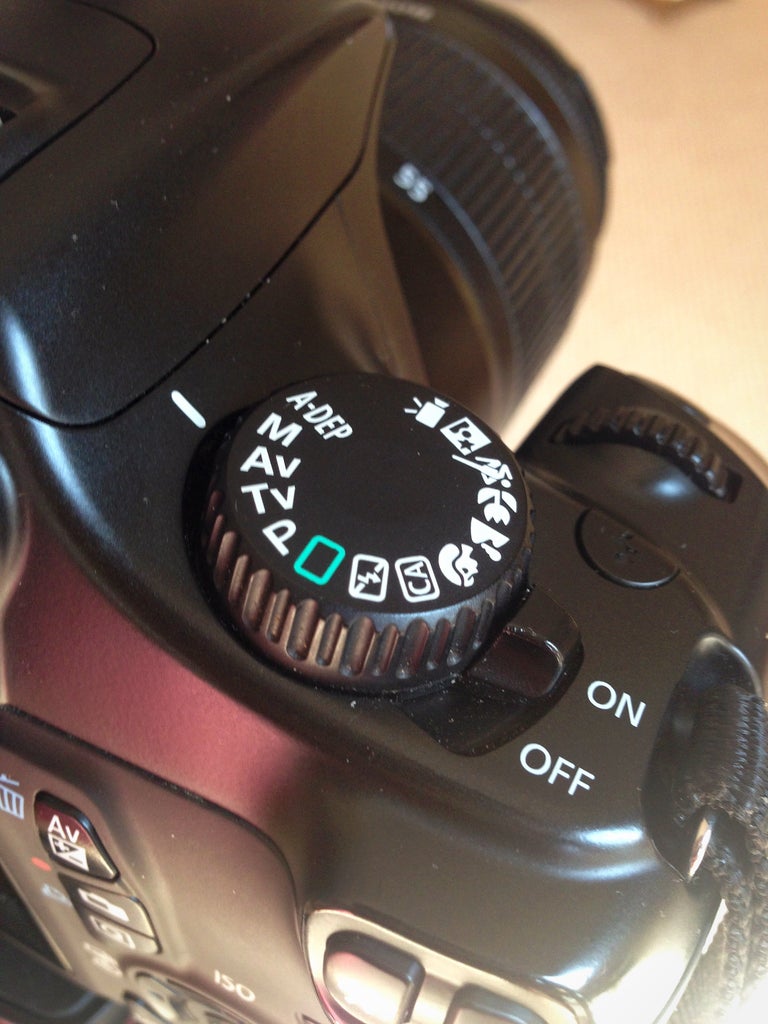
Before pressing the shutter and taking some actual photos, you'll want to make sure you've chosen the correct camera settings to pick out as much detail as possible from sky. To do this, first select your camera's Manual shooting mode by twisting the dial to the M position, as seen in the first photo. Your screen should now display a great deal more options than it would in any of the other automatic shooting modes.
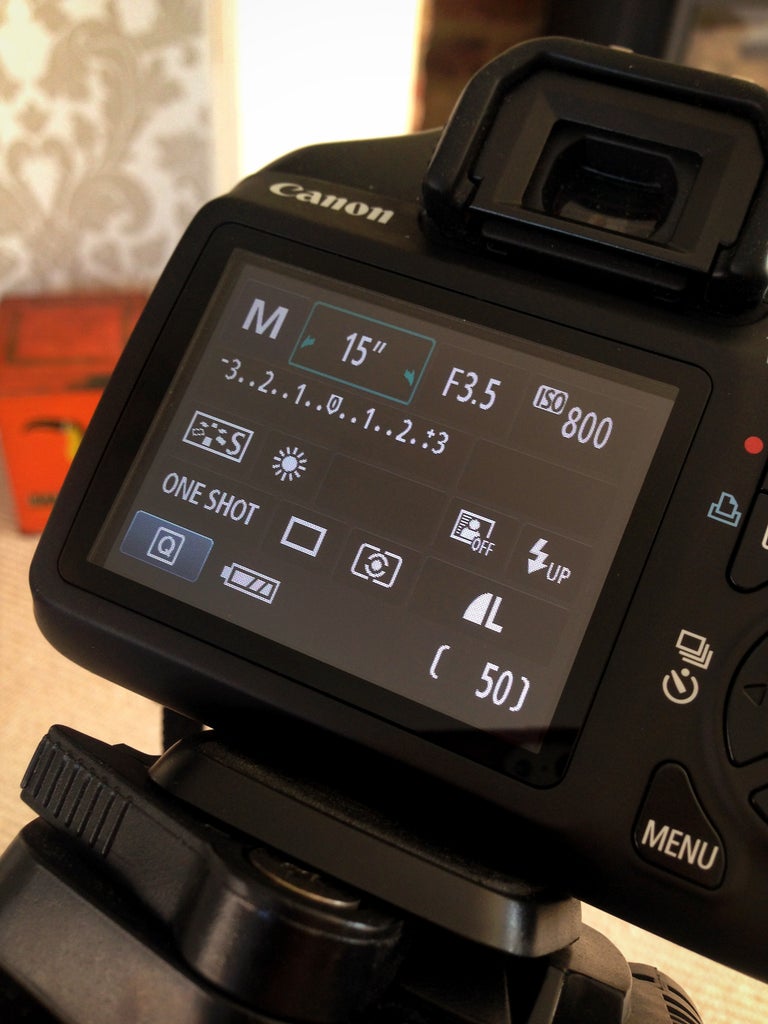
The vast array of settings which your camera expects you to change might seem confusing, but in practice there are only three important ones (at least for beginners). For me, these are shown in a row at the top of the screen, in the order of Shutter Speed, Aperture and ISO.
Shutter Speed controls how long the sensor is exposed to the incoming light. During the day, this will typically be a few hundredths of a second which means that the mirror will flip up and down faster than you can blink. At night though, the sensor needs to be able to gather light for a period of seconds, or perhaps even minutes. This is because the objects in the night sky are many millions of times dimmer than the bright sunlight which most cameras are designed for.
To decide what Shutter Speed to use, there's a simple rule called the 500 Rule. This states that the Shutter Speed in seconds should be roughly equal to 500 ÷ the focal length of your lens. For example, with my 18-55mm lens zoomed all the way out, a good Shutter Speed might be 500 ÷ 18 which is ~27 seconds. The idea behind this rule is that you should limit your exposure to avoid stars smudging across the image due to the Earth's rotation. While the 500 Rule is useful, sometimes it's easier just to take your camera outside and experiment. If the stars appear as trails rather than points of light in your photo, just reduce the Shutter Speed by a few seconds and try again.
Aperture is the next setting, and more often than not, it's the easiest one to sort out. It controls the size of the opening in your lens, with smaller numbers denoting a wider opening. When you're photographing the night sky, the more light you can gather in a shorter time, the better. Because of this, I normally set the Aperture wide open; that is, I choose the smallest value the camera will allow. There's one side effect to this approach though - a wider Aperture will give you a smaller depth of field. This means that if your photo includes a portion of landscape, parts of this landscape may not be in focus. You can fix this problem by tightening the Aperture setting until you're happy.
Finally, you will need to choose an ISO value. This setting controls how sensitive the electronics in your camera are to the incoming light. A higher ISO value means that the camera is more sensitive, and can detect fainter objects for a given combination of Shutter Speed and Aperture. Higher values also mean that noise will be more prevalent in your photos, so it's important to start low (perhaps at 400 or 800) and increase the ISO only if you need it.
That's a lot more information to take in if you've never seen these settings before, so I'll summarise:
- Put your camera in Manual shooting mode with the top dial.
- Choose a Shutter Speed either using the 500 Rule, or by starting at a value of a few seconds and experimenting.
- Choose an Aperture either by selecting the lowest number possible, or by selecting a higher number that keeps the foreground in focus.
- Choose an ISO by starting at a value of a few hundred, and increase it only if you can't get the desired result using the other two settings.
Step 4: Getting the Best Out of Your Results

Your camera is now in a state where you should get some decent photos out of it. There's one more thing to think about though - the technicalities of actually pressing the shutter. Everything is mounted on a tripod so that it'll hold steady during the long exposure times needed to capture the stars, but we haven't considered the vibrations caused if you release the shutter by actually touching the camera. One way around this problem is to use the self timer, set to about 10 seconds. The delay should give the camera enough time to settle before it actually takes the photo. This low-tech solution is normally good enough for me, but if you want to get even more technical, you could get yourself a remote shutter release like I mentioned in Step 1. This gives you a separate handset to control the shutter, and often gives you extra useful options such as time-lapse shooting, and easy access to your camera's Bulb Mode (another Shutter Speed mode which keeps the exposure going as long as the release is pressed).
After your first session, you'll no doubt be excited to get your photos onto your computer ready to share. The results straight from the camera are often decent, but it's worth putting in a bit of extra time to enhance them and release their full potential. Check out my other article on Enhancing and Improving Holiday Photos for an idea of how to get started with photo editing. This was written with daytime photos in mind, but most of it should apply to your night shots too - especially the parts talking about levels, curves and sharpening.
Finally, if you want to get even further into astrophotography, this is only the tip of the iceberg! There are many other tutorials out there which explain methods for stacking multiple photos to improve image quality, using a DSLR with a telescope in place of the lens, and merging different photos together so that you can focus on landscape and sky separately. There are some truly amazing photos out there taken by amateur astronomers, and seeing other people's impressive work is what inspired me to learn how to use a DSLR properly in the first place. I'm more of a casual photographer though, and up to now I've been happy with the simple one-shot approach explained here. If you're a beginner and found my tutorial useful, I'd love to see your results!


