Introduction: I Restored an Old Tonka Truck for My Son
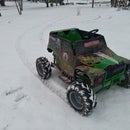
First picture is the obligatory finished project pic.
Second pic is how I found it. Relatively rough all over, but complete. I had been wanting to play with a process called electrolytic rust removal and this truck looks like an ideal candidate for testing that process. It's basically reverse electro-plating that should strip rust off of steel. It looks like it could be a great technique/tool to add to the workshop.
In this instructable, I'll go over the steps I took to restore the Tonka truck back to like new condition. This is an original 80's truck with the dual stack exhaust.
Step 1: Disassembly
Disassemble everything. This involves drilling out rivets,
carefully unfolding brittle rusty steel tabs and popping off a couple axle caps.
The wheels are held to the axle with push nuts. They pop right off if you pull on them with pliers. If you're careful, you can re-use them. If they break, they should have them at your local hardware store for less than a buck. I was able to re-use mine.
There are rivets holding the bed to the chassis. You can drill them out by selecting a bit just slightly larger than the inside shaft of the rivet. Drill on the side with the bigger flared end. Avoid enlarging the hole the rivet was placed through, you just need to get the flared end separated and it'll pop right off.
If you look on the underside of the cab, there are six small metal tabs. Gently straighten them out and slide the metal cab of the plastic grill/fender piece. The smoke stacks, cab glass and other small plastic bits all remove just by pulling on them.
Step 2: Electrolytic Rust Removal on the Steel Parts
The gist of the process is you are submerging a rusty item in a solution of washing soda and water (washing soda increases conductivity). You then attach your rusty item to the negative lead of a 12v battery charger and the positive lead to some scrap steel (not stainless! only use ferrous metals for this process!) The scrap steel collects rust and contaminants from the work piece (it acts as a sacrificial anode). The process is not noisy or caustic, so it can be a relatively safe way of removing rust. Just be very careful to not short out your battery and definitely use a GFCI receptacle to power your charger. Playing with this process was a big part of why I tackled this project. Liquid stripper would probably have been more efficient on the paint and there wasn't enough rust to really justify the electrolysis, but where's the fun in that?
Everything's hooked up and cooking. The workpiece is attached to the negative battery terminal and submerged in the washing soda solution. The washing soda makes the water more conductive and aids in the process. The sacrificial anodes are attached to the positive terminal of the battery and spaced evenly around the work piece. As electricity flows, particles are removed from the work piece and are deposited on the anodes. This will not affect the base steel material, which makes it a gentle way to remove rust.
I'd have preferred to hook the charger directly to the setup, but most modern chargers are smart chargers. Hooked directly, it detects that the "battery" is beyond dead and indicates a fault. Throwing an actual battery into the mix circumvents all that unnecessary safety nonsense.
...but seriously, don't short batteries. Especially not near water. Be careful with your conductors.
Overview of the items needed for electrolytic rust removal.
Big plastic bin - (I put mine on a dolly to make moving it easier)
Steel anodes (I used old window weights, they have a perfect eyelet at the top for making easy wire connections)
Washing soda
Heavy gauge wire and alligator clips - I used 6awg solid copper and some jumper cable ends that I had laying about the shop
Battery charger/12v battery - If you have an old dumb charger, perfect. If you have a new smart charger, you'll need a car battery to fool the smart charger into charging. The more amperage it can push, the faster it'll work. I was using 12amp charging.
Step 3: Check the Progress
Pull out the anodes after a night of cooking. All the junk on them is material that came off the workpiece. Just scrape 'em off and reset everything if you're not satisfied with the results.
I did a lot of scraping and used a wire wheel on my grinder to work at the paint between overnight cookings. That was some very tough paint.
Step 4: Continue Cooking, Scraping, Repeat
Got the chassis all stripped down. You can see the swirl marks left from my wire brush. I used a variety of different brushes, some by hand, some attached to drills and disc grinders. This paint was very, very tough in the areas that weren't compromised with rust.
Found a Tonka factory stamp hidden under the incredibly thick factory paint.
Several nights in the cooker. Lots of wire brushing, wire wheel on the drill and scraping with a putty knife.
The paint got to the point where it was smearing more than flaking off. So close, but every last bit had to come off.
I started this project to test this technique out and it worked really well on the rusty spots. The process would be best suited to restoring rusty bare steel objects. I'll be using it on some antique hand tools soon, but it has a lot of other potential uses.
Step 5: Paint and Assembly
I considered going with the bare steel look, but figured kids and the eventual rust patina wouldn't mix well.
I painted the pieces with rattle can Rustoleum. 3-4 light coats on each piece. Making sure to avoid runs by not letting the can hover in one spot, don't start/stop spray on the work piece, let it dry thoroughly before handling, etc.
Put new rivets in the body and started re-assembly. A rivet gun just punches a small metal fastener through a specific diameter hole. It can be pressed in loosely to allow swiveling, or pulled tight to really hold. There are two rivets holding the cab to the chassis and two more holding the bed to the chassis. I put the cab on tightly and left the bed a bit loose so it can dump freely.
Step 6: Add Decals and Go Play!
I added some vinyl decals that I found online for around $10, and it's good to go!
I hope you found this article useful.. If you want to see what else I'm currently up to, follow me on instagram
Best of luck on your projects!

Second Prize in the
Fix It! Contest


