

Introduction: INTERFACING SOIL MOISTURE SENSOR USING BHARAT PI


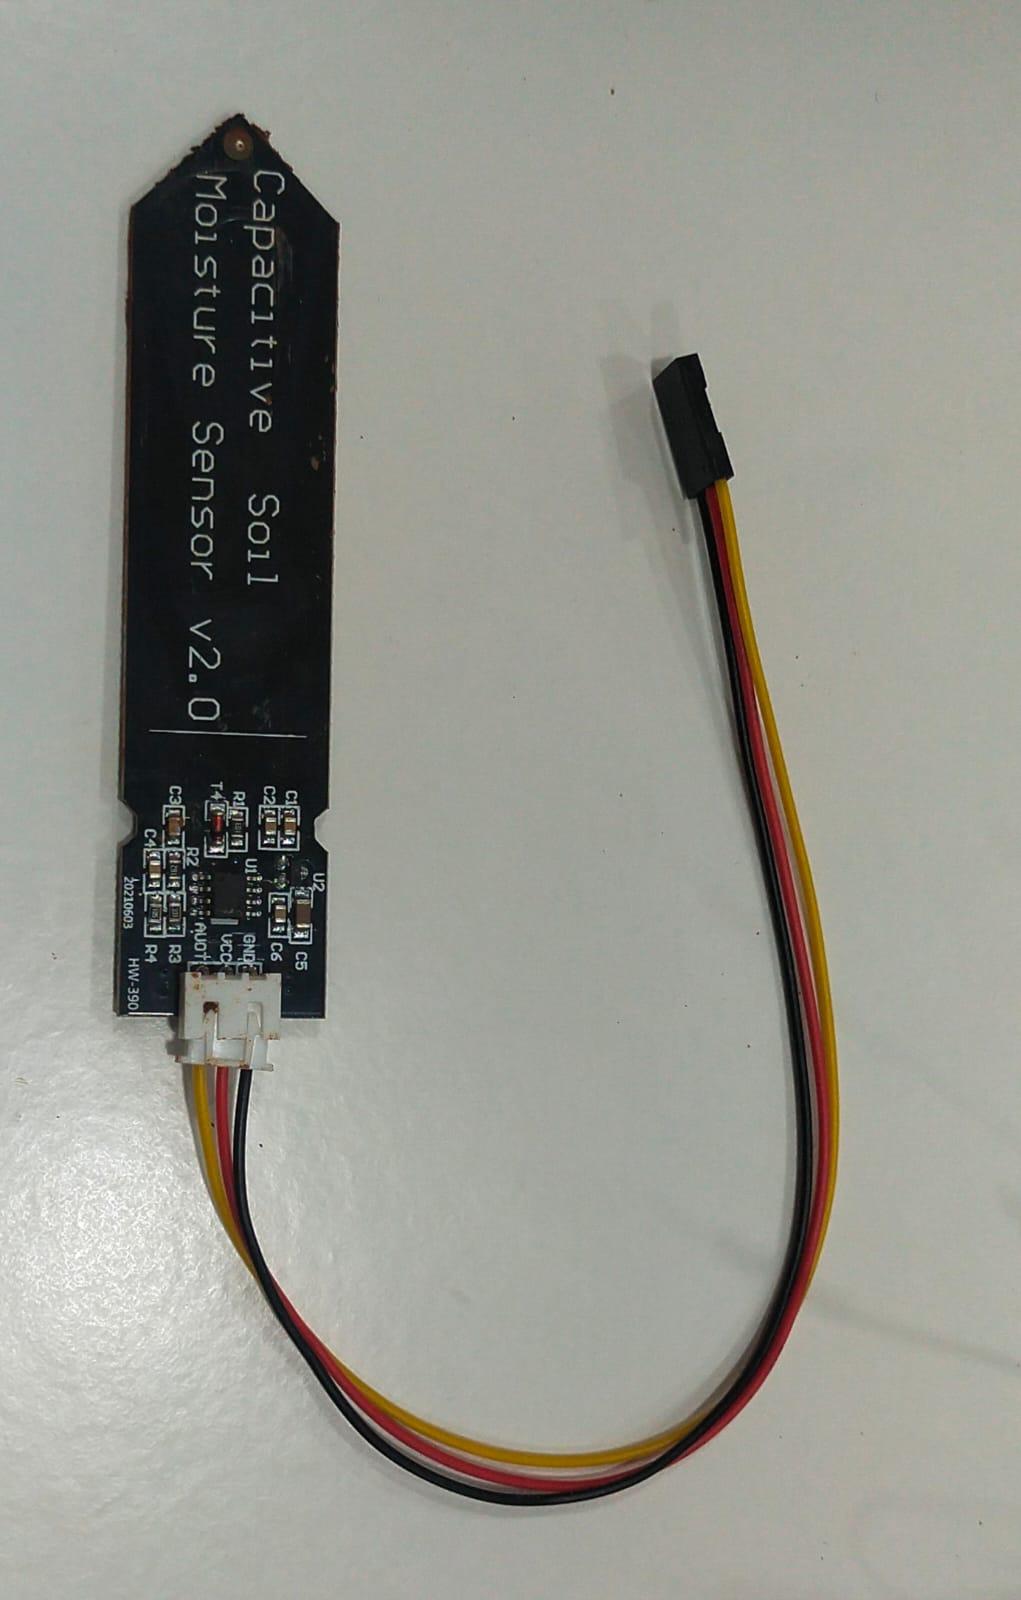
In this instructable, we are going to interface a Capactive Soil moisture sensor v2.0 with Bharat-PI. This sensor measures the volumetric content of water inside the soil and gives us the moisture level as output. The sensor is equipped with digital output, so it can be used in digital mode. In this article, we are going to interface the sensor in digital modes. So let’s begin our tutorial on interfacing Bharat-pi and Soil moisture sensor.
Step 1: Working of Soil Sensor
The soil moisture sensor consists of two probes which are used to measure the volumetric content of water. The two probes allow the current to pass through the soil and then it gets the resistance value to measure the moisture value. When there is more water, the soil will conduct more electricity which means that there will be less resistance. Therefore, the moisture level will be higher. Dry soil conducts electricity poorly, so when there will be less water, then the soil will conduct less electricity which means that there will be more resistance. Therefore, the moisture level will be lower. This sensor can be connected in digital mode.
The specifications of the soil moisture sensor v2.0 are as follows
- Operating Voltage: 3.3 ~ 5.5 VDC.
- Operating Current: 5mA.
- Interface: PH2.54-3P.
- Dimensions mm(LxWxH): 98 x 23 x 4.
- Supports 3-Pin Gravity Sensor interface
- Analog output.
- Weight (gm): 15.
Step 2: Soil Moisture Capacitive Pinout

- Gnd : Power GND(0V)
- Vcc :Power VCC(3.3~5,5V)
- A OUT:Analog Siganl Output(0~2.3V)
Step 3: Requirements


1.Bharat pi
2.Jumper wires for connection
3.Soil for testing
4.Soil Moisture Sensor`
5.Arduino IDE
Step 4: Interfacing With Bharat Pi
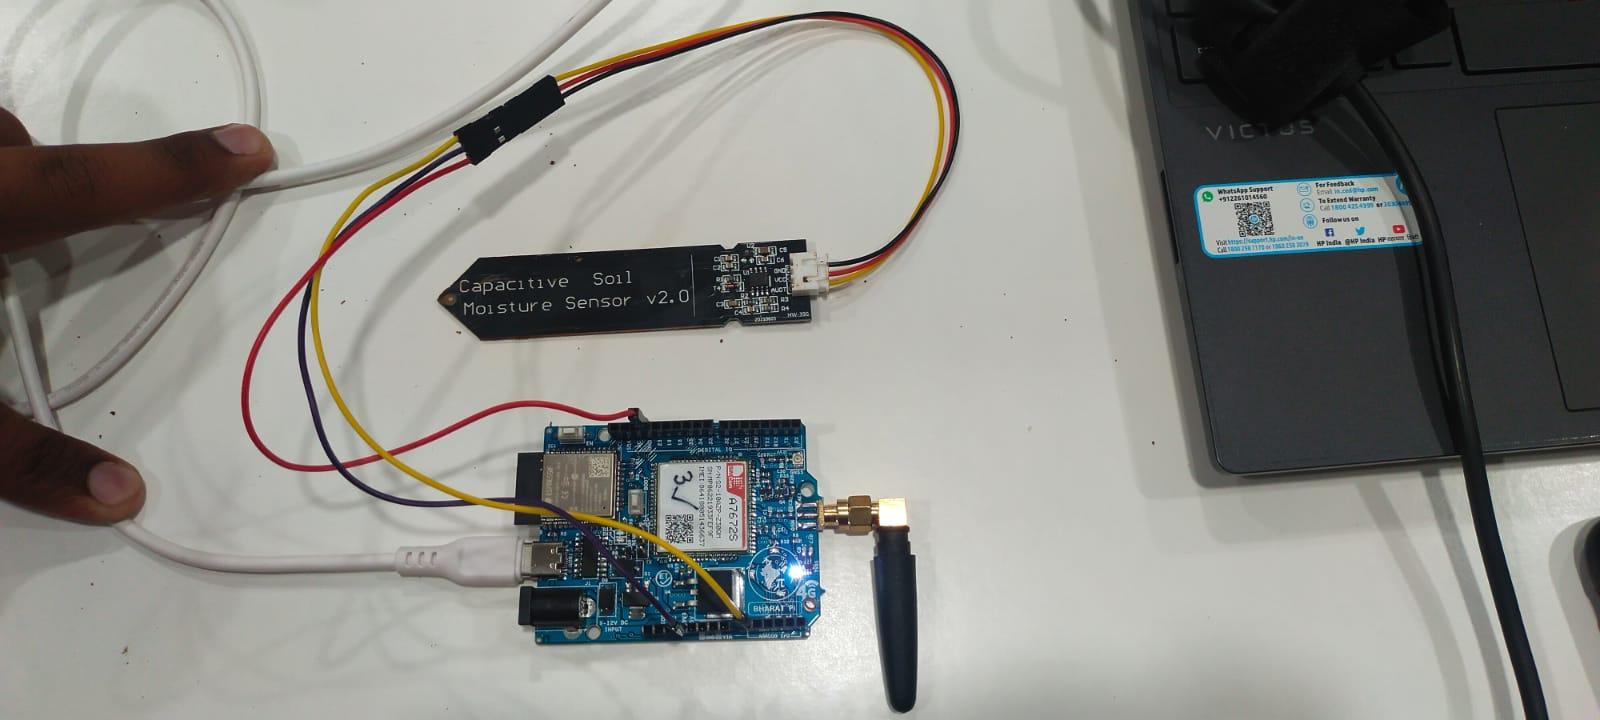

Connections:
- Vcc pin : 5v
- gnd pin : ground
- A out pin to : pin 4
Step 5: UPLOAD CODE FOR AURDINO - IDE

const int sensor_pin = 4; /* Soil moisture sensor O/P pin */
void setup() {
Serial.begin(9600); /* Define baud rate for serial communication */
}
void loop() {
float moisture_percentage;
int sensor_analog;
sensor_analog = analogRead(sensor_pin);
moisture_percentage = ( 100 + ( (sensor_analog/1023.00) * 10 ) );
Serial.print("Moisture Percentage = ");
Serial.print(moisture_percentage);
Serial.print("%\n\n");
delay(1000);
}
Code avilable at git hub:https://github.com/Madhankarthick/interfacing-soil-sensor-wit-bharat-pi/blob/07944eed6fa17038532f2122e3af5816b98d81bf/soil%20sens.txt
Attachments

Step 6: CHECK THE OUTPUT AT SERIAL MONITOR

Step 7: Apllications


- Agriculture: to optimize irrigation, increase crop yields, save water, energy, and fertilizer costs, and protect water resources from runoff.
- Landscape irrigation: to maintain healthy plants and lawns, and conserve water.
- Research: to study soil properties, climate change, environmental science, biofuel, and drought forecasting.
- Simple sensors for gardeners: to monitor the soil moisture of plants and flowers, and water them accordingly.
- Archeology: to detect buried artifacts and structures based on soil moisture variations.


![Tim's Mechanical Spider Leg [LU9685-20CU]](https://content.instructables.com/FFB/5R4I/LVKZ6G6R/FFB5R4ILVKZ6G6R.png?auto=webp&crop=1.2%3A1&frame=1&width=306)


