Introduction: Iron Man Mask Repaint & Mod
Now that I'm home from college for Winter Break, I have time for another project!
Just before Halloween I found an Iron Patriot (War Machine’s name in the Iron Man 3 movie) mask at Goodwill for $4. Being a huge Iron Man fan, I decided to pick it up hoping that I would be able to customize it in the future. Well today is that day!
This Instructable will detail how I modified the design of the mask, painted and weathered it, and added LED lights.
Step 1: Materials & Tools
Materials:
- Plastic Iron Patriot mask
- Various plastic parts (from models, airsoft, NERF, or other toys)
- Paper
- 1mm EVA foam sheets
- EVA foam floor mat
- Sunglasses lenses
- Prescription glasses lenses (optional)
- Blue pre-wired LEDs
- Electrical wire
- 9V battery & connector
- Push button
- Heat shrink tubing / electrical tape
- Spray paint primer
- Spray paint
- Acrylic brush paints
- Enamel brush paints
- Matte spray clear coat
- Painter’s tape
- Disposable gloves
- Paper towels
- Respirator
- Super glue
- Hot glue
Tools:
- Pens / pencils / markers
- Scissors / Xacto blade
- Hot glue gun
- Sandpaper (various grits)
- Paint brushes
- Wire strippers
- Printer
*The links for the items above are not necessarily recommendations. They are simply there to give an idea of what was used for this project.
Step 2: Disclaimer
As you can see in the section above, this Instructable utilizes several tools and materials that can be harmful if used incorrectly. Please use caution and ask somebody for help if you do not feel comfortable doing something.
Step 3: Planning & Research
The planning and research stage of this project was much shorter than most of my past projects. I didn’t have a specific vision for the mask when I started other than the fact that I wanted to cover the eye holes and add LEDs. The paint job was a result of the colors I had on hand, and the other design elements I added were dependent on the plastic parts and detail pieces I could find.
Step 4: Covering the Eye Holes
The first objective for the project was to cover the eye holes in the mask. This is clearly more movie-accurate, and it prevents other people from being able to easily see the wearer’s eyes. The caveat is that the wearer still needs to be able to see out of the mask.
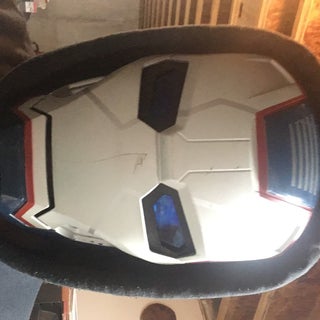
I decided to use the dark lenses from some old, cheap sunglasses.
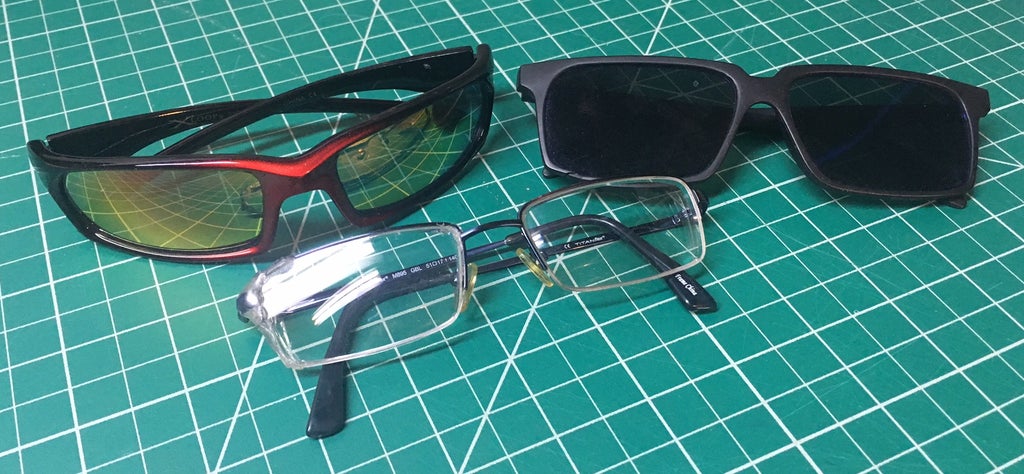
Unfortunately, these weren’t quite large enough to cover the entire eye holes, so I made a sort of gasket out of 1mm EVA foam sheet to fill the area. I used a piece of paper to trace the shape of the eye holes, then cut it out and transferred it to the foam sheet. I used black foam, but feel free to choose whatever color goes best with your design scheme.
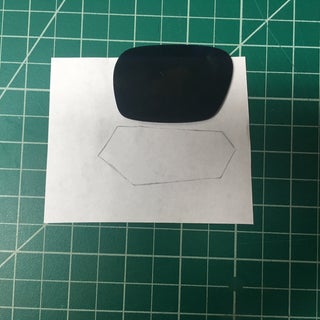
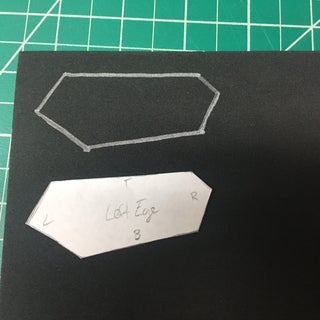
I then glued the lenses to the back of the foam gaskets using hot glue. Now, I wear prescription glasses, but they do not easily fit inside the mask (and I am quite blind without them). Therefore, I decided to glue the lenses from an old pair of glasses onto the back of the sunglass lenses. This way I will be able to wear the mask without my normal glasses and still be able to see fairly well. I waited to permanently glue these into the mask until the painting process was finished so that I didn’t risk getting paint on the lenses.
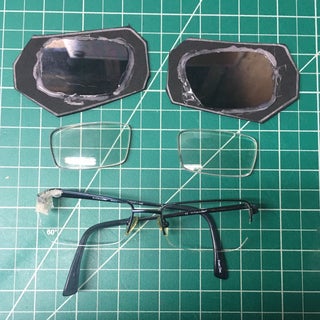
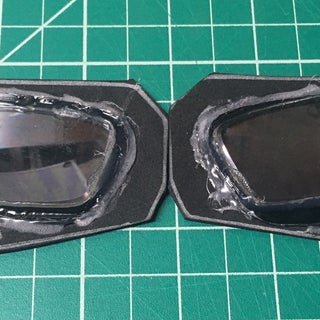
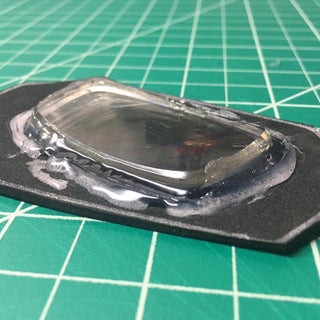
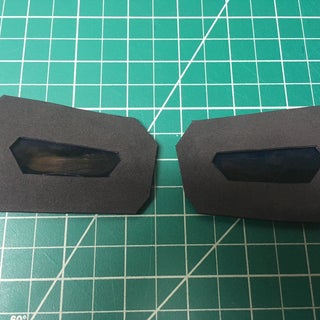
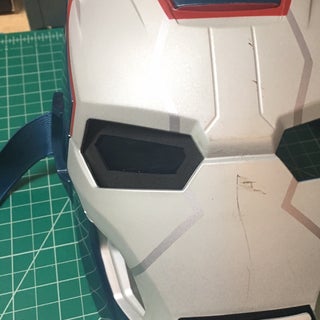
This little mod turned out pretty well. The mask now looks much more realistic, and it allows me to wear it without my glasses.
Step 5: Adding Details
The mask in its original state was quite bare and lacking detail, so I decided to scour my stash of plastic parts for anything that I could glue onto the mask to spice it up. Model pieces, NERF and airsoft parts, electronic components, various hardware parts, and plastic toy pieces are great for this type of thing. The best pieces typically have some sort of interesting texture to them.
After gathering as many potential parts as possible, I held each of them on the mask to try to find where they should go. Once the final parts and their corresponding locations on the mask were chosen, I used super glue to attach them. You could also use hot glue or epoxy, but super glue is plenty strong and it dries pretty quickly.
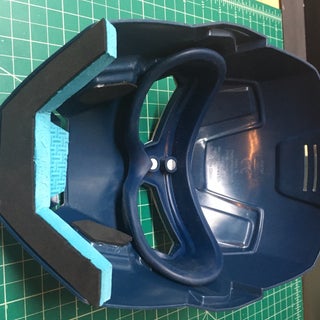
In addition to the exterior details, I glued some foam padding to the inside of the mask to make it more comfortable and to cover the exposed chin area.
Step 6: Adding LEDs
My first thought for this mask was to make the eyes glow, but I quickly realized that this would not work with the lenses I was using. I still wanted to incorporate lights into the modification, so I found two long tubes that I could use as flashlights on the temples of the mask. The LEDs I used are blue in color, rated for 12 volts, and are pre-wired (meaning they already come with a resistor soldered to the LED). The LEDs are wired in parallel to a 9 volt battery (yes this is less than 12, but the LEDs just won’t be as bright) and are activated by a push button switch.
The battery and most of the wires are glued down inside the forehead of the mask.
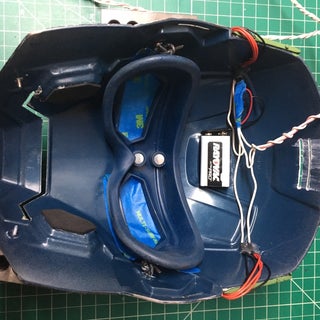
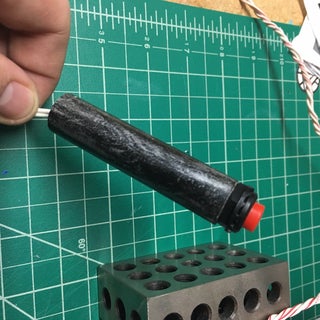
The button was glued into a length of PVC and is connected to the rest of the circuit via a long wire. This allows the wearer to feed the button through their shirt and down their sleeve to be actuated whenever they choose.
Step 7: Prepping for Paint
I used various grits of sandpaper to rough up the surface of the mask and remove the glossy shine. This will help the paint adhere better to the plastic. I also used painter’s tape to cover the eye holes and the mouth hole from the inside so that the spray paint wouldn’t get on the rubber piece inside.
Step 8: Painting
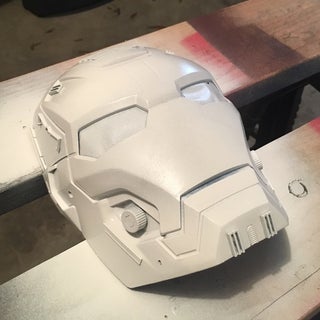
I first used a white primer to establish a base coat. This covers up the original colors on the mask and helps the rest of the paint adhere better.
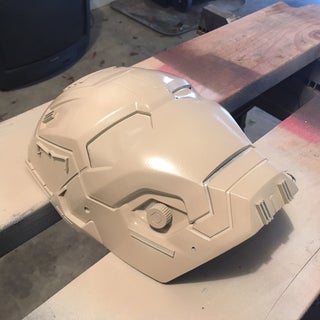
Next, I sprayed 3-4 coats of tan over the whole mask, letting each coat dry for about 10 minutes.
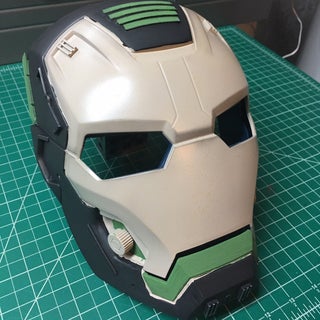
From this point on I used brush paints, but spray paints will work too. I began by filling in the larger sections with acrylic paint before moving onto the smaller details. In this case, I painted the black, then the green, then the silver. Painter’s tape helped to get clean lines between colors, and a hairdryer helped to dry each coat faster.
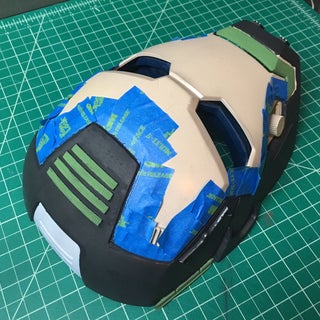
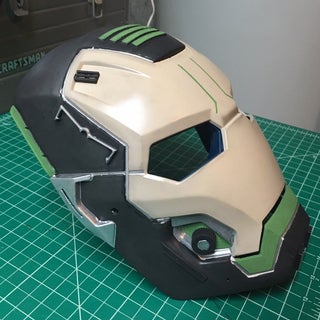
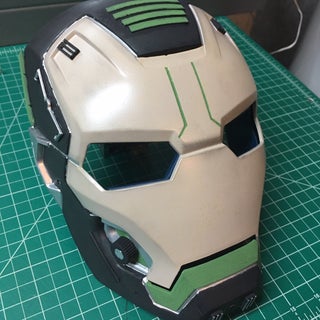
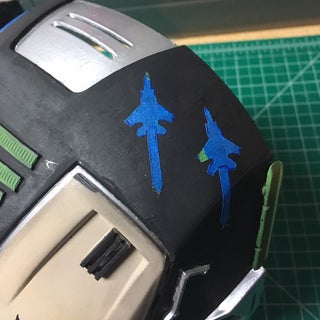
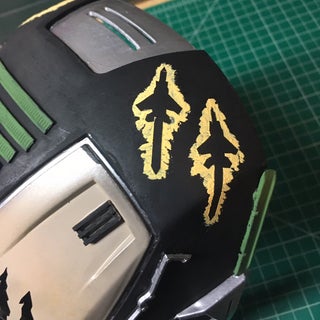
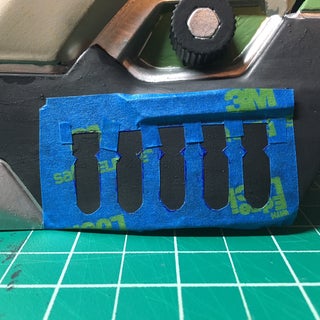
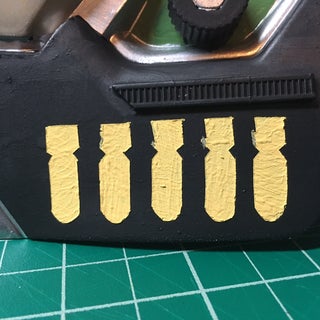
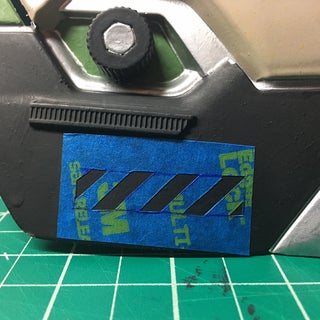
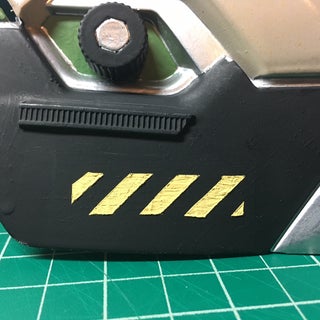
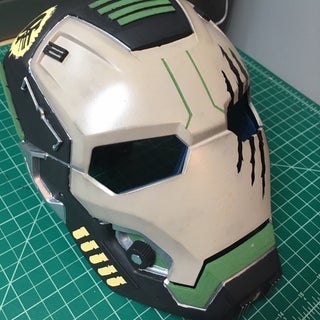
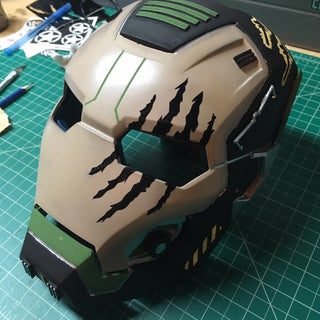
With the main colors dry, I moved onto the details. I wanted to give the mask a military feel, so I found some designs for military decals on the internet and made stencils using painter’s tape.
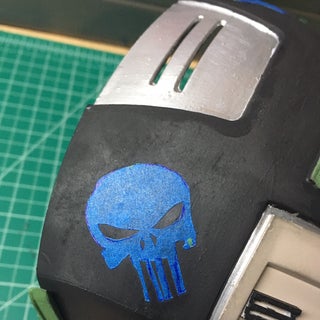
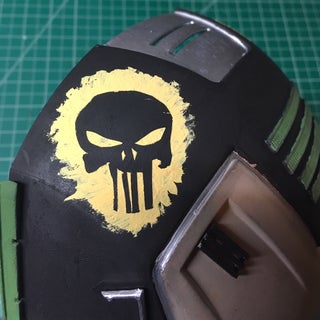
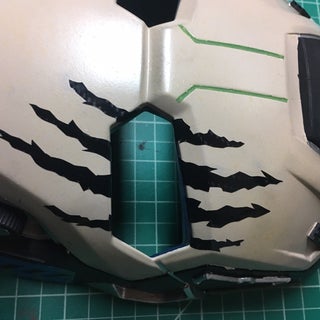
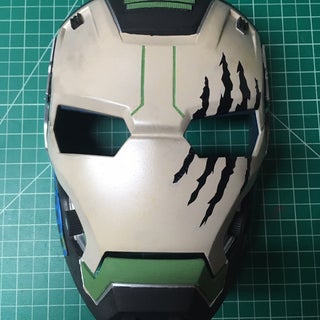
This isn't part of the painting process, but I also added a claw mark detail across the left eye. I found the design on Google, then printed it out and traced it onto some faux carbon fiber vinyl. The vinyl has an adhesive backing which allows you to apply it just like a sticker.
Step 9: Weathering
The Iron Man paint scheme (or Iron Patriot in this case) is very clean, but I wanted to create a grittier, more used and abused look for my mask. This was accomplished through the use of weathering, which is a very common painting/prop making technique.
Normally I make my props look dirty by using multiple layers of washes, but this time I wanted to try a technique I saw Bill Doran use on the Punished Props YouTube channel (check them out for all kinds of prop building goodness). Bill rubbed graphite powder over his parts to give them a metallic sheen that adds another layer of depth to the color. Watch this video from 10:18-11:55 to see his process and the results. I used a pencil and sandpaper to create a pile of graphite powder, put some on my fingertip, then rubbed it all over the black and silver areas of the mask.
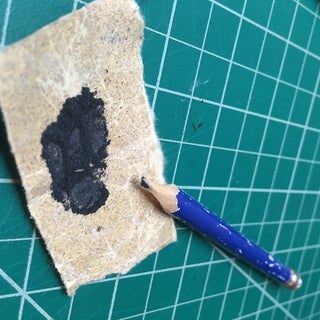
I also rubbed graphite on the tan areas, but mostly on the high and low spots to create a shadow effect. Be aware that the graphite is very messy and will rub off of the mask until a clear coat is applied.
Another great technique for weathering is dry brushing. This is when you put paint on your brush, but you wipe almost all of it off before lightly swiping it across your part. This creates highlights on any raised areas, and it looks like exposed metal beneath the paint. I used silver and copper Testors enamel paints for this. Finally, for that final level of realism, I took an Xacto blade and scraped paint off of several corners and edges. Once all of the weathering was complete, I sprayed 3 coats of clear over the entire mask.
Step 10: Final Assembly
Once the clear coat was dry, I began to add all of the final details. I screwed and glued the faux wiring into the mask, glued in the new lenses, and put the elastic head strap back on. I also finally tried on the mask to test the new lenses. Even though the opening is now smaller than the original size, I am still able to see fairly well, especially with the prescription lenses.
WARNING: Do NOT use super glue to attach anything inside the mask. I did this, and I wasn't able to wear it for any extended period of time for a few days because the fumes irritated my eyes. Try to only use hot glue on the inside of the mask if you can.
Step 11: Conclusions
Overall I’m really happy with how the mask turned out. The new lenses make the mask look a lot more realistic while also allowing me to wear it without my normal prescription glasses. The added foam also makes it more comfortable to wear. I think the paint job is really interesting, and the LEDs provide a cool functionality.
This was a relatively simple project that only took me 3 days on and off to complete. It would be great for a parent or older sibling for Halloween who doesn’t want to wear a full costume. Just put on the mask, feed the button through your sleeve and put a hood on to hide the wires and the back of your head.
Projects like these are always fun for me. I like taking basic toys or props and customizing them into a really cool piece. Hopefully this Instructable has inspired some of you to try it for yourselves!


