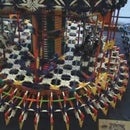
Introduction: K'nex DVD Case
This guide will show you how to build a simple rack to store DVD cases. Practical for storing games (PS2, Wii, xbox..) and movies.
Step 1: Basic Shape I
This is the supporting part. It exists out of 2 diagonal grey rods with each a yellow connector. On that is a red and white connector at the sides as shown in the pickture.
Step 2: Basic Shape II
Next we need another red rod with a combination of purple and blue connector at both ends.
Make this twice.
Step 3: Basic Shape III
Now put the parts from step 2 at both sides of the parts from step 1.
The images show how the basic shape should look like.
Step 4: Making Layers I
Now we add a few small rods in order to attach the next layer. Now it fits one DVD case.
Step 5: Making Layers II
This step shows the final adjustments in order to have a shape that can be repeated as meny times as needed. (Except for the red connector at the bottom.)
Step 6: Adding an Extra Collumn
It's possible to add extra spaces by building it upwards as done so far but also by adding an extra collumn.
Just replace the purple parts at one side at one side by blue ones and the red connectors by yellow ones. Now you can add an extra collumn with the same model as done so far.
Step 7: Tilting Backwards
When the rack has the correct size it should be tilted backwards a little to make it more comfortable to use. Just add a small rod at the bottom front of the rack or put the rack tilted on some base.
I rather use the rack horizontal as shown in the image caus this will alow you to read the names on the covers without having to look at it from the side.
Cheers


