Introduction: Leather Tools and Supplies
Here are all the tools you'll need for the specific kind of leatherwork we will be doing in this class. I'll show you how to use a few more optional tools along the way as well, but there are a few basics that you will definitely need to get started. You can buy your tools individually, or you can also choose to buy a leatherworking tool kit. I'll talk more about each tool and material specifically in a minute.
Essential Tools for this Class:
- X-acto knife or Industrial knife
- Shears or strong sharp scissors
- Adjustable V-gouge
- Manual punches, or rotary punch
- Awl
- Mallet (wooden, plastic or rawhide)
- Quartz slab and poundo board or heavy wooden cutting board
- Cutting mat (or other appropriate large cutting surface you don't mind damaging)
- Line 20 snap setter
- Rivet setter
- Hammer
- Wire cutters
- Clear 18" x 2" ruler
- Metal ruler
- Pencils
- Thin cardboard scraps
- Sponges or rags
- Scotch tape
- A printer or access to a place to print the pattern file
- Clamps or binder clips
Materials
- Stiff 4-6 oz leather - at least a 12" square
- Line 20 snaps
- Small rapid rivets
Step 1: Know Your Tools
Leatherworking requires some initial investment in tools, there's just no getting around it, but you can still do quite a bit with a few essential tools. Here's some information about each of the basic tools we'll be using.
X-Acto Knife - a cheap and easy to use leather cutting tool, great for details but not as good for cutting very thick leather. Make sure you have a lot of extra blades.

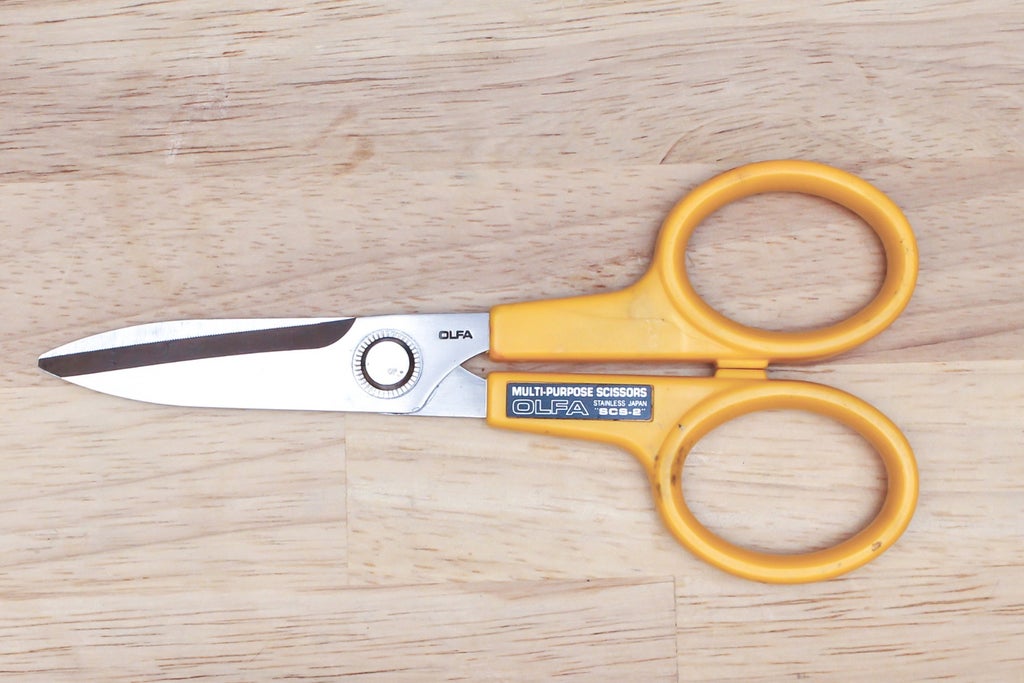
Leather Shears - I prefer these semi-serrated Olfa shears for cutting leather. They always stay sharp and are great for cutting out small patterns in thin to medium leather.
Cutting Wheel - a good way to cut long straight lines in leather when used with a metal ruler and a cutting board, not an essential tool, but great for cutting straps.

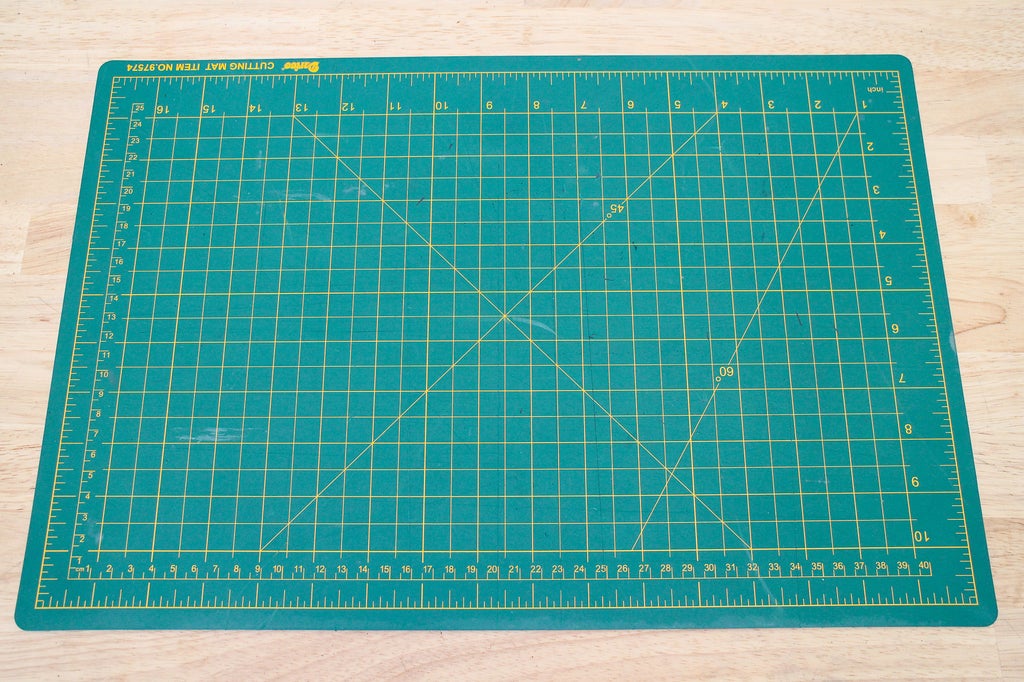
Cutting Mat - a self healing cutting mat or another smooth, damageable, surface with some give is essential for cutting leather.
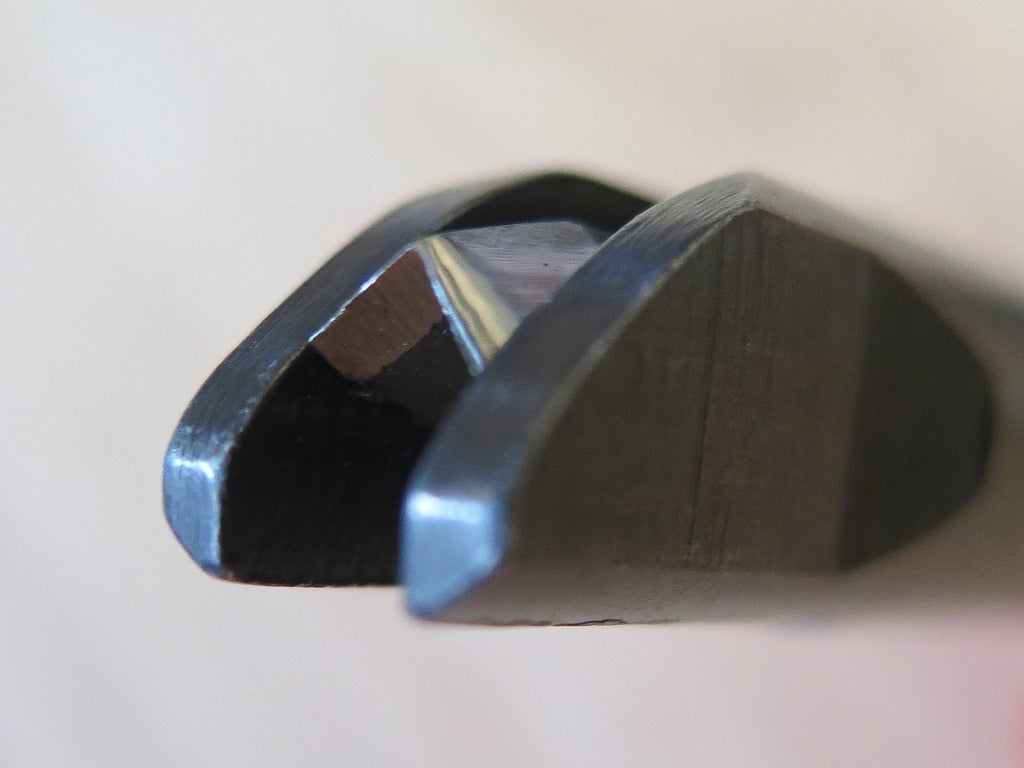
Adjustable V-Gouge - carves variable depth grooves for creating clean folds in leather. A very important tool, make sure you get one of these.

Mallets - for stamping, setting snaps, and using manual punches, you always want to use a mallet, not a hammer. Leather mallets come in rawhide, wood or poly, and come in different weights. A medium weight mallet is a good all around choice


Hammer - sometimes you do need a metal hammer for leatherwork though, folding, setting rivets etc, it's a good idea to have one around.

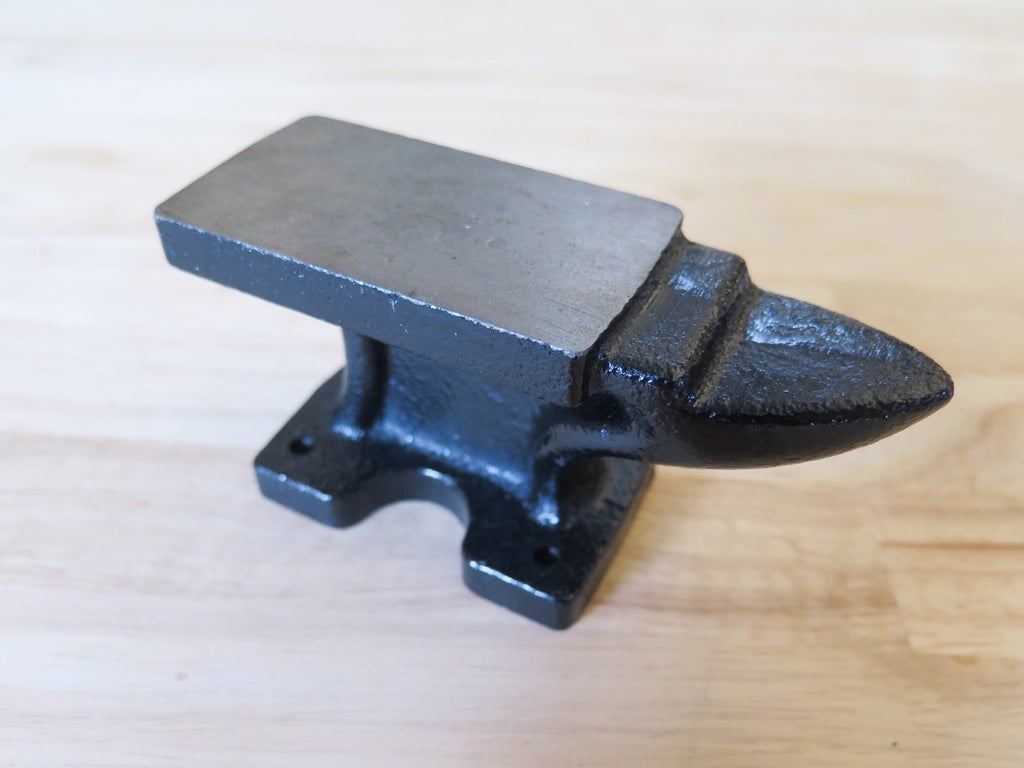
Mini Anvil - as useful as it is adorable, a mini anvil gives you a stable hard surface when you need one, helping you punch holes and set snaps and rivets in awkward places.
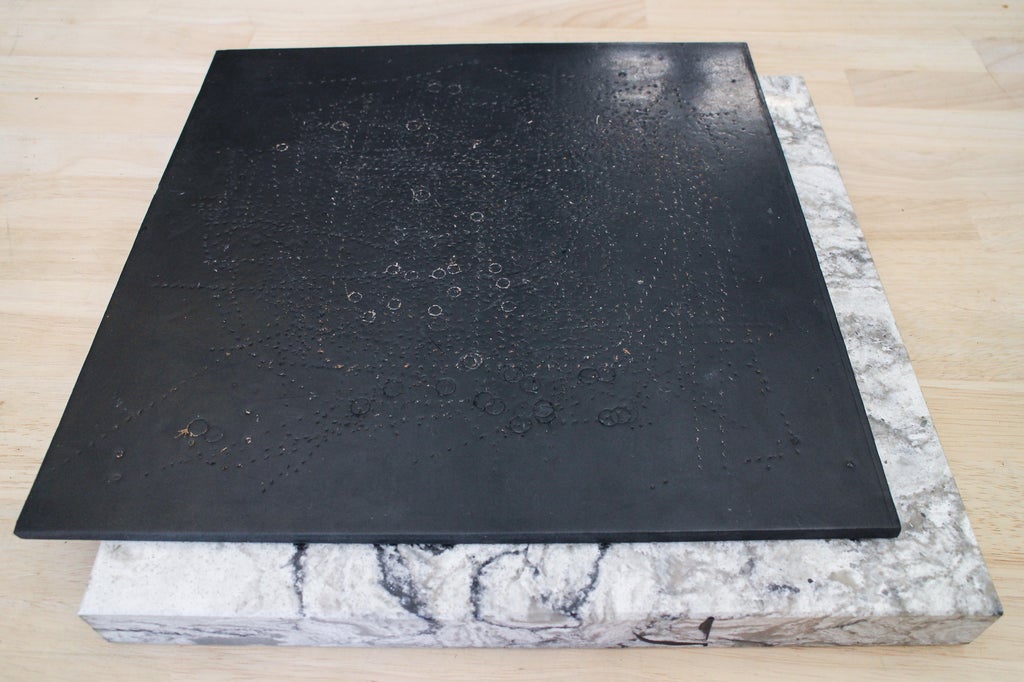
Quartz - a smooth solid base for stamping and punching. If you don't want to spend the money to get one of these a salvaged paving stone, slab of hardwood or steel will work too.
Poundoboard - a plastic slab like a cutting board that goes over your quartz slab so your tools aren't deformed or dulled during punching and stamping
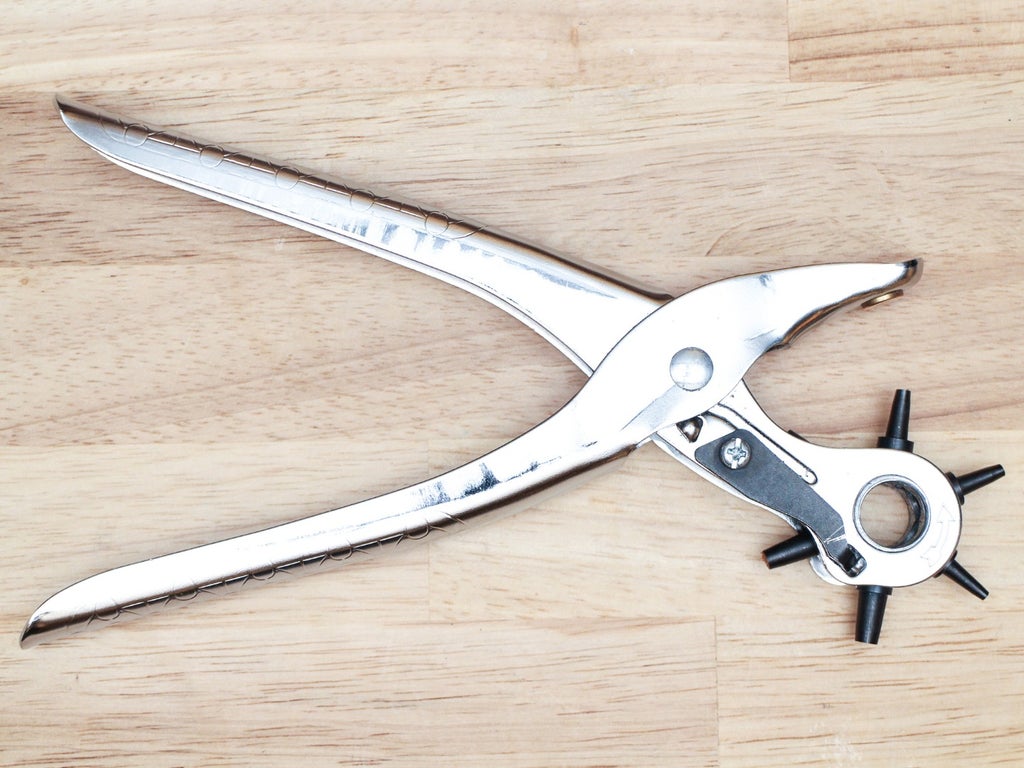
Rotary Punch - easily punches different sized holes in leather without having to use a hammer and a punching surface, but can't punch more than a few inches in from an edge.
Manual Punches - individual punches that create holes when hit with a mallet on a punching surface. Not as convenient to use as a rotary punch, but they can make holes in hard to reach places and come in more sizes. Sets with interchangeable heads are the most economical.
Awls - poking and scratching tools for creating small holes and marking leather. I mostly use them to punch sewing holes, or trace the outlines of patterns onto leather.

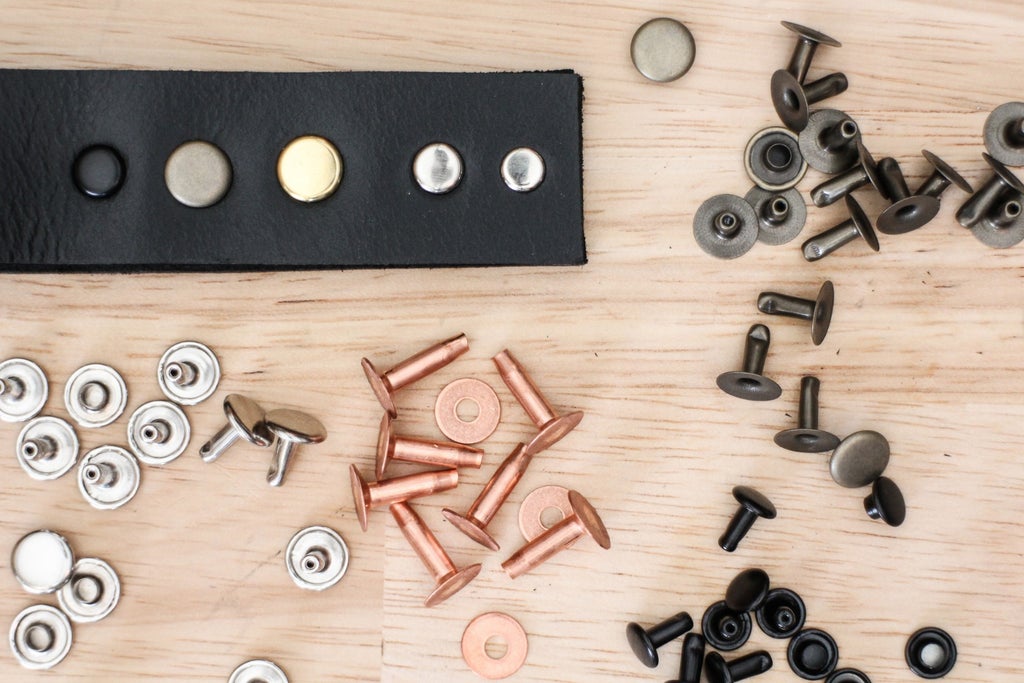
Rivets - simple two part metal fasteners used to join layers of leather together. Available in different sizes and finished. Some varieties can simply be set with a hammer, others require specialized setting tools.
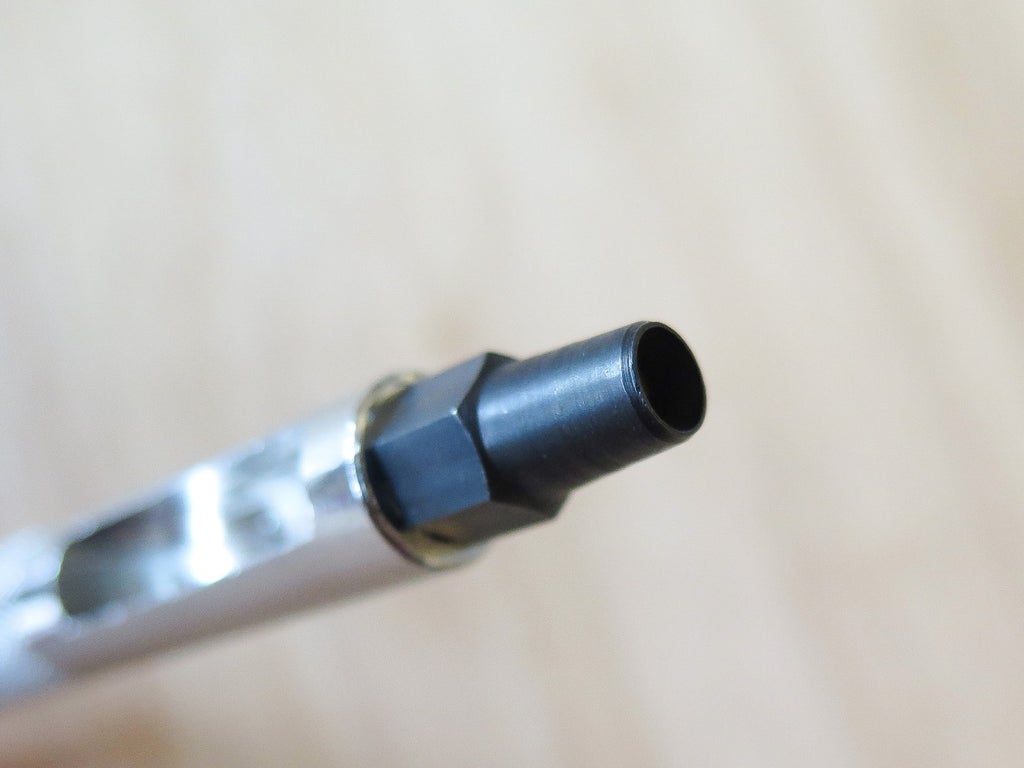
Rivet Setter - tool use to set certain types of rivets, usually two metal parts used with a mallet.
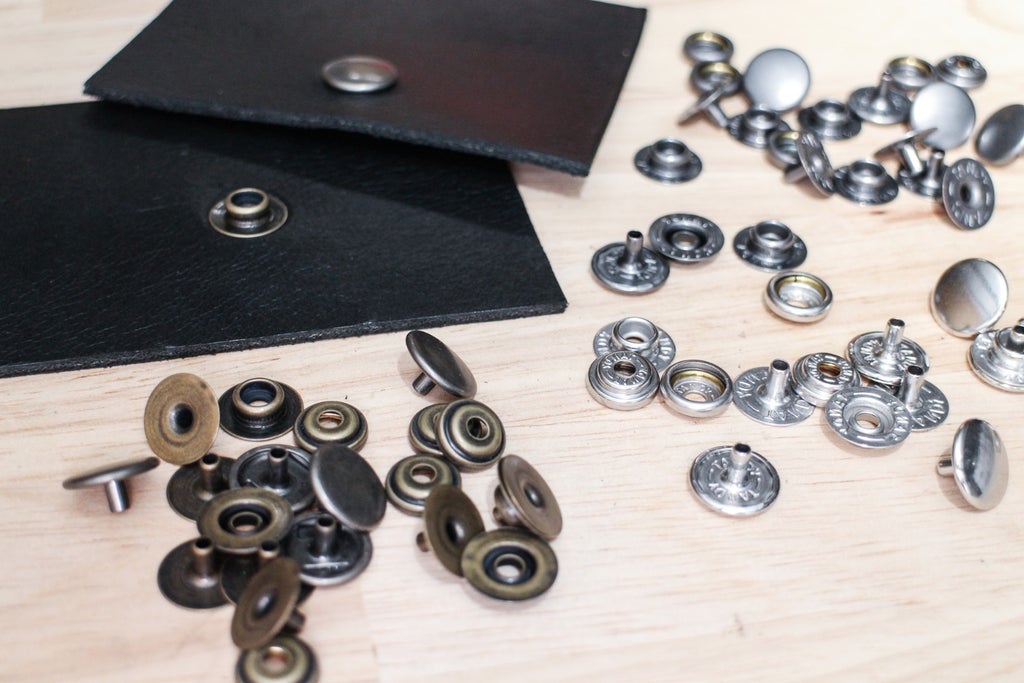
Snaps - Simple metal closures that are set into leather much like rivets. Snaps consist of 4 parts: the cap and the socket, and the post and the stud, and each pair it attached using a specialized setting tool.
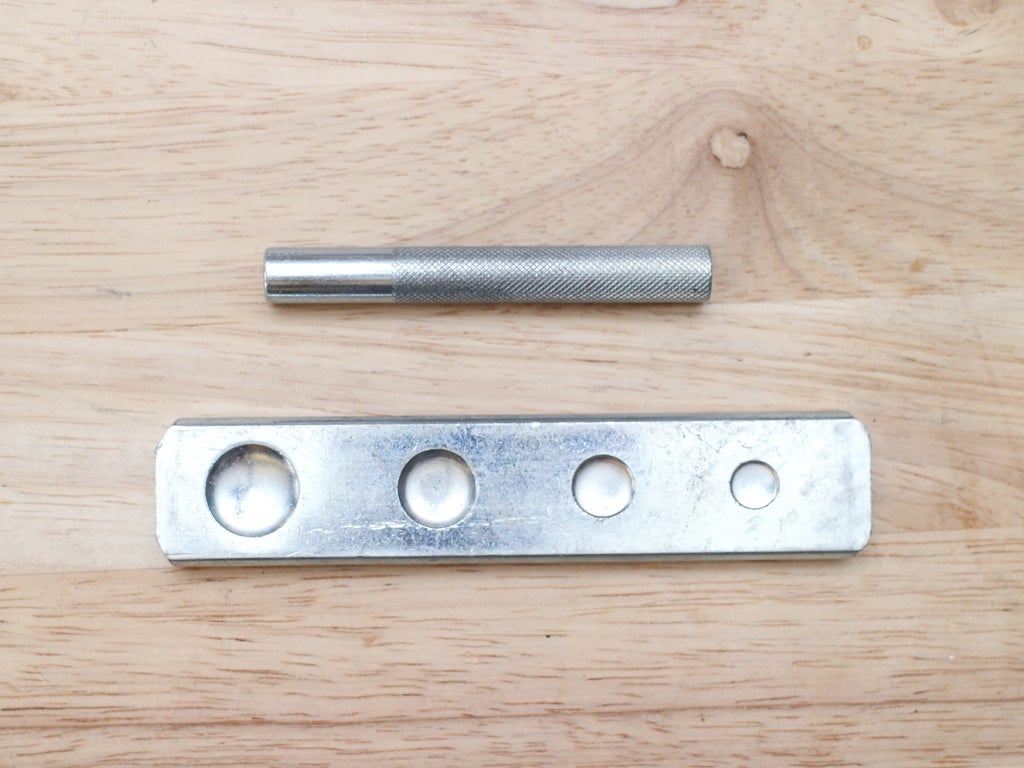
Snap Setter - tool used to set the halves of a snap together, usually two metal parts used with a mallet.

Step 2: What We're Making
In this class we'll be making a very simple project: a leather wallet assembled with rivets and snaps. I'll give you a pattern for this project, but you will also have some creative license to make your piece unique. You will be able to choose the color and finish of the leather you use for your wallet, and the metal finish of the snaps and rivets.

We'll be constructing out design using a type of leather called chrome tanned leather. Chrome tanning is a modern manufacturing process that produces fully finished leather (we'll talk more about how this type of leather is created and used later in this lesson). Chrome tanned is by far the most common type of leather, and working with it is a great way to be introduced to leatherwork because you don't have to worry about dyeing and sealing. Just choose a beautiful pre-finished piece of leather and use methods like cutting, gouging, folding, and riveting, to create an amazing project. Once you've been introduced to these skills, you'll be ready to tackle some even more advanced techniques.
This same pattern could easily be made using veg tanned leather if you wanted to tackle some more advanced leatherworking techniques like tooling and dying, but I won't be covering those techniques in this class. To learn more about working with veg tanned leather, you can check out my DIY Millennium Falcon Purse, How to Be an Elf, and Sculpted Leather Tech Cases Instructables.
Step 3: Materials for Your Project
Hardware: one line 20 snap, and 6 small rapid rivets in the finish of your choice
Leather: a piece of stiff 5-7 oz leather at least 12" x 24".A cowhide like this thin latigo (in the 5-7oz thickness) is a good choice.

Step 4: Setting Up a Leather Workstation
Finding a good area to do your leatherwork will really help you have a productive creative experience. Having a dedicated space that you don't have to set-up and clean-up every time is ideal, but not always possible.
What you will definitely need is a sturdy, well lit surface with enough space to fit at least an 18" x 24" cutting mat. Butcher blocks, work benches, sturdy desks and even kitchen countertops all work well, rickety tables will just be frustrating! In a pinch, the floor can work as a base for cutting, punching and pounding... though your downstairs neighbors may not approve ;)
Having a tool box to organize your leather tools is very helpful, and, if you're like me, keeping your hardware in clear plastic divider cases is essential for your sanity. A different compartment for every size and color of rivet!? Yes please!

You will be creating some leather and paper scraps as you go, so it's good to have a garbage can nearby to help keep your space clean, but don't throw away too many of your scraps! Leather is expensive and sometimes small scraps can really come in handy.
Step 5: Some Leather History
Leather has been a part of human culture since pre-history. As a byproduct of hunting, animal hides were most likely the first material used to protect our distant ancestors from the elements as garments, footwear and shelter. Almost any animal hide can be turned into leather, including even the skin of some fish! The most common animals used for leather are usually large mammals, often the herbivores we are already hunting or raising for meat like cows, sheep, deer, or buffalo.
Unfortunately, raw animal hides will just rot or harden if left untreated, so early craftsman had to find a way to keep the hides soft and pliable by treating, or tanning, them with natural chemicals from the environment. Interestingly enough, some of the best compounds for tanning animal hides turned out to be other parts of the animals themselves, such as fat, bone marrow, brain and urine!
Leather was important in both Egyptian and Roman culture where more advanced methods of tanning using oils, minerals, and plant extracts had been discovered. There are paintings in some Egyptian tombs that depict leather manufacturing, and intact pieces of leather have been found buried with the pharaohs. In Rome, tanning was efficient and widespread enough that that even the common people, not just the rich, could afford to buy leather. In fact, a version of the high laced leather sandal worn by Roman senators is still part of our modern fashion repertoire today!

Photo by Daderot (Own work) [CC0], via Wikimedia Commons
In Europe, from the 14th - 18th centuries tanning was a skilled craft controlled by guilds, but working as a tanner was still a brutal, smelly job that required a lot of manual labor. In the late 1700s, tanning began to develop into a more large scale manufacturing operation, but it wasn't until the discovery of the chrome tanning method in 1858 that the industry really changed.

Photo by Anonymous artist - http://www.digibib.tu-bs.de/?docid=00000286, Public Domain
Chrome tanning, which is a mineral tanning method that uses chrome salts as the main tanning agent, reduced tanning time from 8 weeks to a few hours! This radical discovery along with the development of new machinery for processing leather quickly put most small independent tanneries out of business and turned tanning into big time manufacturing.
Old methods of tanning are preserved in places like Morocco where tanners still use things like municipal waste water, lyme, and pigeon dung to tan hides, and extracts from plants like henna, mint, indigo, and poppy to create beautiful bright dyes.

By Bernard Gagnon (Own work) [GFDL (http://www.gnu.org/copyleft/fdl.html)

Donar Reiskoffer [GFDL (http://www.gnu.org/copyleft/fdl.html)
The tradition of of leatherwork in North America is to a large extent tied to the culture of the American West. Leather was a vital material for pioneers, cattle-herders and Native Americans alike, who often lived far from a source of manufactured cloth, but close to an abundant supply of animal hides. The leatherwork of these cultures developed a distinct aesthetic which was often a synthesis of native and colonial artistic traditions.

By Leoboudv - Own work, CC BY-SA 3.0, https://commons.wikimedia.org/w/index.php?curid=9...

By Billy Hathorn - Own work, CC BY-SA 3.0, https://commons.wikimedia.org/w/index.php?curid=1...
Today 80-85% of leather is chrome tanned in large industrialized manufacturing facilities, but there are still smaller tanneries producing veg tanned leather as well.
Leather is used for a wide variety of purposes in the modern world, and has played an important role in the fashion statements of many diverse cultural movements. From bikers and punks, to cowboys and socialites, many demographics can claim leather as an integral part of their sartorial identities.
There is still a thriving community of hobby leatherworkers in America, and more and more contemporary designers and craftsman are experimenting with leatherwork and developing new techniques and aesthetics. Leather also takes very well to laser cutting, which has resulted in a lot of very complex and interesting designs. Researching some of the possibilities will get you even more excited about learning to work with leather! You can also follow me on Pinterest where I am constantly collecting new leather inspiration. And a quick search for handmade leatherwork on Etsy will bring up a myriad of great independent designers.
If you want to delve further into the fascinating world of leather history, this is a good resource:
Why Leather - Edited by Susanna Harris & André J. Veldmeijer
Step 6: Shopping for Leather
As I've already mentioned, we'll be using chrome tanned leather in this class. Before you go leather shopping, it helps to know little more about what distinguishes chrome tanned leather from other types of leather, and how to choose the right kind for any given project.
While you can certainly pick out leather for your projects by look and feel alone, knowing how to ask for what you want with a few specifics makes you a more effective online shopper, and gives you some instant leatherworking cred with leather shop owners... which can make a huge difference, believe me :) I'll give you some basic information about leather types in the next section that will help you navigate the leather shopping experience.
Step 7: Basic Leather Classifications
There are three basic things you need to think about when you are shopping for leather: What kind of leather it is, how thick it is, and how big it is. Understanding how leather is divided into these categories will help you know what to look for.
Leather Types
Chrome Tanned leatherhas already been dyed and finished during manufacturing. It is tanned using chemicals like chromium sulphate which shorten the tanning process and make it possible to create leather with more diverse colors and finishes. Chrome tanned leather does not take additional carving, stamping tooling or dyeing the way veg tanned leather does, and it will not be deformed by water in the same way. Chrome tanned leather is used to create most of the leather products you see, especially garments, handbags and furniture. We will only be working with chrome tanned leather, or pre dyed veg tanned leather, in this class.

Veg Tanned leather has not been dyed or finished in the tanning process and can be tooled, stamped, carved, moulded and dyed. Veg tanned leather is tanned using natural tannins that are found in organic matter, and is usually a light beige or flesh tone, the natural color of the leather (though you can find some veg tanned hides that have been pre-dyed). Veg tanned leather is mostly used for hand leathercraft like leather carving, armor, saddlery, shoemaking and bookbinding, and it usually requires dyeing and sealing to create a finished piece. We won't be using veg tanned leather in this class, but you could easily make the same design using veg tanned leather and some additional finishing techniques.

Rawhide is an animal hide that has been de-haired and cured, but not tanned. Rawhide is a stiff, semi translucent material that needs to be soaked in water in order to become flexible. Once it dries, it becomes rigid and holds its shape. It is used to make drum heads, water containers, moccasin soles and parts of saddles. Rawhide is a very specialized material and we won't be using it in this class.

Leather Weight
The thickness of a leather hide is measured in ounces (oz). 1 oz equals .4mm, or 1/64 inch. Most of the leather we will be dealing with in this class will be between 4-8 oz.
Knowing the weight you are looking for is useful when shopping for leather. There are gauges you can buy that are designed specifically to measure leather weight, but they are unnecessarily expensive. Alternately, you can use calipers or a ruler for a slightly less accurate measurement. I like to refer to a visual guide, especially when shopping online. I've included one here that you can print out:
Attachments
Step 8:
Hide Size and Part
Hides are divided into sections which are sometimes sold individually. A hide is usually divided in one of the following ways. Different parts of a hide can be better for different projects. For example, if you wanted to use the raw shaped edge of the leather for a rustic look, a Belly section would be better than a Bend.

One problem that you will encounter as a hobby leatherworker is that leather, especially chrome tanned leather, is mostly sold by the hide or half hide, which is quite large when you're talking about a cow (other hides, like lamb and pig are a lot smaller). The majority of leather suppliers, like Tandy and Hide House, won't cut smaller pieces. This can make buying leather very expensive, and limit the variety of colors and weights you can use in one project. There are a few ways to work around this:
Find a leather supplier that will cut you smaller pieces of hides. Mercifully, my local leather store, S.H. Frank in San Francisco will happily sell me whatever size piece of leather I need, and I'm sure some others will too. If you find any good local resources for leather in your area, please send me a message and I will add your store to the leather suppliers list!
Work with a friend. If you know other people who want to learn leatherwork, go shopping together, buy a few different hides and split them between you. Or even become your own small-time leather dealer!
Raid scrap bins. A lot of leather stores have bins of remnants that will work for small projects. (Tandy's remnant bins are usually not worth buying from, but Hide House has a pretty good scrap collection).
Use salvaged leather. Thrift store handbags, coats, belts and other accessories can be a great source of chrome tanned leather scraps. Re-use centers like Scrap in San Francisco and Materials for the Arts in New York also sometimes have leather, and home and auto upholsterers may have scraps they are willing to part with.
Check fabric stores. A lot of fabric stores (like Fabric Outlet and Discount Fabric in SF) carry some leather in smaller sizes, though it is often thin garment weight, which we aren't using in this class.
Step 9: Common Types of Chrome Tanned Leather
Since we'll be working with chrome tanned leather and there are so many different kinds, it will be useful for you to know a little more about some of the most common varieties.

Garment Weight leather is thin and supple enough to be sewn into clothing. Usually between 1 oz to 3 oz, and most commonly lamb, goat, pig, deerskin, or cowhide that has been thinned. It is most often sewn with a sewing machine, not worked by hand. We will not be using garment weight leather in this class.

Upholstery leather is mostly used on furniture but is also a good choice for accessories and heavy duty leather clothing. Thicker and more durable than garment weight, but can still be sewn with industrial sewing machines. Usually cowhide between 3 oz and 4 oz. A good choice for the bag project in this class.

Latigo leather is much stiffer than upholstery leather and is usually used for belts, straps harnesses, etc. Latigo is combination tanned, first chrome, and then veg tanned. It is available anywhere from 4-10 oz. A thinner latigo is a good choice for the wallet project in this class.

Suede is leather which has been textured to be soft and "fuzzy" on both sides instead of having a distinct grain and flesh side. Suede is usually garment weight, around 1 to 4 oz, and is mostly used for clothing and footwear.

Embossed or Printed leather has been stamped to create an overall texture effect like an artificial reptile hide. Often finished with a very artificial, almost plastic looking coating, but can also be textured veg tanned leather. Usually fairly stiff for its weight which makes it great for sculptural projects, or for the wallet project in this class.

Metallic leather has been embossed with a metallic foil grain to give it a very shiny, metal-like, appearance. metallic leather comes in all kinds of weights, and can add a very unique look to leather projects.
Step 10: Where to Shop
Now that you know what you're looking for, where do you go? There are many online resources for buying leather and leather tools, and depending on where you live, you may even have a local leather supplier in your area. There are a surprising 108 Tandy Leather stores located across North America, and quite a few local independent stores as well.
Leather
Napa Hide House - Large leather retailer with a great selection of hides sourced entirely from animals that are already being raised for meat or agriculture
The Leather Guy - large selection of both veg tanned and chrome tanned hides as well as hardware
Buffalo Leather Store - Good source for bison and goat leather
S.H. Frank - eccentric and slightly disorganized leather warehouse in San Francisco. Large selction of mostly chrome tanned leather, and they will cut hides to size for you.
Leather Tools
Tandy Leather - a good all around supplier of leather, tools and hardware, dye etc., though their hardware is often limited to a very western aesthetic. They are very knowledgeable about leathercraft, ship quickly and have locations all over the US. If you are committed to leatherworking, investing in their discount membership programs is a good deal.
Weaver Leather Supply - high quality and high price
Springfield Leather - all around collection of hides, tools and hardware
Hardware
Buckle Guy - good online selection of buckles, rivets, grommets, clasps and other hardware
Step 11: Quiz
{
    "id": "quiz-1",
    "question": "What kind of leather are we using in this class?",
    "answers": [
        {
            "title": "Veg Tanned",
            "correct": false
        },
        {
            "title": "Chrome Tanned",
            "correct": true
        }
    ],
    "correctNotice": "Yes!",
    "incorrectNotice": "Nope. Try Again"
}
{
    "id": "quiz-2",
    "question": "What percentage of leather produced today is chrome tanned?",
    "answers": [
        {
            "title": "15%",
            "correct": false
        },
 {
            "title": "55%",
            "correct": false
        },
        {
            "title": "85%",
            "correct": true
        }
    ],
    "correctNotice": "Yes!",
    "incorrectNotice": "Sorry. Try Again"
}
{
    "id": "quiz-3",
    "question": "True or False: Only mammals have skin that can be turned into leather.",
    "answers": [
        {
            "title": "True",
            "correct": false
        },
 {
            "title": "False",
            "correct": true
        }

    ],
    "correctNotice": "Yes! Almost any animal hide can be turned into leather including the skin of many reptiles, amphibians and fish!",
    "incorrectNotice": "Nope, guess again."
}
Step 12: Let's Get to Work!
Now that you have some basic information about tools and types of leather, go ahead and buy everything you need so we can get started learning how to cut leather and working on our project, making a leather wallet!


