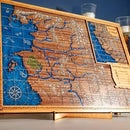
Introduction: Legend of Zelda - Breath of the Wild Shadow Box
As a huge fan of Breath of the Wild and really anything Legend of Zelda, I decided to make a layered shadow box out of Maple and Acrylic. As I had just purchased a laser cutter, this seemed like the perfect time to try this project.
Step 1: Find a Reference Photo
I picked the first image because of its very clear and distinct levels of separation. I could see right away how I could use these levels within a shadow box and how I could incorporate a top acrylic layer to keep it all contained.
Step 2: Create Layers
I brought the image into Gimp (photo editing software) and isolated each layer. I did not care what the layers themselves were colored I just wanted to see how each layer would be set up.
Step 3: Load the Layers and Organize to Be Cut on the Laser Cutter
This step is a little specific to people that own a laser cutter (or have access to one). I own a Glowforge personally so I move all my work from Gimp to Inkscape(Adobe Illustrator free alternative) for final processing and organization. You could use the same files as a template to be used as an x-acto knife. Once this was processed and saved, I sent the cut files through to my Laser cutter and it went to work.
Step 4: Painting
I knew I wanted the sky in the background to be white and the front to be black so I progressively had each layer get lighter until we got to the white sky. I colored the engrave applied to the acrylic layer with blue paint to highlight the top layer.
Step 5: Assembly
After allowing ample time to dry, I started the assembly process. All layers were attached together using small amounts of super glue. I stared with the back layer which was painted white then glue up each mountain later until the top black Zelda/Link cut out layer was added. I put in a small piece of scrap wood at the top behind the black later for support since there was nothing keeping Zelda's head from falling back. I did not attach the acrylic piece yet. I set it on top to ensure it fit properly and looked correct.
Step 6: Framing
With leftover maple pieces I created a frame custom fit to the size of the piece. This frame was thick enough to account for the thickness of the entire piece including the acrylic top that has not been glued in place. I assembled the frame around the finished project, dropped the acrylic top in place then glued the thin top frame boarder on top of the acrylic sheet to hold it in place.
Step 7: Put It on a Shelf and Look at It Forever
Pretty self-explanatory step and makes quite a statement in our living room. I'm very happy with how it turned out and it just makes me love the game and the Legend of Zelda Universe even more.

Participated in the
Fandom Contest


