Introduction: Look at Me Light Switch
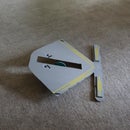
Look at this little character (if you are within six feet) and his red light "topper" will come on. Continue to stare for three seconds and the eyeball will spin around to face you. Continue to stare for three more seconds and the controlled lights will change state (on if currently off--off if currently on). For the next five seconds, you will be ignored. Repeat if desired.
The "Person Sensor" (tiny camera and microcontroller--less than ten dollars) lets an Arduino know that someone is out there (and where they are within the field of view).
Supplies
Qwiic cable for person sensor
Arduino Uno
USB power supply
(2) 5 volt relays
3d printed parts
Breadboard
Wire wrap wire
3mm screws and nuts
Red led
220 ohm resistor
Google eye
Poster putty
Solder
Wire (misc.)
Heat shrink tubing
Attachments
Step 1: Schematic and Code
This is the schematic and Arduino code for this project. Please note that "person_sensor.h" must be in the same folder as "look_at_me0301.ino"
Step 2:
Attach wire wrap wire to the led. Protect one lead of the led with heat shrink tubing (or electrical tape). Insert the led legs into the little "cap."
Step 3:
Connect the person sensor using the Qwiic cable. The cable comes out the top of the sensor.
Step 4:
Drill a hole in the front of the body.
Step 5:
Insert the cable through the body hole. Place the sensor inside the sensor holder, then attach the holder to the body by melting with a soldering iron (temperature about 390 degrees F).
Step 6:
Attach the servo motor to the servo motor mounts. Attach the mounts to the body by melting (use soldering iron).
Step 7:
Attach "google eye" to printed eyeball using poster putty. Insert led wires through top of eyeball through center. Attach servo horn to printed eyeball.
Step 8:
Secure servo horn to servo with screw. Push led cap and wire into top of eyeball assembly.
Step 9:
Open remote control transmitter and remove two phillips screws.
Step 10:
Solder wire wrap wire to "on" and "off" switch positions.
Step 11:
Finish wiring according to the schematic and place components in the electronic holder.
Step 12:
This is not a "clap on, clap off" switch from years past; this is a "look on, look off" switch for the present age.


