Introduction: Magnetic Speed Control of Trains


For "Santa's Shop," an animated Christmas display window (https://www.instructables.com/id/The-Story-Santas-Shop-2016/) getting multiple trains to start and run (not too slow and not too fast) is complicated by the fact that everything must start, run and stop at night (controlled only by a master on/off timer switch). The business (not mine) allows use of their window, but I can only access it during business hours--and not make too much noise or disturbance then.
Using two hall effect sensors (and a magnet on the train), an Arduino can sense speed and adjust the voltage up or down to stay in a desirable range. If the train is "stuck" (dirty track, rollers--train needs oil), the Arduino can sense this (no sensor activity for 15 seconds) and give a full voltage start up jolt for one second, while gradually increasing the base voltage to get it running until I can get in to service the system.
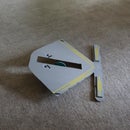
I used a 3d printer to create the brackets that hold the hall effect sensors.


Supplies
PARTS:
Arduino Uno
USB power supply and cable
Breadboard
Wire
Heat shrink tubing
Solder
Magnet
Wood screws
Four 3mm screws (6 mm long)
Step 1:


I secured the hall effect sensors using 3mm screws (6 mm long).
Step 2:

I spliced extra wire to the sensors so that they would reach the Arduino (which is ultimately one layer down beneath the trains).
Step 3:

The sensor bracket is fastened to the wood base using wood screws.
Step 4:

The sensors are placed nine inches apart.
Step 5:

The hall effect sensor will only react to one pole of the magnet--if the magnet is turned the wrong way, it will never be detected.
Step 6:


With the magnet I am using, the sensor will detect proximity within about 3/4 inch or less. Results will vary depending on the strength of the magnet.
Step 7:


Wire the assembly according to this schematic.
Step 8:


Although it seems like a simple enough task to "get the train rolling and maintain speed," I had to consider that the train (on startup and during running) could be anywhere and moving or not moving. At any time, the train could change speed or stop moving.
The train engines (about 95 years old) are colorful and fun to watch, but their performance is not entirely predictable--this system should keep them running with a decent level of reliability.
Attachments


Runner Up in the
Magnets Challenge


