Introduction: Make an LED Kite Out of Recycled Parts!


Hey there, I hope everyone is safe and healthy during this pandemic. Well, staying at home I realized I had some old and unused electronic circuits and faulty mobile adapters. Being an electronic enthusiast and an avid kite flying fan I wondered, wouldn't it be great to combine both of these interests. So I came up with this LED kite which can obviously fly like as it is supposed to and brighten up the sky. You can fly it in the evening or at nigh and enjoy the unique view!
As a matter of fact, what makes this build special is that it is made out of completely recycled parts! The overall build would have costed around a dollar or even less. I hope you enjoy this special and fun project.
Let's get building!
Step 1: Gathering the LEDs


The most important component of this build is the LEDs of course, and more importantly they should be small and as light as possible(we don't want to add unnecessary weight to the build). I had this old LED lampshade which no longer works and upon opening it I found lots of SMD LEDs, perfect!
So I went ahead and desoldered 3-4 of them while making sure they don't get damaged while I take them out.
Step 2: Selection of Connecting Wire...


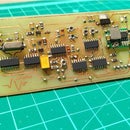
Well, to keep the build as light as possible, it is best to use insulated copper wires that can be easily salvaged from old mobile chargers . I had a faulty mobile charger and an LED driver that contained such pulse transformer and inside it was the thin insulated copper wire we need. This copper wire is quite enough to supply the necessary current to the LEDs. I desoldered one of the capacitor and removed the core and took out the insulated wire.
Step 3: Soldering Wire on to the LED


It was now time to solder the copper wire on to the LED terminals, using some sandpaper, I scratched off the protective enamel layer of the wire and soldered two wires to each terminal of the LED
Step 4: Testing the LED

After I soldered one LED with the copper wire, I got this 3.7V 18650 Li-Ion cell to test the LED, You can use any other 3volt to 3.3volt supply to test this out. As you can see, it works great!
Step 5: Selecting the Battery....


The battery will be mounted on the kite and will directly power the LEDs without any long wire hanging along with the kite, which obviously is not a practical approach. So I got this small 60 mAH Li-Ion battery from an old Bluetooth headset. This battery is super light and barely adds any considerable weight to the build and is perfect for out application. Alternative sources to power these LEDs can be small button cells in series or even a CR2302 3V coin battery.
The reason I went for the Li-Ion battery is that I wanted this project to be rechargeable, keeping in mind the plug and play style of approach. I made it in such a way that I can easily plug in a charging mechanism and charge it fully and then plug in the LED connections to light the kite up..More on the charging module later ...
Step 6: Making a Total of 3 LEDs


I made a total of 3 such LEDs with copper wires soldered to connect it to the top, left and right corners respectively. All the three LEDs are connected in parallel such that they can be powered with a 3.7V battery. I tested them with the small Li-Ion cell as well and it works like a charm!
Step 7: Getting Yourself a Kite


Being a kite lover and an avid kite flying fan, I had a few kites at my home to which I tied the necessary knots and it was now ready to fix the LED and battery.
Step 8: Fixing the LEDs


I used tape to fix the LEDs in the respective corners and connected them up in a parallel connection. I fixed male and female header to the battery and LED connectors so that it can be easily plugged and unplugged without any hassle, Using such connectors can also provide easy connection to plug in the charger
Step 9: The Battery Charging Feature


To charge the Lithium Ion cell I used a TP-4056 module, which efficiently chargers the cell with the necessary charging algorithms and protection for the battery, as you can see the male and female header provide and easy connection to switch between charging and LED modes for the battery. Since the capacity is small it takes about 10 minutes to charge the entire cell and can easily give me 15-20 mins of on time with 3 LEDs.
Step 10: The Final Product


I made myself two of these kites and they look amazing! It was now time to test these out in the evening or at night. Make sure that you have a good steady flow of breeze so as to assist the kite maintain altitude and you have good control over it.
I hope you like this build, don't forget to check out the video in the next step and do look out for the test flight and while you are there, consider subscribing to my channel which will motivate me to share more such content with the community. Do share your feedback and comments and feel free to ask any doubts you might have :)


