Introduction: Mason Jar Night Lamp


During the Covid pandemic, being a student, we didn't have any other choice but to stay indoor throughout the year and have our classes online. Having so much more free time than I usually have when school goes on, I thought of being creative. The first thought which strikes me each and every time while being creative is to open Instructables and go through the current contests and the recommended projects. So this time, I thought it was high time that I get innovative and make something that could help others.
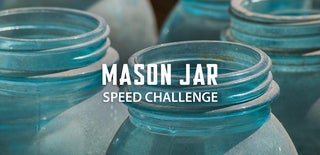
Having tons of items at home, and one of them being a mason jar, I thought, why not participate in the mason jar contest? So here I am, happy to take you guys through my journey while making this DIY mason jar night lamp.
Hope you guys enjoy throughout the process of making this simple yet charming project and if you guys enjoyed it, please feel free to drop a vote for the mason jar speed challenge.
Thank you :-)
Step 1: Gathering All the Materials


To begin with, you need to gather all these materials to make this night lamp. There is nothing fancy required to make it, most of these supplies will be found at home.
Here is the list of items:
- Mason jar
- Electrical wire for connecting to the power socket
- Bulb holder
- Bulb
- Acrylic paints and paintbrush
- White paper and tape
Step 2: Designing the Jar


As a theme, I chose Halloween as it's round the corner but you can draw anything you feel like. With the help of a permanent marker, doodle or make your own design all around the jar. In my case, I tried filling up every part of the jar with some spooky drawings. Yes I know, they aren't terrifying at all, in fact it's the other way round.
Step 3: Coating the Inside With Paper


You will require white paper now. If it's a jar my size, then one A4 sheet will do. Cut it according to the jar's height. The reason behind putting this coat of white paper inside the jar is to prevent the direct glare the bulb and to keep the paintings visible to our eyes while the bulb is switched on.
Step 4: Putting Colours to the Project's Dull Life


Once the paper is put inside, use acrylic paints to colour your design in order to make the whole project more colourful and attractive.
After painting, leave it for drying for at least four hours before proceeding to the next step.
Step 5: Fixing the Bulb to the Mason Jar


Once the paint is dry, take the wire through the jar's hole. Once it's in, connect the bulb holder to the wire. For keeping the bulb holder in one place, you can put a knot over the jar's lid for preventing the holder to slide. Finally attach the bulb to the holder and close the jar's lid.
Step 6: Time to Go to Bed


You're done! Now all you need to do is wait for the night to creep in. Once it's dark, plug in and turn on your DIY Mason Jar Night Lamp and see it come alive.
If you had fun making this project or at least going through the steps, please do me a favour by dropping a vote in the mason jar speed challenge.
Happy Making!
Participated in the
Mason Jar Speed Challenge


