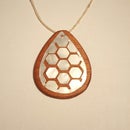
Introduction: Metal Cast Fidget Spinner With Voronoi Pattern
In this Instructable I will be showing you how to design a fidget spinner in Fusion 360 using a Voronoi addin, 3D print the model, and then cast it in metal. There are quite a few steps involved in creating this project, and I had to reach out into all disciplines in order to complete this spinner. I used Cad Modeling, 3D printing, clay working, and metal casting in order to complete this project.
Tools & Materials:
• Fusion 360 w/ Voronoi Addin
• 3D Printer
• Ceramic Clay
• Low Temperature Casting Alloy
Step 1: Designing Base Plane
To design the spinner I used Autodesk’s Fusion 360 and a Voronoi Addin. The first step was to start by creating a sketch, than making two concentric circles. The small circle should be the outer diameter of your bearing, and the largest circle will be dependent on your design. After than, make an equilateral triangle that is restricted within your largest circle. I was making a three-sided spinner, so that is how I divided up my design into three even parts. I made the triangle equilateral by setting up constraints making the three sides congruent. Constraints in Fusion 360 can be used in a whole assortment of different applications, and I will be using them quite often in the coming instructions.
Once I had by base sketch finished, I then added three rectangles off of the sides of the triangle, and then added a trapezoids on top of those to reach my desired look. I was able to get these geometries ‘regular’ (equilateral and equiangular) again by using constraints, I carefully tweaked the design until I reached proper proportions and dimensions for the design I was aiming for, and from there I had finished the basic outline.
From this stage you will have to what you want your final project to be. I wanted my final product to be cast metal Voronoi pattern, so from there I moved onto the next step of adding in the Voronoi pattern.
Step 2: Voronoi Extension
In this step I will be explaining how you can apply a custom geometric pattern using a Voronoi Addin for Fusion 360. I first had to decide the parameters of the Voronoi generator, and since I wanted a large selection of shapes I chose a 15 x 15 cm square with 100 rounded shapes. I first made sure that the generated Voronoi sketch was on the same axis as my spinner sketch, and then I started dragging shapes from the generated sketch onto my model. I had spent hours adjusting every single shape in order to make sure it was the right size and that it fit into a visually appealing pattern. I also had to make sure that the designs all had the same number of equally sized holes in order to take balance into effect. Using such an irregular Voronoi pattern will lead to a slightly unbalanced fidget spinner, so I then used an awesome feature included in Fusion 360, which is the Center of Mass selection. Simply use this tools and select your spinner model, and it will give the center of mass of your spinner. If the center of mass is too far off, you can go back into your sketch and start tweaking the shapes until you can balance out the model.
Step 3: Extruding 3D Model
The next step in Fusion 360 is to extrude your plane into a three dimensional model to print. I extruded the sketch slightly larger than the width of my bearing, which came to 5.5 millimeters thick. I found during my test models that this is a good thickness to spin and handle. I next filleted the edges of the exterior of the model and the Voronoi pattern in order to make the model more ergonomic and easier to hold and fidget with.
Step 4: 3D Printing
I then used the 3D Print function in Fusion 360 to convert my file into an .stl file. I imported the file into Cura, a slicer program, and used my Reach 3D Printer to print a fidget spinner out of PLA. I printed it in 0.6mm layer height, with 35 percent infill.
You can stop here if you would like, and it would still be an awesome fidget spinner, however I wanted to take it an extra step farther and cast it in metal. Keep in mind that if you are going to follow my instructions to make the mold, you will want to scale up the size of the spinner to account for shrinkage of the clay mold when it is fired and also to account for the shrinkage of the cast metal when it cools (won’t occur to all metals, so it depends on what you are using).
Step 5: Making Clay Mold
I will be using an inexpensive fired clay mold to use as a mold for the molten metal, and it can be used multiple times depending on the complexity and detail of the part. To create the mold I first took high temperature porcelain clay and carefully pressed my fidget spinner into it, making sure to make an even and smooth mold without trapping air bubbles or any imperfections. I then removed my fidget spinner and allowed the clay to dry completely. Once it had dried, I then put the mold in the kiln to bisque the clay, which essentially turns the clay back into stone. After I fired it and removed it from the kiln, I then had a mold ready for casting. This is an incredibly cost effective way of making mold provided you have the setup because for a piece this size you shouldn’t even need a full pound of clay. Depending on the type of clay you are using each mold could be anywhere from 25 to 50 cents. I would recommend that if this is the first time you have to make a mold in this manner to make multiples in case your first cast fails or you break a mold. In reality, it is always good practice to make multiple molds just as insurance in case any accidents during firing or casting, especially since the molds are so inexpensive.
Step 6: Casting Metal
Use a low temp casting alloy- I am using 60/40 plumbing solder for my casting. Depending on the metal you are using there will obviously be many different setups, but for me I used a soldering iron and a propane torch. I melted the soldering wire directly into the mold, but you can also lay in wire and toss it in the oven or bbq provided it can reach a sufficient temp. If you didn’t use the Center of Mass tool to balance the spinner, or if there were slight imperfections during casting, odds are that the fidget spinner will be off balance due to the irregular pattern, and there are a few relatively easy ways to deal with that.
To balance it, you first need to find out which side is heavier. To do so, insert your bearing, then put a rod loosely through the center of the bearing. You will then need to balance the rod horizontally, and allow gravity and the weight of the spinner to spin until the heaviest side is the one closest to the ground. Use a small drill bit to drill out some material from the inside of the bearing hole (anywhere underneath the finger caps so it won’t be seen and you can preserve the aesthetic). Keep repeating this process until the spinner doesn’t react to the test anymore. Another option is to slowly file or sand down the outside of the spinner instead of drilling out from the inside. You would balance the spinner the same way, however you would just be removing material in a different manner.
My first attempt I had used a soldering iron, which honestly didn’t even make it out of the mold. The uneven heating of the metal caused weak spots in the casting, which caused it to break. Another alternative would be using a larger heat source such as a propane torch, which can melt metal across the entire mold, resulting in a better cast. Please only use a blow torch if you are absolutely certain what you are doing. Inducing such a large thermal shock into a clay mold could be detrimental, and if there is any water trapped inside the clay might even explode. Regardless of what method you use, make sure to always use proper safety equipment, use your best judgement, and get adult supervision if needed. Being safe is way more important than a weekend project being successful!
Step 7: Final Thoughts
Overall I am thrilled with the way this spinner turned out, and the cast metal gives it a really good weight! By using Fusion 360, I was able to model it perfectly, and I also had a phenomenal metal cast which also kept it balanced. I love the metal and the Voronoi pattern, and I am thrilled with the way it turned out since it was my first time ever designing a 3D model for my new printer!
Thank you!
Brandon

Participated in the
Design Now: In Motion Contest

Participated in the
Untouchable Challenge


