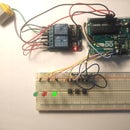
Introduction: Most Simplest Toggle Switch With Arduino
Simple! I hope you like it! Enjoy to fool around!
Nothing more to say than in the commenting code...
Step 1: The Code
/*********************
Simple toggle switch
Created by: P.Agiakatsikas
*********************/
int button = 8;
int led = 13;
int status = false;
void setup(){
pinMode(led, OUTPUT);
pinMode(button, INPUT_PULLUP); // set the internal pull up resistor, unpressed button is HIGH
}
void loop(){
//a) if the button is not pressed the false status is reversed by !status and the LED turns on
//b) if the button is pressed the true status is reveresed by !status and the LED turns off
if (digitalRead(button) == true) {
status = !status;
digitalWrite(led, status);
} while(digitalRead(button) == true);
delay(50); // keeps a small delay
}
Step 2: Another Revised Code Edition With Notes
/*********************
Simple toggle switch
Created by: P.Agiakatsikas
*********************/
int button = 8;
int led = 13;
int status = LOW;
void setup(){
pinMode(led, OUTPUT);
pinMode(button, INPUT_PULLUP); // setting the internal Pull up resistor of the button, that is HIGH
}
void loop(){
// Initially the button is unpressed and is HIGH (pull up) and is not equal to LOW therefore
// the inversion will be bypassed and the LED status will be LOW
//If the button is pressed its status will become LOW that means (a) status = (b) status
// Therefore status=!status will inverse and the LED will Light (HIGH)
if (digitalRead(button) == LOW) { /
status = !status;
digitalWrite(led, status);
} while(digitalRead(button) == LOW);
delay(50); // keep a small delay
}


