Introduction: PUBG Theme Song+Animation With Arduino!


Hello there and welcome to this fun instructable! I hope all of you are well and staying healthy. This small but amazing project is about playing the PUBG theme song and even creating some game animations using arduino.
The components used are very easily available and very easy to assemble on a piece of breadboard. I will be sharing the entire building and coding process in this instructable, stick around till the end!
I would highly suggest you watch the video to get an idea of the project :) If you like it then like and share the video. Consider subscribing to my channel if you enjoy my build.Thanks!
So, without any further delay, let's get started!
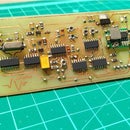
Step 1: Gathering All the Parts..


The build mainly consists of an Arduino Nano which is the main core for this project. You can use any other Arduino variants like the popular Arduino Uno, Arduino Pro Mini, Arduino Mega etc. To display the animations and the images, I decided to go with a 0.96 inch OLED display with a resolution of 128 by 64 pixels. This display can be interfaces with the arduino with the I2C protocol that requires just two wires for data and clock,thus reducing the number of connections and making the project more compact. For playing the PUBG theme melody I used a 5V buzzer of which I connected the positive pin with digital pin 6 of arduino and ground goes to ground of Arduino.
These are the list of parts needed for the project :
- Arduino Nano (or any other arduino board of your choice)
- 0.96 Inch OLED display module
- 5V buzzer
- Jumper wires
- Breadboard
- Arduino programming cable
Step 2: Connecting Up the OLED Display


A total of 4 connections are needed for the OLED display to be connected from arduino:
Vcc --> 5V of Arduino
Gnd --> Gnd of Arduino
SDA --> A4 of Arduino
SCK --> A5 of Arduino
Pins A4 and A5 of the arduino serves multiple purpose of analog inputs as well as pins for I2C communication. Here we have utilized the pins for the I2C protocol for interfacing with the display module.
The link to the Adafruit library used in this project : https://github.com/adafruit/Adafruit_SSD1306
Step 3: Connecting the Buzzer


The 5V buzzer has a positive and negative supply terminal.
Positive pin--> D6 of Arduino(digital pin 6)(you can use any digital pin of the arduino)
Negative pin--> Gnd of Arduino
We are going to create the desired tone on digital pin D6 to which the buzzer will play the melody.
Step 4: All Hardware Connections Complete..


All the necessary connections of OLED display and the buzzer are complete. Now let's go ahead to understand the programming aspect of the project..
Step 5: Including the Library and Initializing Display Protocols

The entire program has been segregated into 3 components:
- The main program consisting the initialization and the sequences of image display and melody
- "pitches.h" file consisting of the list of musical notes and the associated frequency
- "pictures.h" file consisting of bitmaps of the images to be displayed.
The process of how to convert an image into a bitmap array for OLED display is discussed in the upcoming steps.
I will also attach the entire code along with this instructable for you to use:)
Step 6: The Theme Song Melody..


I looked up on the internet for the basic notes that comprises the PUBG theme song and then added them to the melody array.
By spending a considerable amount of time playing and replaying the melody sequence, I then created the time duration array that is concerned with how long each note needs to be played. The combination of the melody array and the duration array comprises the complete information to play the song.
Step 7: Playing the Song During Startup..

There are a total of 63 notes that I used to make up the melody sequence.Using a for loop and iterating through the notes and duration array with a predetermined pause between each note, the entire sequence is played once, since this piece of code lies in the void setup(). Interestingly, none of the code for this project utilizes the void loop() of the arduino code as I intend to play and display images only once. Of course if you want a repeating sequence then that has to be put in the void loop() function.
Step 8: Converting the Images to Bitmaps..

Now, the interesting part of the project is the process to convert an image to a bitmap array for the OLED display according to it's pixel density. For this I found the prefect online tool that allows us to generate the custom bitmaps.
The link for this online application is : https://diyusthad.com/image2cpp
Thanks to the amazing creators of this application, this makes my work much easier.
Upon going to the link you first have to upload the image you want to create the bitmap of. One thing to note here is you should try to select images that do not have a lot of color contrast in it, try sticking to images with a few solid colors,without any gradients to get better results
Step 9: Adjusting the Resolution According to Your Display

In the next step, we have to resize the image according to out display resolution. For our OLED display, it is 28 pixels wide and 64 pixels in height, which I have adjusted as shown in the image. Adjust the brightness threshold to make sure the image is considerably clear (this is where the advantage of using images with solid colors comes into play, the more the color gradients, the image quality in monochrome display will degrade as it messes up with the brightness threshold).
Next step is to fit the image on the screen keeping the proportions intact and adjusting for symmetry for which the options are already there. You can explore these options to get the desired image output. For reference you also get the amazing preview option!
Step 10: Generating the Bitmap Array..

After adjusting the image parameters, in the next step just select Arduino code as output format and click generate to get the desired bitmap array!
There! you have successfully converted your image to desired bitmap array. I have done this process for a total of 7 images and saved them.
Step 11: Displaying the Images As Sequence


For displaying the images I have used the Arduino millis() function to call the draw() function which is basically a set of commands to clear the display,plot the bitmap array to the OLED and initialize the display. The main logic being that after every 3.5 seconds, the image is changed and the next image is displayed. Well, 3.5 seconds is not a unique number, I just figured out that if I divide the entire melody duration by 7 images I got roughly 3.5 seconds for each display. You can add more images to this and reduce the display time for each image if you wish.
The code snippets explain how the functions are called based upon millis() function.
The entire bitmap arrays of the images are stored in the "pictures.h" file
Step 12: The Entire Code:
Here I am sharing the entire code for all of you to play around and experiment with!
Once everything seems fine it's time to upload it to the board :)
Attachments

Step 13: The Results:


As you can see the images turned out to be great! And so did the melody! I hope you have watched the video in which the entire demonstration is present.
I hope this Arduino's version of PUBG is an exciting project for all the game and electronic enthusiasts out there.
Please feel free to share your feedback in the comments and share any suggestions.Also, consider subscribing t my channel for more such content as this is a part of the OLED series I am working on. Do let me know if you build this fun project :)
Until next time.

Participated in the
Arduino Contest 2020


