Introduction: Personalised Homemade Exploding Head Christmas Crackers
Shop-bought crackers are so boring...
Everyone wants a bigger bang for their Christmas day cracker, don't they?
Well, shop-bought crackers at the Christmas table are all very well, but they have several problems as identified by end-users (my family):
- they have naff presents (and paper hats that split when jammed on my big head)
- no-one gets the present they want
- the jokes are rubbish
- the bangs aren't that impressive
[update - I understand that no-one in America knows what a Christmas Cracker is. they look like this and EVERYONE has them on the table for Christmas dinner in the UK

See Christmas crackers on Wikipedia]
To make them better, I having been custom making crackers for the family every year since the kids were about 6 or 7 and have dealt with the first three issues over the years by making the crackers bigger and filling them with stuff I know the people getting the cracker should like (mostly!).
This year, I decided to go for it and make the cracker experience something no-one would forget in a hurry.
Firstly I upgraded to a roomier gift box design to allow more stuff to get packed in them - this allowed a good range of sizes of presents (all personalised to the recipient). The biggest difference is that each cracker was topped with a caricature puppet of the family member it was intended for and the bangs were SUBSTANTIALLY upgraded by incorporating an explosive charge to blow off the puppet's head. As a party piece, this was successful beyond my wildest dreams - they were spectacular and went down well.
This Instructable shows how they were made...
First a demo - now this is how a cracker should work...
DISCLAIMER -
THIS INSTRUCTABLE CONTAINS CUSTOM EXPLOSIVES
DO NOT MESS ABOUT WITH THESE UNLESS
YOU ARE HAPPY TO RISK PERSONAL INJURY TRYING
:)
Step 1: Why Bother Designing Special Crackers?
They are UNIQUE to your dinner guests, contain MORE STUFF and have EXPLOSIONS!
Says it all really. The thinking behind them was thus simply to make dinner even more memorable and fun in an absurd sort of way...
The crackers final design was really more of a cross between three Christmas favourites
- a Christmas stocking - they are essentially a random container to contain several surprise gifts
- a Christmas cracker - they were still nonetheless destined for the dinner table and needed traditional hat, jokes and a bang (a BIG bang)
- a Jack-in-the-box - the suspense of a lighted fuse and the sudden explosion to decapitate them was inspired by the traditional wind up surprise toy
Having a decent sized box meant many things could be included, such as proper hats, headphones, candles, books, stupid oversize glasses, facepacks etc as well as jokes, balloons and party poppers etc.
Incidentally, as I had been good all year, Santa brought me a Rothenberger Superfire 2, the best blowtorch on the market - thanks Santa. You don't get those in shop-bought crackers!

Previous versions of our annual home-made Christmas crakers...
For many years I had been making traditional crackers by hand but they were pretty much just hand made versions of the traditional design. For those, I just made them bigger to get more stuff in them and added cracker snaps myself (although usually more than one to up the bang).
About 4 years ago I upgraded by making these much more fun cartoon TNT sticks, which greatly increased the amount of goodies that could be fitted in (much appreciated!)

They also had a bigger bang due to using four or five cracker snaps per cracker. You can just about make out how that worked. The base of the TNT stick has 2-3 snaps attached at one end in two places exactly opposite each other on the sides. The top ends of all of the snaps are attached to the lid to form the "fuse".
Pulling the fuse exploded all the snaps and removed the lid in one hit!

That's OK, but can we make them bigger, better and more spectacular?!
Of course we can!
After 4 years of faithful service, this year I decided to retire the TNT and go large by upgrading the Christmas dinner experience by creating personalised crackers with explosively removed heads. The rest of the Instructable shows how.
Step 2: Tools and Materials Used
This build used quite simple tools and materials. The design, build and finish was intended to be rough and ready. They will only be used once.
The only indulgent materials were a few rolls of sticky-backed plastic film and a 100 shot missile barrage firework to obtain the gunpowder and a decent length of fuse cord.
Materials
Puppets
- sketchpad and pens for designing the caricatures of my family
- builder's insulation mineral foam for the head shapes. This is the fireproof crunchy stuff used to line walls. Originally from a skip, but I always have this lying about for ad-hoc sculpting.
- papier mache made from baking paper (also known as greaseproof paper or baking parchment) and diluted decorators PVA glue
- Fine tipped permanent marker pens for drawing on face features, hair etc on he puppet heads
- Promarker artists felt tip pens for colouring the puppets skins tones, hair etc
- varnish to seal the completed heads
- gold, silver and black gaffer tape for making puppet clothes
- cardboard for making puppet bodies and the internal cannons
- masking tape for knocking together the puppet body components prior to papier mache-ing
- contact adhesive for sticking cardboard together when masking tape isn't enough
- jam jar lids screwed to corks attached to the heads so they could be fired from the cannons
- cocktail sticks for holding wet papier mache in place in concave forms while drying
Boxes and lids
- cardboard from shoe and tool boxes, recut to make more useful tall square shapes
- contact adhesive to glue the cardboard together strongly
- gaffer tape to strengthen joints, corners and edges as necessary
- self-adhesive vinyl (sticky-backed plastic for covering the boxes in a high gloss finish quickly
- black electricians insulation tape for applying edge trims over the vinyl sheet
Munitions
- cardboard for making the internal cannons
- corks for making the cannon end plugs
- masking tape to hold the cannon together (it is very strong when wrapped in layers)
- gunpowder reclaimed from a barrage firework
- gunpowder infused fuse cord also from a barrage firework. These are great as the fuse is one long cord that zig zags through the individual barrage rocket barrels. With care, you can get a good long piece out
- cork plugs as attached to the heads as described above (using jam jar lids and masking tape/papier mache)
Tools
This Instructable didn't need any very specialist tools. The marker pens I use are artists quality, but any old felt tip markers would do. Similarly, the modelling tools are good, but you can do this with a spoon and your fingers just almost as well.
- Fine tipped permanent marker pens for drawing
- Promarker artists transparent-colour permanent marker pens for colouration
- scissors for cutting cardboard etc
- stainless steel modelling tools for applying papier mache
- Stanley knife for cutting cardboard
- power drill and bits for drilling holes in jam jar lids
- power driver for driving screws
- vice for holding work
- self-locking grips (Mole grips) for holding parts
- finishing hammer for beating cardboard, prior to hand rolling
- kitchen knives (ham carver and bread knife) for carving the builders foam
Step 3: Making the Basic Caricature Heads in Papier Mache
Blowing off your actual own head is funnier
Family and homemade entertainment is what Christmas dinner is all about, so what better than to have crackers that not only have generous amounts of personalised gifts inside, but are contained in a bespoke gift box with a lid that has a caricature puppet of the recipients too which has a mini cannon inside that allows your table guests to blow their own head off and thus to watch their own heads literally explode with excitement - wowzers!
Here's how I made the basic 3D heads before turning them into projectiles to be blown off later.
As always, start by drawing

The heads were created by drawing some super rough sketched caricatures of each of the family. I did these from memory, but you can also start with photos and mess about exaggerating the features as you draw from the photo
Then carve them out in rough

I then reproduced the drawn heads in 3D by carving them in builders insulation foam which is light and easy to carve. You can find lumps of this thrown away in skips all the time. Expanded polystyrene block is OK too. I prefer this foam because I don't like the white balls that you get with polystyrene.
Then good 'old papier mache

The laminated papier mache was pretty crudely applied using everyday kitchen baking paper and PVA.

HANDY TIP! - Baking paper (also called greaseproof paper or baking parchment) is really cheap and extremely strong when wet. It is also really good substitute for craft wet-strength tissue for things like lantern making.
I used three coats of this. I use small pieces on the facial details. These crease less and so are just easier to get fine detail with. On the larger less noticeable areas like the hair, I used bigger bits. These can be much longer for speedier building up of the layers, though it is best to keep them narrow, to avoid creases.
Drying with fan heaters

To speed things up, I put the papier mache heads over a fan heater and gave them a turn occasionally.
TOP TIP! - Drying is more effective and efficient if you enclose the papier mache in some sort of bounding box so the heat surrounds it and accelerates the drying.

Step 4: A Basic Cardboard Cannon Propulsion Mechanism
Think like a pirate
The munitions needed to blow the puppet heads off was a simple cannon. This is exactly the same basic concept as a ship's cannon - a cylindrical barrel, closed at one end and open at the other, with a projectile that fits snugly into the barrel and behind which is an explosive charge that can be detonated using a simple fire fuse that is inserted through a small hole into the explosives.
Here is a test detonation of the puppet head of my daughter.
This was the moment I knew this was going to be something special!
The most suitable shells that I could find turned out to be wine bottle corks. I have loads of these from wine making. They are soft so comparatively safe to fire about without maiming people if hit by a ricochet (minimising maiming is always a good idea!)
The slight elastic quality of cork also allowed them to be inserted into the barrel tightly without needing precision-engineering the barrels They were also convenient because they are of a consistent shape and I had plenty of them.
Here is a finished cannon, one of which was fitted into the body of each puppet. The exploded view shows two corks. The left hand one is the projectile that gets fired. The right hand one is a plug, that was was sealed into the rolled cardboard tube to form the cannon.
The cannon is sealed tight with plenty of masking tape. This is quick and very effective. The cannon was made by simply rolling cardboard round the corks with the projectile in place at one end to get the right size and the plug at the other.
The projectile was included to get the shape just right. It was obviously not sealed in with tape and was removed afterwards.
A fuse entry hole was punched into the barrel, just above the plug using a pointed modelling tool.

TOP TIP! - Cardboard tends not to roll smoothly into a barrel when it is this small, so you can smooth it out using a hammer. This makes it easy to roll evenly.
This is a finishing hammer that I recently restored.
That is a separate story - see this post on my Making Weird Stuff blog:
makingweirdstuff.blogspot.co.uk/2016/11/reviving-long-lost-hammer.html

First failed prototype
The final cannon used gunpowder and fuse cord extracted by dismantling a 100-shot rocket battery firework. Prior to this, I had tested firing a cork using a party popper. This actually worked for a plain cork (albeit with 5 charges combined into one popper).
My first tests launched a plain cork about 20 feet down the test area (garden).

Later on I discovered the party poppers didn't have enough power to launch the additional weight of the papier mache puppet head, even though they are not very heavy.
That was the point at which I resorted to gunpowder from fireworks. This is the amount of gunpowder you can get out of a £16 ($20) battery firework. It is about three quarters of an inch deep in this small jar. Also shown is a length of fuse cord. This is gunpowder sealed into string. I got about fifty inches of that.

Fixing the cannons into the puppet bodies
I don't have many detailed shots of this part of the build, but you get an idea from this photo. The hole in the left-hand puppet is actually the upright cannon barrel, that was fixed into a ring-shaped disk, before building up a truncated conical body shape around it. Like the cannons, these were secured using masking tape first. The finished cannon/body mount was finished off with two coats of papier mache for strength and consistency with the rest of the puppet. The arms were added at this stage too. They are simply rolled kitchen tissue shaped with masking tape.
The right-hand puppet shows a head with cork attached half-fitted into the barrel of the body-mounted cannon. At the front of the body, you can see a hole that allows access to the smaller fuse hole in the cannon barrel inside it. This was needed to thread the fuse

Here is the fuse threaded into the front of the puppet body.

From the top of the puppet body, you can see the fuse entering the cannon blast chamber. After priming, this is where the cork fits that is attached to the puppet head.

And here is the gunpowder being loaded into the puppet body to prime the cannon. Note, this was measured to avoid the head blowing off too dangerously (obviously, it was still dangerous. The risk is part of the excitement!)

Step 5: Turning the Heads Into Cannon Shells
The basic heads needed a cork attached that could be inserted as the payload into the cardboard firing cannon inside the puppet body, prior to detonating the gunpowder launch charge.

This was easy enough to do by first securing corks to jam jar lids with a screw for each.

These was then just taped onto the base with masking tape to secure it, then finished off with papier mache.

Step 6: Finishing Off the Boxes, Puppet Faces and Costumes
Build up the puppet bodies on the box lids
For each box lid, I built up a puppet body (including the cannon as described in step 4.
The cardboard bodies were made from crude truncated cones, with arms added. The arms were shaped from tissue paper bound together with, and attached to the body with, masking tape.
These were reinforced with more papier mache. Here you can see them being dried.

Building up the boxes
The boxes were no more than cardboard folded up and glued into neat squarish or rectangular box shapes, which were then covered in adhesive vinyl laminating roll (known in the UK as sticky-backed plastic) .

I chose strong primary colors to make them more jolly. For each box in red I made the lid blue and for each blue box I made the lid red. The black trim is wide plumbers insulation tape.
Here are the boxes with the box bodies covered, but the heads and lid bare.

Drawing the faces on
The faces were essentially drawn on from based on the original sketches, then colour built up with washes of Promarker artist felt tip pens. These have decent pigments but unusually are transparent. Using them is much like applying layers of watercolour wash, except they are permanent markers - awesome.
Here is a first sketching in of the features on my puppet head. You can also see the clothes are simply created by applying coloured tape to the body.

A bit of Promarker rouge to give me a nice healthy complexion and to get some colour in my hair - what a looker!
You can see I wasn't aiming for flattery here...

Here it is again along with (right) my son's puppet at the point I was drawing on his (only mildly exaggerated) demonically mischievous features being sketched on.

And in its full glory with skin tones and hair colour added

In some cases the clothes were made from tape, then further coloured with the felt tip pens

Here is the whole family. They skate nicely on the borderline of funny and insulting! More or less everyone found everyone else's funny except their own - result!

Conclusion
This was so worth it. Though the pyrotechnics might need to be scaled back for younger children (mine are just adults), there's nothing quite like something this personalised (and excitingly dangerous).
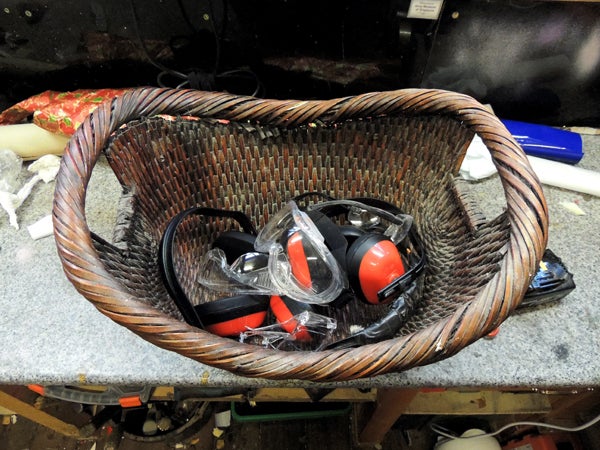
You might consider handing out protective eye and ear wear like I did too!


Participated in the
Homemade Gifts Contest 2016


