Introduction: Pico Powered DC Fan Driver
Hello everyone and welcome back.
So here's something cool: a 5V to 12V DC motor driver based around a Raspberry Pi Pico Board and a couple of electronic components.
The Raspberry Pi Pico is the heart of this project.
In order to drive the DC motor load, we have integrated the AO4406 N-channel Mosfet IC, a high-power Mosfet used in SMPS for fast switching purposes. Its Vds is 30V and it can withstand a maximum of 13A of current.
In a future project, we will use this arrangement in a PC project to control the DC fan through the Motor Driver Board. For now, we are utilizing a 12V PC fan as a test load.
As for the workings of this motor driver board, it has a few modes.
The load operates at 255 duty cycles on the first tap. The load will operate at 140 duty cycles with the second tap, and it will be turned off on the third press.
This Instructables is about the complete construction of this motor driver board, so let's get started with the build.
Supplies
These were the materials used in this project:
- Custom PCB
- AO4406 N-channel Mosfet IC
- 10K Resistor
- Raspberry Pi Pico
- AMS1117 3.3V
- 10uF 1206 Capacitor
- 1uF 1206 Capacitor
- SMD push button
- M7 Diode
- DC Fan 12V
- 12V Power source
Step 1: PCB DESIGN
The schematic, which is divided into three sections—the AMS1117 part, the Raspberry Pi Pico portion, and the Mosfet as switch setup—is the first stage in the PCB design process.
The A04406 Mosfet, a N channel High power Mosfet IC in an SOIC8 package, is what we utilized for this project. Its source is connected to GND, its drain is attached to a CON2 port, and its other end is connected to 12V from the input side. This CON2 will be used to connect the load, in our case a 12V DC fan. The Mosfet gate is connected in series with GPIO0 via a 10K resistor.
The second section includes the AMS1117 setup, which is primarily the AMS1117 minimal setup with a 10uF CAP at the AMS1117's input and a 1uF CAP at the output. Between the input VCC and the AMS1117's input, we add an M7 diode to reduce excessive power coming from the input side.
Additionally, we added an LED that will function as an indicator and is in series with the input side via a 1K resistor.
The Raspberry Pi Pico is located in the third section. It is paired with a toggle switch that is linked to both GPIO1 and GND. When the switch is pressed, GPIO1 is connected to GND.
After setting up the schematic, we export the netlist and convert the schematic into a board file.
We model a 24 x 80 mm outline in the layout, and we arrange all of the SMD parts, with the switch in the center, on the top side. The Pico is positioned on the bottom side.
The board was finalized and then send to PCBWAY for samples.
Step 2: PCBWAY
After completing the PCB design, we export the gerber data and send it to PCBWAY for samples.
An order was placed for a yellow soldermask and white silkscreen.
After placing the order, I received the PCBs within a week, and the PCB quality was pretty great. The silkscreen I used is completely random and asymmetrical, so it's pretty hard to make, but they did an awesome job of making this PCB with no errors whatsoever.
You guys can check out PCBWAY if you want great PCB service at an affordable rate.
Step 3: PCB ASSEMBLY
- Using a solder paste dispensing needle, we first add solder paste to each component pad individually to begin the PCB assembly process. In this instance, we are using standard 37/63 solder paste.
- Next, we pick and place all the SMD components in their places on the PCB using an ESD tweezer.
- With extreme caution, we lifted the complete circuit board and placed it on the SMT hotplate, which increases the PCB's temperature to the point at which the solder paste melts and all of the components are connected to their pads.
- Next, we add the PICO on the bottom side of the PCB using a soldering iron.
The Board is now complete.
Step 4: FAN ASSEMBLY
- In order to supply 12V to the circuit, we first connect the DC Barrel jack on the input side of the board.
- Next, we used a soldering iron to install the DC 12V Fan to the load side.
The setup is now ready to be tested but before that, let's have a look at the code.
Step 5: CODE
const int switchPin = 1;
const int MotorPin = 0; //PWM Pin
int MotorMode = 1;

void setup()
{
    pinMode(MotorPin, OUTPUT);
    pinMode(switchPin, INPUT_PULLUP);
    digitalWrite(MotorPin, LOW);

}
void loop()
{
    if (digitalRead(switchPin) ==LOW)
    {
        MotorMode = MotorMode + 1;
        if (MotorMode == 4)
        {
            MotorMode = 1;
        }
    }
    if (MotorMode == 1)
    {
        digitalWrite(MotorPin, HIGH);
        delay(300);
    }
    else if (MotorMode == 2)
    {
        analogWrite(MotorPin, 140);
        delay(300);
    }
    else if (MotorMode == 3)
    {
        digitalWrite(MotorPin, LOW);
        delay(300);
    }

}
Let's break down the code:
Constants:
const int switchPin = 1;
const int MotorPin = 0; // PWM Pin
int MotorMode = 1;
- switchPin is set to 1, indicating that the switch is connected to digital pin 1.
- MotorPin is set to 0, indicating that the motor is connected to digital pin 0, which supports PWM (Pulse Width Modulation).
- MotorMode is an integer variable initialized to 1, representing the current mode of the motor.
Setup Function:
void setup()
{
    pinMode(MotorPin, OUTPUT);
    pinMode(switchPin, INPUT_PULLUP);
    digitalWrite(MotorPin, LOW);
}
- pinMode is used to set MotorPin as an OUTPUT and switchPin as an INPUT_PULLUP.
- digitalWrite sets the initial state of MotorPin to LOW.
Loop Function:
void loop()
{
    if (digitalRead(switchPin) == LOW)
    {
        MotorMode = MotorMode + 1;
        if (MotorMode == 4)
        {
            MotorMode = 1;
        }
    }

    if (MotorMode == 1)
    {
        digitalWrite(MotorPin, HIGH);
        delay(300);
    }
    else if (MotorMode == 2)
    {
        analogWrite(MotorPin, 140);
        delay(300);
    }
    else if (MotorMode == 3)
    {
        digitalWrite(MotorPin, LOW);
        delay(300);
    }
}
- The loop continuously checks the state of the switch using digitalRead.
- If the switch is pressed (LOW), it increments the MotorMode variable. When MotorMode reaches 4, it resets to 1.
Depending on the value of MotorMode, different actions are taken:
- If MotorMode is 1, the motor is turned on (HIGH) for 300 milliseconds.
- If MotorMode is 2, PWM is used to control the motor speed (analogWrite with a value of 140) for 300 milliseconds.
- If MotorMode is 3, the motor is turned off (LOW) for 300 milliseconds.
This code essentially cycles through three different modes of motor operation each time the switch is pressed.
After uploading the code to the PICO, we use the DC Barrel Jack to plug the 12V adaptor into the board.
Step 6: RESULT
Here's the result of this simple build- A working Motor Driver running a 12V PC Fan through a Raspberry Pi Pico connected with an AO4406 Mosfet IC.
The first tap activates the setup; the second drives the motor to run at 140 duty cycle; and the third tap deactivates the load. This is a continuous process.
The initial code is capable of including more modes, making modifications incredibly simple.
This driver can be used to power a wide range of DC loads, such as a solonoid, an array of LEDs, pumps, and other devices that run on a 5–12V voltage. It can also be used to power any type of motor that runs on 12V.
Step 7:
Here's the final step of this project, which was to implement it into the woodwork fusion PC.
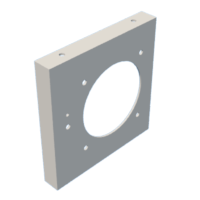
- The plan was for the fan to draw air from the top and circulate it around the PC, improving ventilation and keeping things cool. To that end, we first 3D printed the fan-circuit holder, which was designed to fit atop the woodwork fusion PC.
- We mount the fan with its 3D-printed body and circuit to complete the fan assembly.
- Subsequently, we position the assembled fan mount over the woodwork fusion PC and fasten the entire assembly with four wood screws.
Power was provided by ATX Supply 12V.
The switch on the Pico Fan Driver board controls this fan setup. A simple press turns the device ON, the second will reduce the fan speed by fifty percent, and a third tap turns the fan off.
Feel free to modify or use any of the files as you see fit; they have all been included in the article attachments.
Checkout wood work fusion PC for more info about the mentioned PC Project-
https://www.instructables.com/WoodWorks-Fusion-PC/
Leave a comment if you need any help regarding this project. This is it for today, folks.
Thanks to PCBWAY for supporting this project.
You guys can check them out if you need great PCB and stencil service for less cost and great quality.
And I'll be back with a new project pretty soon!
Attachments

This is an entry in the
All Things Pi Contest


