Introduction: Projet2_nested_object


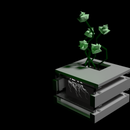

This second project aimed to create a series of nestable/stackable objects. My final design ended up being a series of attachable objects. This final image (above) illustrates the last step I took during this creative inquiry: the extrusion of a digital flower.
Step 1: Play-dough Tinkering


I began this assignment with play-dough. Trying to visualize physically what would be my nestable/stackable design. I took some objects that I have at home: nails, rope and metal wire. And tried to see what kind of composition I could come up with. I identified two ideas that were worth investigating. First: tiny vases for tiny flowers that would assemble like pieces of a puzzle. Second: simple 2.5D shapes - e.g. circle, square and triangle - that could be attached together in order to create sculptural shapes.
Step 2: Textured Vase


I started by implementing the vase idea. I used Python in Grasshopper to create the vase surface using the revolution component. I baked my shape and, in Rhino, I used the command CreateUVCurve, which created a flat rectangle of the UV of my shape. I used the same technique presented in project 1 to generate a pattern that would fit the dimensions of the UV plane. I used the SurfaceMorph component in Grasshopper to morph the pattern around the vase and a Difference boolean operation in Rhino to engraved the vase with the pattern.
Once printed, I was not convinced. First, I should have accentuated the pattern. Next time, I will make it larger and thicker so the details on the surface are more visible. I also noticed undesirable bumps on the circular surface. I think that they come from the nozzle being too close to the bed at the start of the print. I releveled the bed after making this print.
This print took a lot of material so I decided to investigate my second idea.
Step 3: Making Attachable Pieces
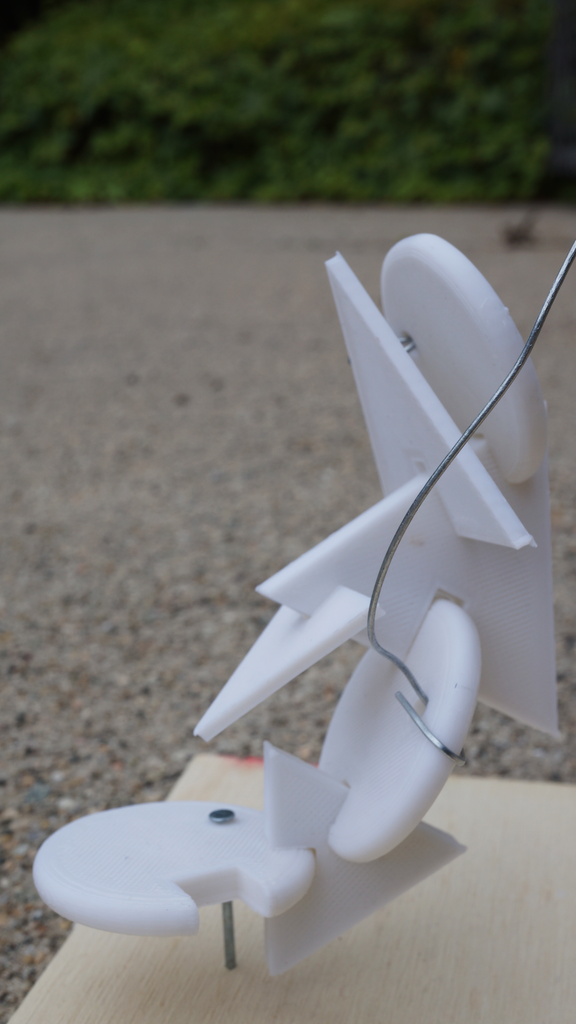


I started by making a 2.5D circle, using the Revolution component in Grasshopper to make a mesh and subtracting a box of 5mm-width to it in Rhino (with the Difference boolean operation). I had in mind to produce a series of shapes that would have a width of 5mm and an opening of 5mm as well, so they could attach to one another.
I screwed up some of them by forgetting the scale ratio to use in Cura. So some of the shapes have a 1cm opening or a 2.5mm thickness.
Inspired by my first attempt with play-dough, I decided to make small holes in some of the shapes in order to insert nails and small bits of things. It allowed me to make a little composition on an old piece of wood and with an up-side-down flower from my garden.
These experiments with flowers inspired my final documentation.
Step 4: Documentation or Extruding a Digital Flower?


The attachable pieces when stacked on top of each other could resemble a flower. So using a photo I took of a calla lily from my garden as a ground, I placed the attachable pieces on an iPad. I wanted to play with the dimensionality: the flower, here, existing only as a digital image but originating from a real tridimensional object in contrast with physical pieces of an abstract puzzle generated digitally. Also calla lilies, in addition to being beautiful and strange-looking, have deep roots (pun?) in the history of art with Georgia O'Keefe and Diego Rivera depicting them abundantly.
I took a few pictures of the setup. In my opinion, the best shots are the ones where the flower looks like it is extruding from the screen, morphing into simple geometrical shapes.


