

Introduction: Raspberry Pi Pico Blinking LED


Today, let us learn how to make a led blink using Raspberry Pi Pico. Let us begin!
Supplies


1 color LED
Breadboard
2 Jumper wires
1 resistor (50 - 330 ohm)
Raspberry Pi Pico (H)
Step 1: Putting on the Raspberry Pi
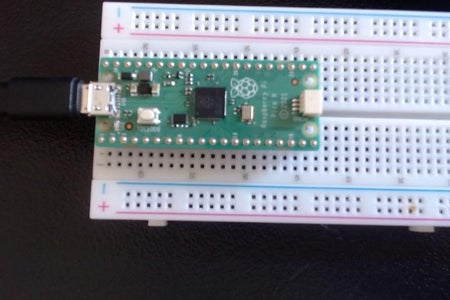
Place the Raspberry Pi Pico on the breadboard, leaving 2 rows of pins out on both sides. In other words, place it in the center.
Step 2: Adding the Resistor

Add on the resistor at 44 at the very right side and the other end at 40 on the very right side.
Step 3: The LED

Add the LED as shown. The longer hand is the one on the resistor's side and the shorter hand is on the side with nothing yet. Place the LED at 40 on the right side and 40 on the left.
Step 4: Jumper Wiring 1
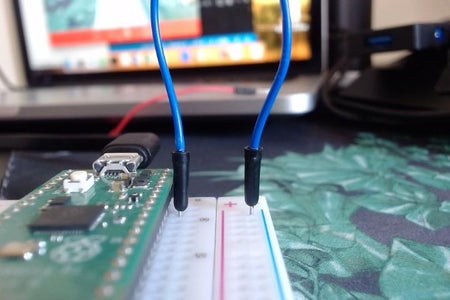
Connect 1 jumper wire to GPIO pin 38 closest to the Raspberry Pi. Then stab the other end into the first one on the left hand corner.
Step 5: Jumper Wiring 2

Add the second jumper wire to 40, the closest to the left hand side. Then, jab the other end into the last one of the 4th cluster of pins above. Like shown
Step 6: Thonny Code

Install Thonny IDE and on the application, install MicroPython. Then type in the code as the image. Click run and enjoy!


