

Introduction: Plastic Recycling at Home: My Chopping Board


I'll explain how I made this cutting board, recycling some polypropylene that I found at home.Besides being a very colorful cutting board it is also strong, resistant to cuts and very easy to clean, even in the dishwasher.
Supplies


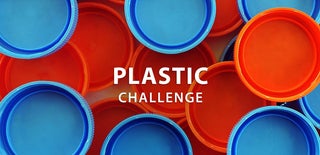
For this project we need polyethylene or polypropylene which can be recovered very easily, since they are two of the most common plastics. Polyethylene (PE) is often used to contain disinfectants, milk and some food products.
Polypropylene (PP), on the other hand, is used for vegetable crates, containers for detergents, soaps, shampoos and some food products.
You also need an oven that reaches 230°C, silicone oven gloves, a mold, clamps and tools to flatten and cut the slab obtained.
I use a countertop oven, is portable and I transport it outside every time I need it, obviously it is dedicated only to melting plastic and I never put food in it.
Step 1: Types of Plastics, Brief Introduction

I want to write a few lines to identify the various types of plastic, show you the numerous uses it has, but also the dangers of this material.
1.PET (Polyethylene terephthalate)
It is a plastic used mainly for bottles of water, drinks or food because it offers a strong barrier to the penetration of oxygen. Over time it tends to release phthalates and therefore the same container cannot be used more than once.
It has a density higher than water and therefore, if dispersed in the sea, it can hardly be recovered and disposed of.
It has a very low starting viscosity temperature (60-80°C), if you put it in the dishwasher you will find it deformed; to recycle PET it is necessary to bring it to about 280°C. It is easily recyclable and is reused several times.
2.HD-PE (High-density polyethylene)
Polyethylene is one of the most common plastics and the first to be synthesized, it has a high resistance to corrosion and is used to contain food, but also: detergents, shampoos and chemicals. It has a density slightly lower than water, resists well up to temperatures of 120°C and is malleable at 180°C. It is easily recyclable and is reused several times.
3.PVC (Polyvinyl chloride)
It is used for pipes, curtains, sheets. It is a rather dangerous type of plastic because it contains many additives including phthalates, which are very dangerous for humans. It's dangerous for the environment as over time it tends to degrade and pollute the water it comes into contact with because is much heavier than water and if it settles on the bottom of the seas it is difficult to recover it and continues to release toxic substances. The fumes generated by the fusion or combustion of PVC are carcinogenic and also for this reason it is not easily recyclable
4.LDPE (Low-density polyethylene)
It has long been used for shopping bags, glasses, plates and cutlery; in europe these products have been banned, replaced by more easily biodegradable plant-derived polymers. It is still used for packaging.
5.PP (Polypropylene)
It is one of the most popular plastics and is used for a variety of objects. It has excellent mechanical characteristics, withstands high temperatures and fatigue efforts (it is used for living hinges). It softens from 160-170°C and becomes malleable from 190°C. It has a density slightly lower than water, about 0.9g/cm3.
6.PS (Polystyrene)
It can be found in solid or foam form and is used especially for food containers and packaging as it is inexpensive and easily synthesized. It is one of the most dangerous plastics as it is not biodegradable and if heated (or worse burned) it emits carcinogenic black fumes; it is often not even accepted by plastic recycling centers. It is the plastic that most pollutes the seas, and it would be appropriate to ban it or severely limit its use.
7.Others
In this category there are non-recyclable plastics: Polycarbonate (PC), Nylon, ABS etc. some of these are particularly dangerous if not disposed of correctly.
Step 2: What I Recycle
Brief summary of the previous chapter on what I recycle (outside) the home.
1. PET: you need ovens at too high temperatures, I cannot recycle it and I dispose of it in the appropriate containers.
2.HD-PE: YES
3.PVC: NEVER RECYCLE AT HOME!!! dispose of it in the appropriate containers.
4.LD-PE: no, I dispose of it in the appropriate containers.
5.PP:YES
6.PS: NEVER RECYCLE AT HOME!!! dispose of it in the appropriate containers.
7.Other: NEVER RECYCLE AT HOME!!! dispose of it in the appropriate containe
Step 3: Casting Procedure


Today I collected some PP, I cut it into strips to facilitate the fusion, in order to make a cutting board for my kitchen.
I calculate the required volume and the weight of the PP (density about 0.9g/cm3). I set the oven at about 190-200°C and begin to melt the plastic a little at a time.
I didn't wear the gas mask because I was outside and I opened the oven letting it air before approaching it; a little blue smoke was coming out, not much anyway.
NOTE: NEVER melt plastic in the kitchen oven!
I add some plastic every 5-10 minutes and when I'm done I get a very hot blob.
Since I wanted to get a streaked effect, I twisted the melted plastic and then crushed it and put it back in the oven, repeating this process 3 times.
Various effects can be obtained by adopting other techniques and mixing plastics of different colors (but don't mix different type of plastic).
If you cut small strips you obtain a camouflage effect, while if the starting pieces are very small, it will have a granite effect.
NOTE: use silicone gloves, on which the plastic does not stick (the little that may remain peels off by itself when it cools), never use cloth gloves.
When I have achieved the desired effect I put the plastic inside the mold and let it cool while keeping it pressed; cooling the plastic will lose about 10% of its volume.
NOTE: the molds must be made of steel or a smooth material (in my case laminated chipboard), when it cools it comes off by itself; never use wood directly because the plastic will stick and, even when cold, it will never come off.
I let it cool for about 3h, the times vary according to the amount of melted plastic, the material and the shape of the mold. The longer it takes the plastic to cool, the more resistant it becomes, so don't think about speeding up this process.
Step 4: Processing


After the plastic has cooled, I obtained a rough parallelepiped that I went to plan thanks to a wooden case I had previously built on which I slide a mill with a 40mm flattening tip. I made about 3 passes of 1mm each and finally I obtained a perfectly flat surface, then I overturn the piece and repeat the same procedure for the opposite face until I reached the desired thickness.
Finally, using the blade of a cutter, I smoothed the two surfaces, removing some remaining burrs.
NOTE: Do not use sandpaper on polyethylene or polypropylene as they are soft materials and you would always get a dull surface, better scrape with a blade.
Finally I squared off the sides using a circular saw and/or a miter saw.
Step 5: Conclusions


I am very satisfied with the result: plastic frees my imagination, both in colors and effects
The second photo is a plate that I had previously obtained with the same technique but using only blue fruit crates (also made of polypropylene).
The third photo is instead the waste from the milling process, which I have kept aside and which I will later melt to have a new object, this time with a granite effect, since the starting material is very fine.
I hope this instructable can inspire you to create what you like best, plastic is an extraordinary material to recycle, it is never waste.
First Prize in the
Plastic Challenge


