Introduction: Restore High Heeled Boots


My wife tends to wear her shoes out because she walks a lot at her job. She was burning through a pair of cheap boots per month and killing her feet before I starting searching for deals. I scored this pair for about $80 2-3 years ago and she has worn them completely out. They should have been tossed long ago because the heel wrapping is so bad but she loves them because they are so comfortable.Since I'm "non-essential," I have plenty of time on my hands to fix them!
The extent of my leather working skills comes from making a knife sheath in Boy Scouts roughly 20+ years ago. My great-grandfather did some cobbling work (but I never met him) and I have a cobbler's hammer without a handle.
Basically, if I can figure this out, you can figure it out!
This whole thing cost about $40 but you could do 3-4 pairs of boots with all of that. Which is good, because I have another set to do.
Side note, I seem to fix shoes a lot. Probably because I buy them slightly used. But, I have a couple of other tutorials if you need to repair your soles or stretch the calves of your boots.
Supplies
- Stacked leather wrap
- dye (they make some specifically for end grain but I didn't know that at the time so I just used regular stuff)
- glue
- Mink oil
- exacto knife
- tape measure
- string
- cardboard
Step 1: Prep the Heels


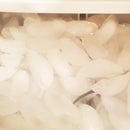
Here you can clearly see the damaged leather wrap. This is really the reason for this project as you can spot it from a mile away. Shoe polish could have concealed the other damage well enough.
Start by removing the old leather wrapping. some of it will come off easily, other parts will need to be picked at with a knife. Once everything is off, sanding the glue and fuzzy bits off with 150-grit sand paper.
I opted to not do the platform area of these boots. They're in reasonable condition and I figured that dying them would have gotten them close enough to acceptable that it wouldn't matter.
Once you have the heels sanded, get out a piece of string to help you measure how much leather you will need. I used weed whacker string because it was within an arm's length. I would need a little more than 5" of leather for the main piece of each heel (10.5" total).
I cut 10.5" off the main piece of leather wrap then stained it black. It took two coats to get an even color. Try not to do one heavy coat. The leather is glued on the edges and I could see the dye weakening that bond if the leather was too wet.
While you have your dye out, go ahead and re-dye your boots. I went over the heels, toes, rear seems, and anywhere that there seemed to be wear. At this point, it's already looking pretty good!
While the leather wrap is drying, go ahead and put a coat of mink oil on the shoe. Mink oil soaks into leather and helps waterproof and protect the leather. It also adds a soft shine.
Note: If you're looking for a quick fix and don't want to deal with leather, retailers sell heel wraps. I can't vouch for them but they come in all sorts of patterns. You could also tape off the leather areas and just paint the heels with spray paint. Frankly, I doubt many people would notice a black heel as long as it was pretty close to the same sheen and your paint job was good.
Step 2: Apply the Back of the Heel, Trim


My leather was still a bit wet when I did this step. Not soaking wet, but I ended up with some dye on my hands (it washes off). I wanted it a bit wet to help with the stretching. I'm not certain if this is how pros do it but it worked for me.
Start by cutting your large strip into two equal pieces. Liberally apply glue to the center of the heel.
Then, apply your leather starting at the back of the heel. Pull and stretch, but don't tear the wrap, until the wrap is all the way around the sides and back of the heel. Add glue if you need it. It cleans up easily and we will be trimming this down so too much glue is better than too little glue (within reason of course). We will do the flat interior piece later.
I held it in my hand for a couple of minutes to ensure a firm bond. Then, I clamped it with a simple spring clamp to help keep everything tight while drying. The drying process is around an hour until you can work on it again.
Rough cut the leather wrap leaving about 1/4" around the heel. When cutting, always make sure your cutting stroke is being done in a way that pushes the leather wrap towards the heel instead of pulling it off the heel. For me, that meant that I was pushing my cuts, rather than pulling.
Make the final cuts. For the sides of the heels (where it meets the flat interior side), you can place the knife against the flat heel to make a clean, straight cut. The rear of the heel, where it meets the leather uppers, you just have to trim very carefully.
Trim around the bottom heel. It's the easiest cut since it's straight but I still managed to mangle it a bit.
Step 3: Interior Piece


Make a pattern of the interior piece. I used piece of cardboard from a case of Coke, it doesn't need to be fancy. Use that pattern to cut two pieces of wrap. Make sure the pattern will fit both shoes (you may have to flip it over).
Dye the pieces.
While waiting for those pieces to dry, apply more mink oil to the rough spots of the boot where you dyed previously (like the heel area). It will take lots of coats to bring them back from the dead so use this time to make that happen. Don't get too much oil on the heel yet. You don't want to risk getting oil where you're about to glue.
Once the pieces are dry, glue them onto the flat surfaces. Let the glue harden. (apply more mink oil if needed)
Trim the pieces with the same technique as before. If you have a really sharp and long knife, you could make one long cut which would look better than the two hundred little cuts that I had to make.
Now, dye the cut edges to match the rest of the heel wrap. Let it dry.
Step 4: Mink Oil (final Time)


Liberally apply mink oil to the heel wrap. Continue spreading it over the whole shoe as needed. When the heel wrap stops accepting oil (or you think that you're done), you're done!
Runner Up in the
Leather Challenge


