

Introduction: Retail Rick (Shirt Folding Machine)

For our final project, we were instructed to create a machine based on our semester. One of our team members had a vivid dream the next night of a machine that could fold shirts so we got to work on the machine.
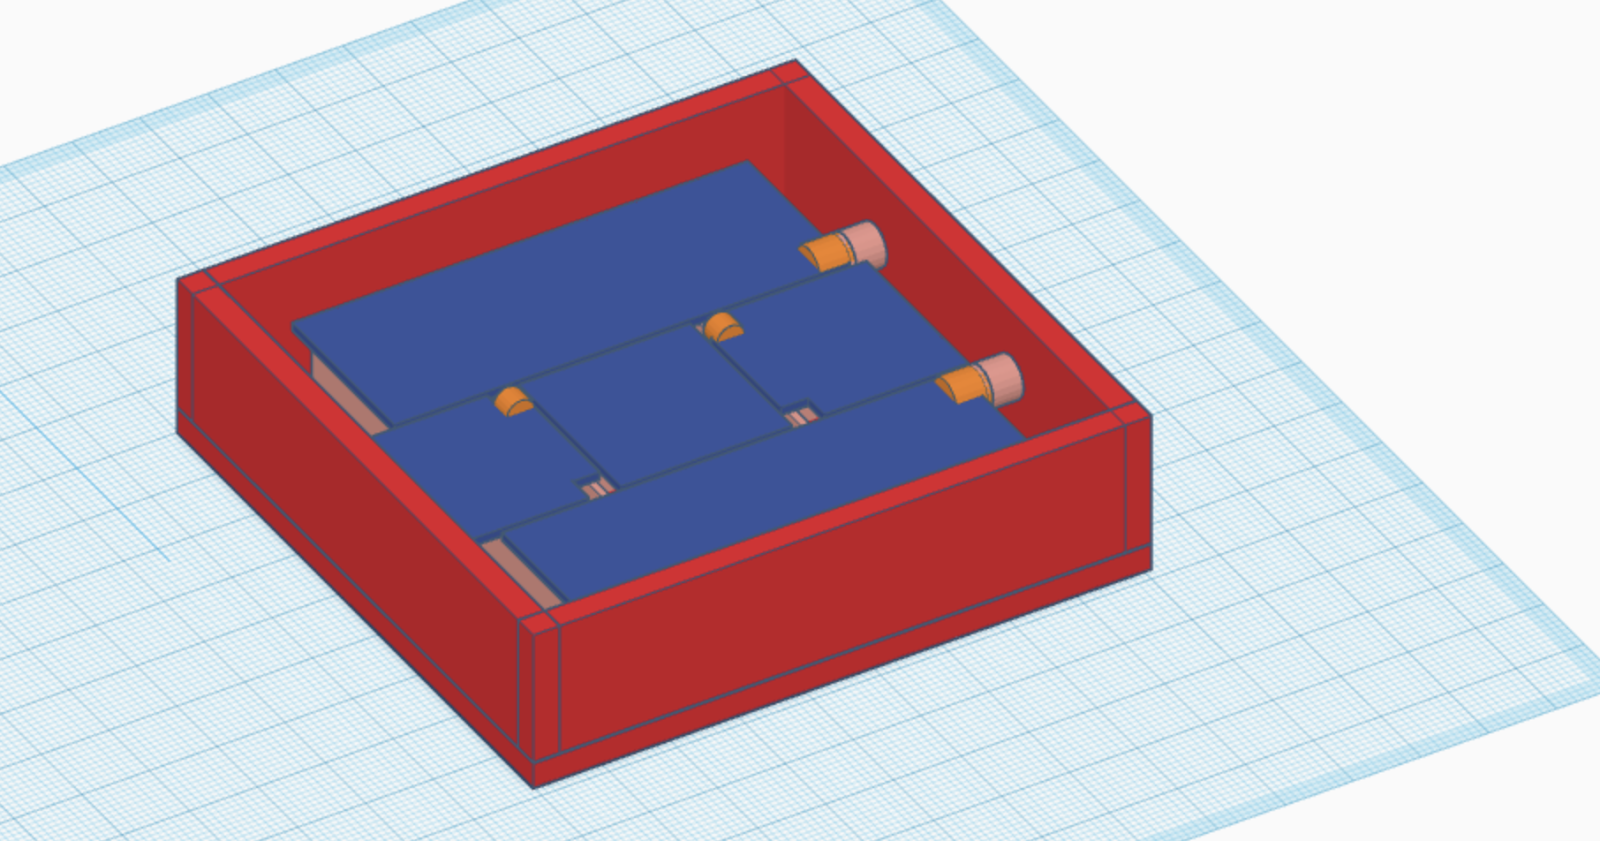
For the design, we calculated the dimensions of the panels and then the necessary torque to fold the shirts (plus some). We used these measurements to order panels and motors. For the panels, we chose corrugated fluted plastic panels so that we could insert stabilizing pieces of wire on the end of the panel not attached to the motor. After ordering and testing the pieces, we made a box where our panels would rest. We drew the specs up for the box in CAD and used a laser cutter to cut the necessary pieces.
After getting our pieces for the box, we sanded the fitted ends, making sure to sand on the same side as to not cause too many inconsistencies. We also used a hammer to make sure the box would fit, but after it stayed together well.
Supplies


The materials we used for this project were
- Four servo motors for the hinges
- https://www.amazon.com/Hitec-32645S-HS-645MG-Torque-Metal/dp/B003T6RSVQ/ref=sr_1_1?crid=2YYLXZSVLWOV2&dib=eyJ2IjoiMSJ9.tat9Yj1iSkYVCCP7fkJGHtulRFM7i5ljlklhGrHWhT3wBm1ERIm3qV9SZGJMdMsTFxiD1GPwtZSSP1Q1Z92x6iTDAJBUlg52-9fPsMaKg4T3nI7O-S3hc4L-EipOQKa3lZfB52AdUcYco6UZVgRW2N1ej-VImqftKRKQ48_Ut9pBCQ2tPiV7DkadctXOVSmDbBQZtUCeVDLa0LYnjWGwa3ezh5R3GctvF3JXSCte7WaZd5ZzjDaEX0VN8zpQXzXMFK9pGHcaE8GzNEa_30_RznvOziZc-9rKU3jZ-gHTUDU.nJ6c_T4VNgpkVUA7DLZ3BNac1fDISp0xlJRL6ihl8Zc&dib_tag=se&keywords=HS-645MG%2BHigh%2BTorque%2BMetal%2BGear%2BPremium%2BSport%2BServo&qid=1711665853&sprefix=hs-645mg%2Bhigh%2Btorque%2Bmetal%2Bgear%2Bpremium%2Bsport%2Bservo%2Caps%2C103&sr=8-1&th=1
- Two pieces of corrugated fluted plastic sheets for the panels
- https://www.amazon.com/Falken-Design-COR-NAT-4MM-2436-Corrugated/dp/B07BCV9TZ9/ref=sr_1_23?crid=3OA4VDN91NX5O&dib=eyJ2IjoiMSJ9.kFPrS_HS_IuYPb6k5EqE30R9dD4dFakTcGRIBzrK2bHUZRLn-iT7qDCE-m8PWzxW2ejbsoTr-Im-W4Zbfnk3fmKN3aNqnx2n1k9uhWm7t10ugYqAmLmj1PLTCNx4au5SrKf6nGd-CMylgkurevyrkmLg0ERc0Mp6ny2FjpzI1vi_XZGKK6ec51j7Ejhum_7fGUXxjlJM4u2yIOW4oTyNYOkd2RJxITHYqPvkTlvDv6FhHA0MFoRcl3ayi8SZpylHElGJQ7E4iCGBwxDiR80emZpZ_1hZDPe-u7Yq42lRWx8.FJ_0ye5wUF7s_TJcFGhon6_05iONir0fndfEaFXVA-M&dib_tag=se&keywords=plastic+corrugated+board&qid=1711665494&sprefix=plastic+corruga%2Caps%2C127&sr=8-23
- Arduino Mega
- Plywood
- 3D-printed hinge supports
Step 1: Brainstorming Design


First, determine the number of folds / size of the folding parts.
Then if unsure about dimensions, create a cardboard model with scores along the lines you want the panels to fold, and test with a t-shirt.
After completing this step, we determined we wanted to have 5 panels instead of 4 as seen in the image.
Step 2: Box Support Design & Creation

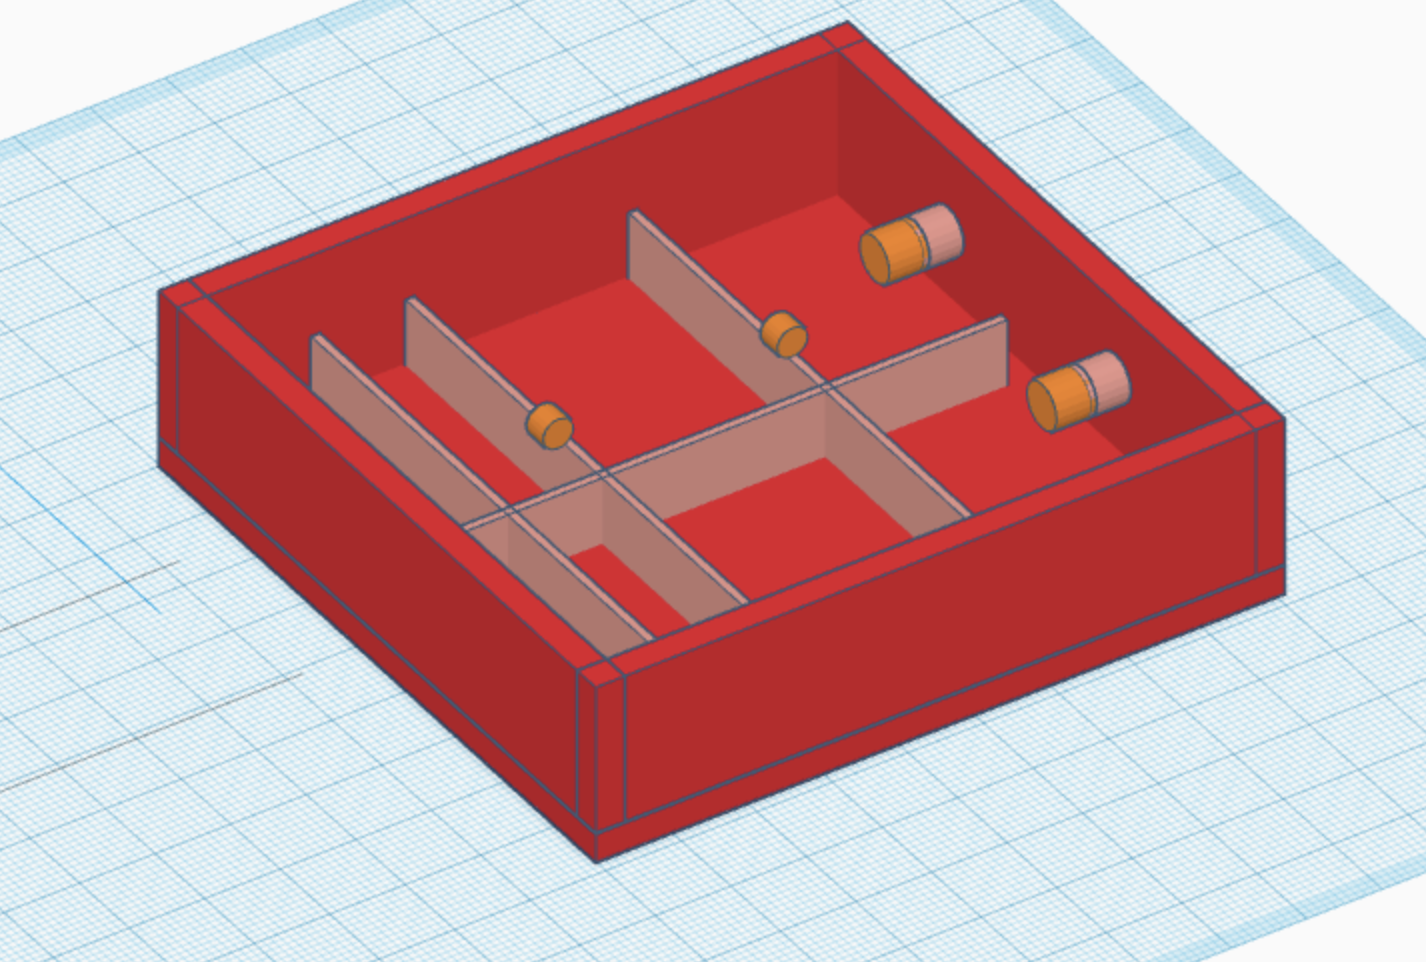
Using TinkerCad, based on your dimensions and choices from Step 1, design a box with pieces that can support the panels.
Then use a laser-cutting machine to cut exact pieces from your plywood.
We chose an interlocking pattern so there would be no need for glue.
Step 3: Build the Circuit
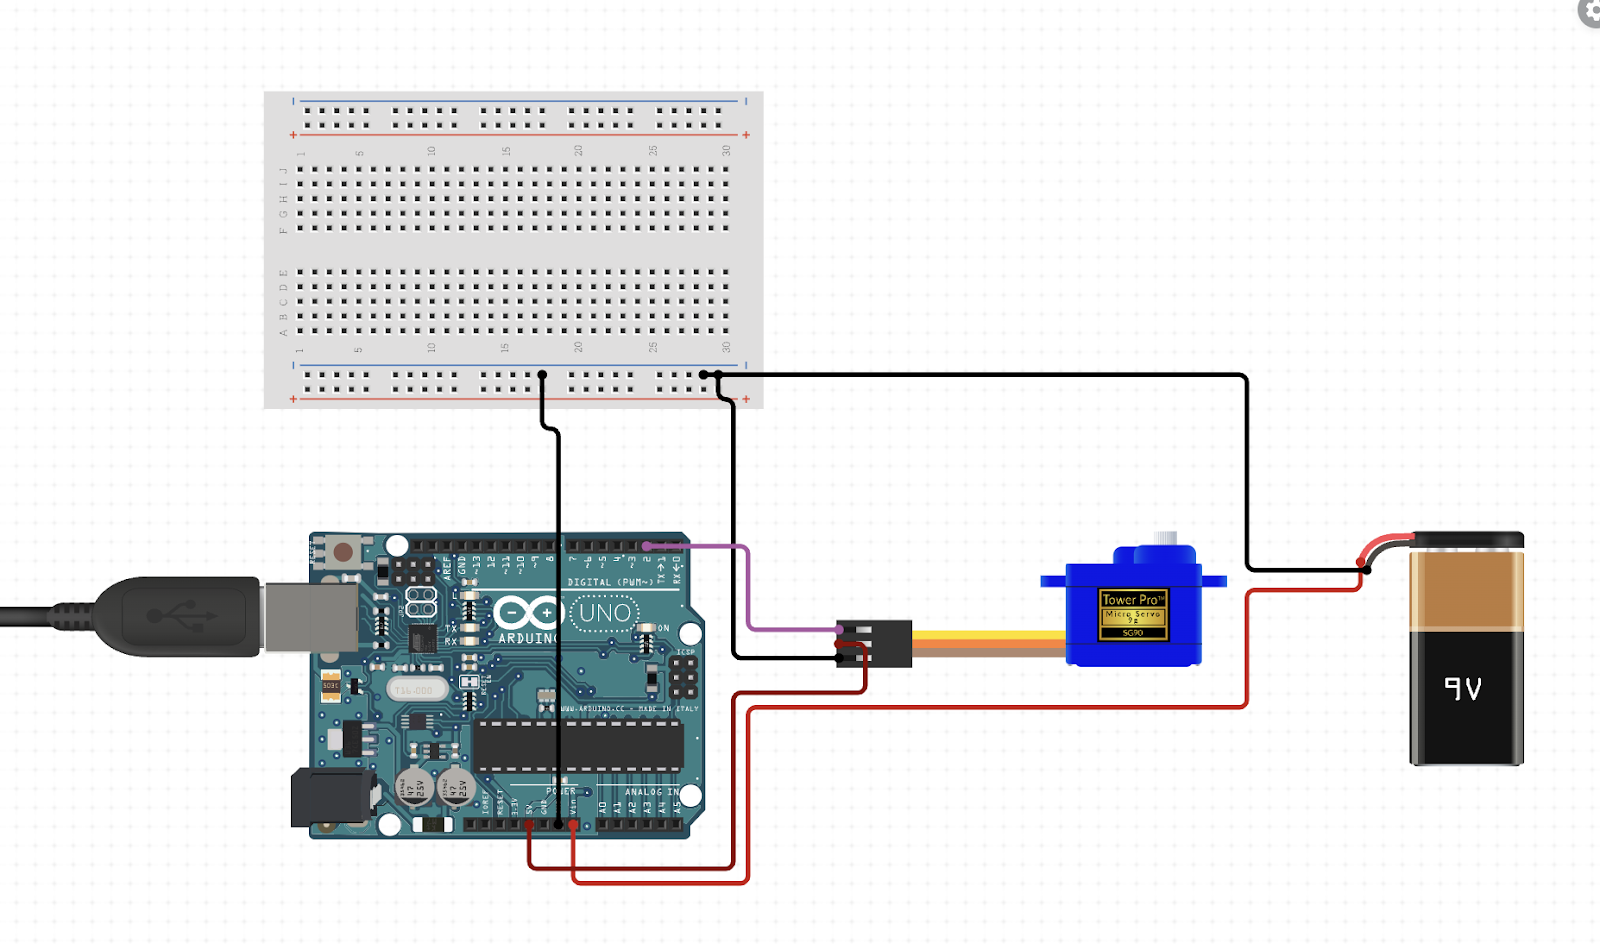
First depending on your number of motors, follow the example of this circuit to connect your motors, Arduino, and battery. As seen, it is necessary that the motor's lightest colored wire is attached to a PWM pin on the Arduino, then the darkest colored wire to ground and the middle one to power.
Step 4: Write the Code
The code we used is attached below but the main idea is that you want the motors to turn from 0 to 180 degrees and then back so that the panels can bend in and back out to create a fold. From there you can number and run the functions based on the order you want the motors to work in.
Attachments

Step 5: Print the Hinge Supports

For this step, you can use the provided file to 3D-print the pieces we used to attach the motor propellors to the panels.
Additionally, it is important to cut out or print supports to hold up the end of the panel not attached to the motor, and blocks to hold the motors up to the height of the box supports.
Attachments

Step 6: Assembly


Now first, arrange the boards, motors, and supports in the places that work for you and mark them in the box. Then drill holes into the supporting pieces of the box to send wire through. Then using hot glue, wood glue, nails, and drills, attach the motors to the blocks and their rotating arms to the 3D-printed supports, then the blocks to the box. Additionally, you will attach the supports with wire to the board. Then attach everything in place and test it to make sure it is to your liking.
Congratulations, you've made a machine that can fold shirts and capris/children's pants!!


![Tim's Mechanical Spider Leg [LU9685-20CU]](https://content.instructables.com/FFB/5R4I/LVKZ6G6R/FFB5R4ILVKZ6G6R.png?auto=webp&crop=1.2%3A1&frame=1&width=306)


