Introduction: Sew a Jersey Infinity Scarf
This simple scarf is just a stretchy loop that you can wrap around your neck once or twice. It is made with two separate layers of fabric which lets you to use two colors or patterns and creates a nice effect when the scarf is looped and twisted. This design also means that all the edges of the scarf are finished, not left raw, and the whole thing is thicker and warmer.
It's a common misconception that you need a serger to sew stretch fabric, but once you know a few tricks, you'll find it is entirely possible to sew all kinds of stretch garments using just a home sewing machine! In fact, I've actually come to prefer using a home machine for my stretch projects. This simple scarf is a good place to start if you want to learn how to sew stretch at home, and it's also a great accessory that is easy to customize with your own fabric choices.
For a detailed overview of all the stretch stitches you can sew with a home machine and how to use them, check out the Sewing Stretch Lesson of my free Machine Sewing Class.
Step 1: Tools and Materials
For this project you'll need these basic sewing tools:
- Sewing machine
- Iron and ironing board
- Extra bobbins
- Extra bobbins
- Machine needles for stretch fabric or jersey
- Fabric shears
- Thread snippers
- Seam ripper
- Hand sewing needles
- Pins
- Magnetic pin holder
- Clear 18"x2" ruler
- Metal ruler or thick plastic quilting ruler (optional)
- Cutting wheel (optional)
- Cutting mat (optional)
Materials:
I'm using a cotton spandex jersey which is nice and soft and also very stretchy. You could use other stretch fabrics through, like spandex, a thicker sweater knit, or even a stretch lace combined with a thicker jersey on the other side.

- 1 yard each of two colors or patterns 60" wide jersey, spandex or light knit
- all purpose thread to match your fabric
Step 2: Cut Your Fabric
Since this design is just two identical strips of fabric sewn together, it's most efficient to cut the two pieces out together so they are perfectly aligned.
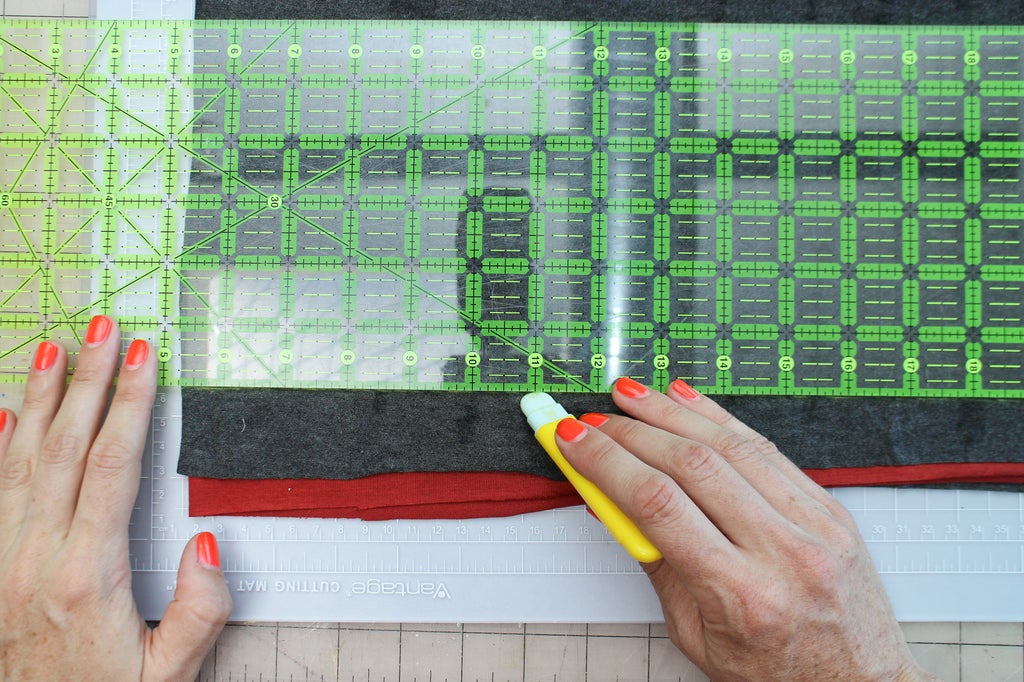
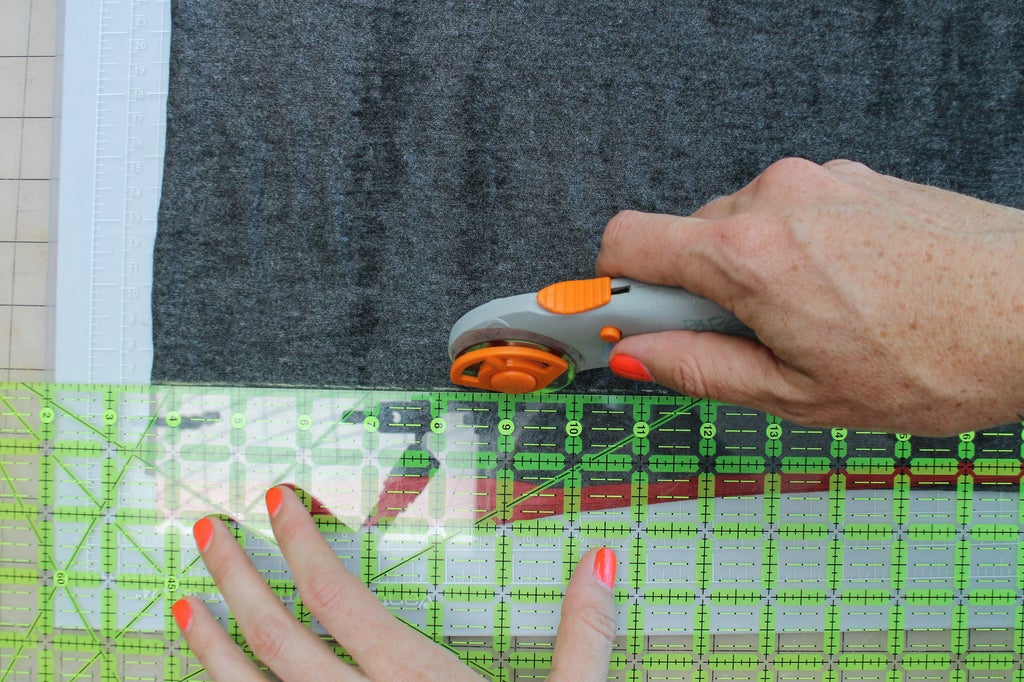
I'm going to use a cutting wheel, but you could cut with scissors too. When you're using a cutting wheel, you need to cut on top of a cutting mat or other appropriate cutting surface. Use a long metal or very thick plastic ruler as a guide. It helps if your ruler is at least as long as the line you need to cut.
Lay your first type of scarf fabric out on your cutting surface, right side up. Then lay the second kind of fabric on top of the first, right side down, lining the edges up as well as you can.

You can cut the whole thing this way, or you can make your cuts shorter by folding both layers of fabric in half and cutting through all 4 layers.

Either way, use your ruler and chalk to measure out a rectangle 14" wide by about 60" long (or 30" long if you're cutting the folded piece).

To cut, lay your ruler along the lines you marked, hold it down with your free hand and run your cutting wheel directly along the edge of the ruler, pushing away from you. Press down firmly so you cut all the way through the fabric. Make your cut in one long stroke if possible, starting and stopping makes jagged edges more likely. Cut both outer edges and then the end.

Always be safe! Keep your free hand out of the path of your cutting wheel blade and work slowly and consciously. Cutting wheels can be very dangerous if you aren't being careful. Keep all your fingers!
Step 3: Sew the Sides
If you cut your fabric folded, unfold it, being careful not to separate the two layers. Then stick a few pins into the long sides to hold the layers in place.


I think the best stretch stitch to use for sewing this project is the overcast stitch, but test your fabric with different stretch stitches on your machine first, adjust the settings and choose a stitch that works well on your fabric. Other good choices could be a standard zigzag or a triple stitch.


Now sew the two long sides of your fabric using all the tips I've suggested for stretch sewing. Be sure to lock your stitches at the beginning and end of the sewing line. Leave about 1/4" seam allowance past the stitching and trim it away when you're done.


Step 4: Turn and Press
Now reach in between the two layers of the scarf and turn it right-side out.


Take it to your ironing board and press the seams flat. I used a sleeve board here which is helpful for pressing small looped pieces.

Step 5: Sew the Ends Together
Take the ends and start pinning them right sides together starting by matching the seams. Pin all the way around as far as you can leaving a small opening that will let you sew.


Use the same stitch to sew around this seam, leaving the opening open.


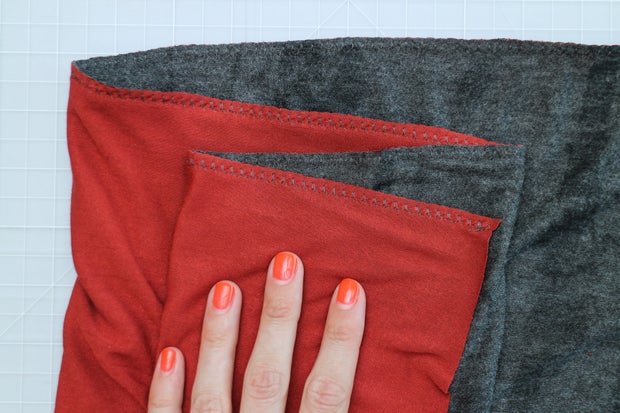
When you're done it should look like this:

It can sometimes be hard to get the seams matching up quite right, they tend to slip during sewing, one way to prevent this is to sew each seam area first, then sew the rest of the way around. And if you really want to be precise, you can baste before you sew. Either way, if your seam end up mismatched like this, you can always take out your stitches and re-sew.

Step 6: Slip Stitch the Opening
Now you're going to close the opening by hand with a slip stitch.
Thread a needle and tie a knot at the end, then begin sewing from side to side catching bit of the fabric on each stitch. For a good description of how to do this, you can always look back at that great Hand Sewing Lesson by Jessyratfink.
At the end, tie a knot and hide the tail of your thread.
Step 7: You're Done!
Now you have a nice stretchy soft scarf accessory! That was easy, right? Being able to sew stretch effectively with your home machine opens up a lot of great sewing possibilities, especially in the realm of clothing. Creating shirts, dresses, leggings, skirts and other comfortable clothes is totally possible even without a serger.
If you've created your own stretch scarf, post an I Made It in the comments section below! And for a lot more detailed beginning sewing instructions, check out my free Machine Sewing Class.


