Introduction: Sewing Stretch on a Home Machine
Working with stretch fabric is often especially appealing to beginning sewers because it is very forgiving, especially for making clothing. Sewing with stretch lets you create fitted garments without a lot of darting and shaping, most stretch also doesn't fray, so cut edges can sometimes be left raw.
Despite these benefits, sewing stretch on a home machine is not quite as straightforward as sewing wovens because your stitches need to be able to stretch with the fabric. Stretch fabrics can also be a bit slippery, springy, and hard to control as you are sewing them. Some people think you need a serger to sew stretch, but while sergers and overlock machines are great tools that can simplify stretch sewing, they are by no means the only option. There are plenty of tricks that will help you sew stretch fabrics effectively on a home machine, and in this lesson I'm going to teach you some of the most useful ones.
Step 1: Different Types of Stretch Fabric
The first thing you need to do when you're sewing with stretch is identify what type of stretch it is. There are all kinds of stretch fabrics that differ by construction, thickness and fiber content which are good for different types of projects. I'm not going to get into all the different varieties here, but I will talk about two basic distinctions.
Woven versus knit stretch: as I mentioned in the intro, knit versus woven is a very basic distinction in fabric construction. Because of the way knit fabrics are constructed, they are stretch by default, but woven fabrics can also be stretchy.

In order for a woven to be stretchy, it has to have a fiber content that is partially spandex or another stretch fiber. Stretch wovens are usually not as stretchy as knits and do not always require the same special sewing techniques. They are usually used to add comfort and mobility to structured garments like jeans, or tight skirts or dresses. We won't be using any woven stretch fabrics, just knit stretch, in this lesson.
Two-way versus four-way stretch: another basic distinction in stretch fabrics is the direction of the stretch. How a certain fabric stretches can affect how you pattern and sew with it on a given project.
2 way stretch fabrics stretch in one direction only (or much more in one direction than the other). 2 way stretch is most often stretchy along the cross-grain (from selvage to selvage) but sometimes along the grain instead. When you are using a 2 way stretch to make clothing, you usually want the stretchiest direction of the fabric to be wrapping around your body horizontally.

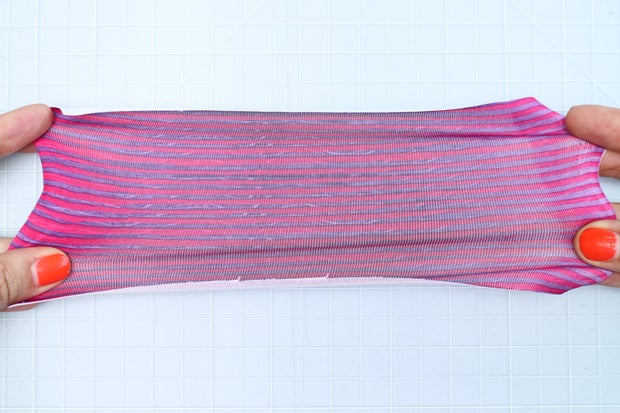


4 way stretch fabrics stretch in both the grain and cross-grain direction. 4 way stretch fabrics usually contain spandex are most often used for garments that need to be especially tight and stretchy, like leggings, bodysuits etc.

The two kinds of stretch that I use most often are jersey and spandex. Jersey is the type of light weight knit fabric that most T shirts are made out of. It is usually at least partially cotton, and is therefore extremely soft and comfortable. Jersey is great for making casual drapey or fitted garments that don't require a lot of complicated construction or finishing.

Spandex is a perfect material for leggings, costumes and bodysuits. Most spandex stretches in all 4 directions, making it pretty easy to fit. These days it also comes in an insane variety of colors and crazy patterns from beautiful ombres, to prints of cats shooting laser beams out of their eyes... something for everyone :)
Step 2: Stretch Stitches
If you're going to use your home machine to sew stretch, you usually have a few different options of stitches to choose from. You know all those squiggly lines labeled with numbers on your stitch selector dial? Well those aren't ancient symbols from the sewing gods, they are actually very useful stitches that will help you sew stretch.
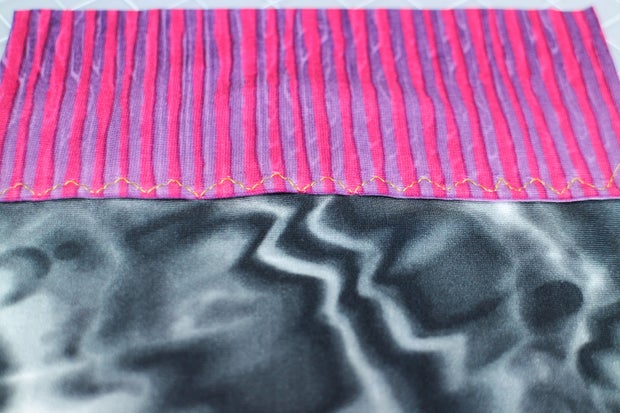
Zigzag - we've talked about this one already, and used it to create a finished edge on hems and seams, but the zigzag stitch can also be used to sew stretch fabrics. Because of the structure of the stitches, zigzag allows the seam to stretch.
Zigzag is a classic for sewing stretch fabrics on a home machine, and if that's the only stretch stitch your machine offers, it's a great option, but it is not necessarily the best option. Zigzag seams have fairly large gaps between stitches, and they have a tendency to pucker. They are also not as strong as some of the other, more re-enforced stretch stitches.


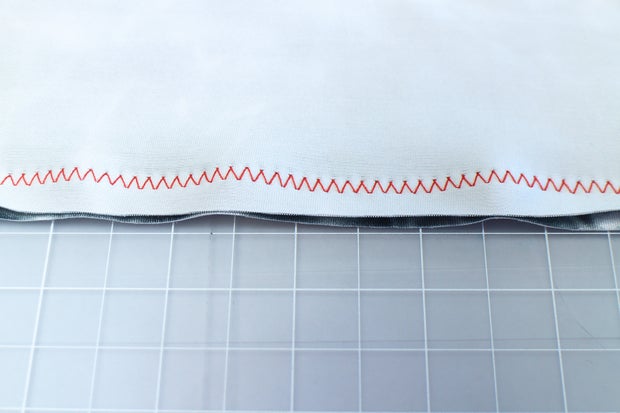
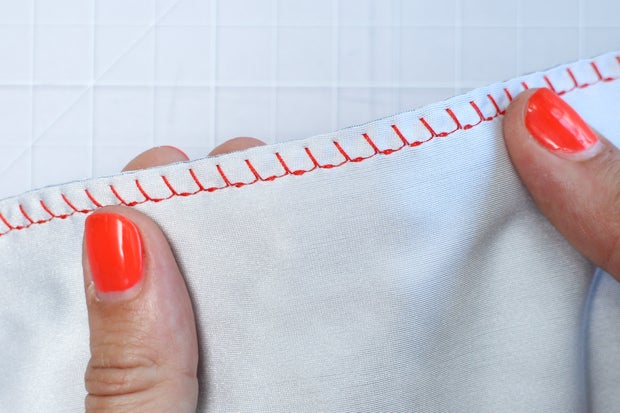
Overcasting (or Knit) Stitch - this is a great stitch for stretch because it both makes a clean unbroken seam line, and creates a wider stitch that finishes the edge of the fabric. It allows for a lot of stretch and is great for stitching spandex and other very stretchy fabrics.


On my machine there is a special "Stretch Stitch" (S.S.) mode on the stitch width dial that you use when sewing most of the stretch stitches. Check your manual.

Triple Zigzag (or Tricot) Stitch- like a regular zigzag made out of a straight stitch, this stitch is both stronger and stretchier. It's a good stitch for top stitching down things that need to stretch, but not as good for seams. It's used a lot on elastic and underwear.


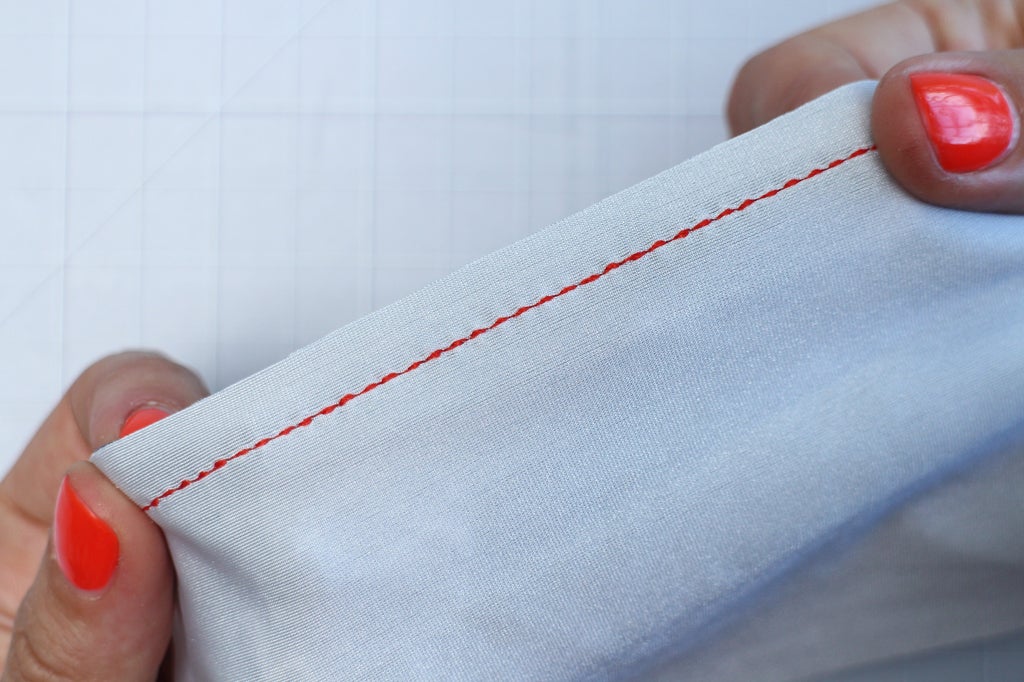
Triple (or Straight Stretch) Stitch - this stitch looks like a regular straight stitch, but each stitch is sewn three times, giving the seam more stretch. It doesn't pucker like other stretch stitches sometimes do, and is good for seams that need to look clean, and have a lot of strength, or seams that need to be pressed open rather than finished together as they are with a zigzag or overcasting stitch.

Step 3: Prepping for Stretch Sewing
When you decide you want to sew a stretch project, there are a few things you can do to make the process go more smoothly.
First, choose the right needle for your project. While universal sewing needles can sew stretch, there are needles specifically designed for different types of stretch fabric. Jersey and stretch needles have ballpoint ends that help prevent the needle from tearing the fabric, and the structure of the needle is designed to avoid dropped stitches.

Test your stitches first on every new fabric. Stitches will perform differently when you are sewing along the grain or cross-grain of a knit, so you need to take that into account when you are sewing.
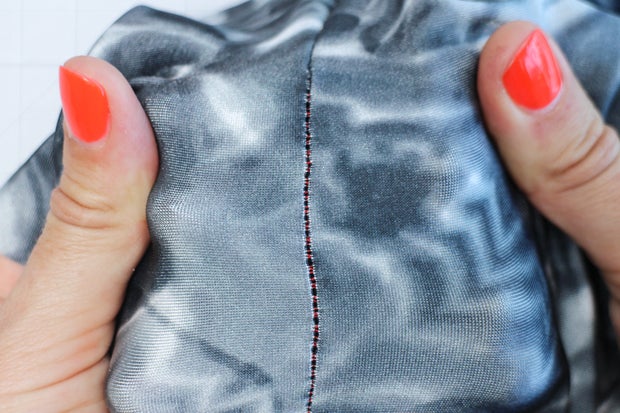
If your machine lets you adjust the pressure of your presser foot, decreasing the pressure can help prevent stretch fabric from stretching or puckering while you sew as you can see in the photo below. (My machine actually doesn't have this function, which is one thing I don't like about it.)

When you're cutting out knit pieces to be sewn together in a seam, try whenever you can to cut the two pieces together and leave them that way. Knit fabric, especially jersey, is very difficult to align right when you are stacking two pieces on top of each other, so cutting pieces together can avoid this issue.


Pinning in not always necessary when sewing stretch, especially of you're sewing two pieces that have been cut on top of each other, but adding a few pins can help keep everything in place.

Step 4: Sewing Stretch
When you start sewing, let the fabric feed naturally into the machine, don't pull it from the back or front or you will stretch the seam as it is sewn. If anything, I sometimes press the fabric forward just slightly from the front as it feeds under the presser foot to combat the tendency to stretch.
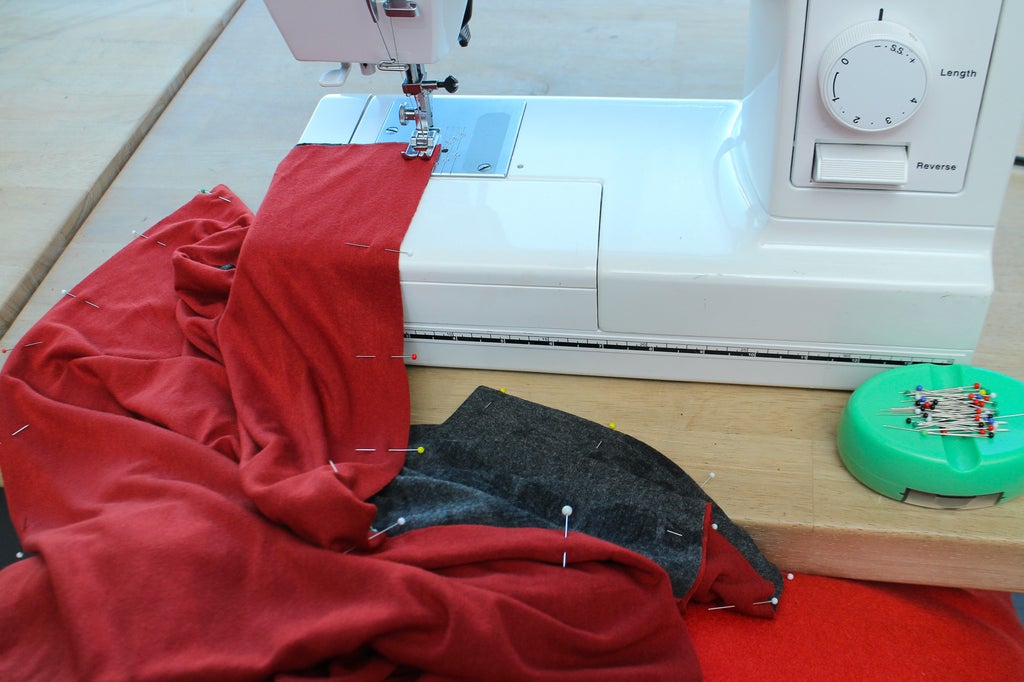
If you're sewing something big, don't let your fabric hang off the machine as you sew, the weight of the fabric will stretch the seam, and make it harder to sew neatly. Support your project on a table or your lap. I sometimes even put a pillow on my lap to hold my project up higher when I'm sewing stretch.
Leave a seam allowance wider than the knit stitch you're using, this will help prevent the seam from getting stretched and puckered as you sew. When you're done, trim the excess away to create a neat finish, being careful not to cut into the stitches.

Step 5: Hemming Stretch
One of the benefits of sewing with stretch knits is that they don't always need to hemmed, but there are some places where hemming is necessary or just makes a garment just look cleaner and more finished. Plus, sometimes, un-hemmed knit edges will to curl-up in odd ways.
When you do want to hem a stretch project, any of the stretch stitches we just talked about would work, but most of them will make a very visible stitch pattern on the outside of your fabric, and the more zigzag style stitches can sometimes create a puckered hem.
A great solution for making clean hems on stretch is to use a double needle. The double needle stitch creates two lines of straight stitches on the top of the fabric, and a zigzag between the two rows of stitches underneath. Most machines have this capability, and it's actually really easy to use. My Janome came with a double needle but you can always order one if you don't have it already.

To set your machine up for double needle sewing, first you need to be sure your machine supports this function. Check in your manual or look online, but generally if your machine has two thread spool pins, it can accommodate a double needle.
There are different widths of double needles, so when you buy one, make sure it's not too wide for your machine. The distance between the needles should be no wider that your widest zigzag setting.
Insert your needle into the machine just like a regular needle, and put a spool of thread on each thread spool pin. Grab the thread from both spools and thread them through the machine together as if they were one thread.

Separate the threads above the needle bar thread guide and thread the left thread through that guide and the left needle. Skip the needle bar thread guide with the right thread and just thread it through the right hand needle.

Fold over the edge of your fabric and pin to create a hem. On knits you almost always want to create only a single fold hem, not a double fold, unless you want to intentionally create a hem with more structure, like on a neckline.

Set your machine to the straight stitch setting and a stitch length of about 2-3. Sew as you would normally an even distance away from the folded edge.
The double needle should create two lines of stitching on top of the fabric, and a zigzag between them on the bottom.
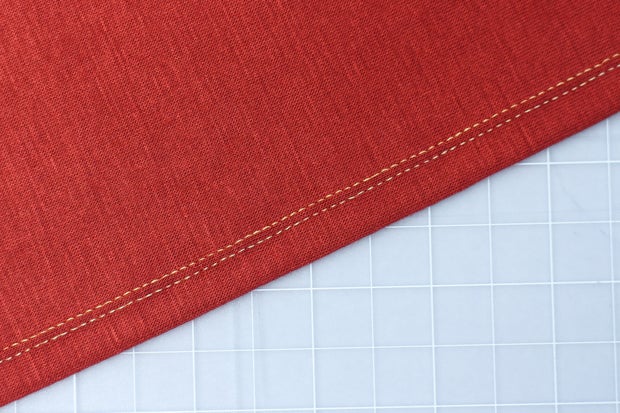
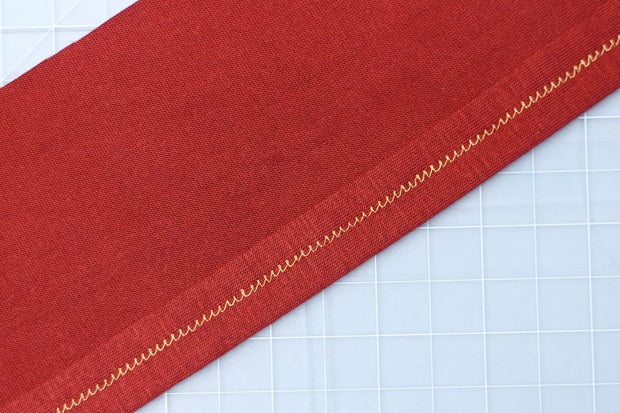
If the zigzag is pulling the two stitches together and creating a pucker between them on top and a tunnel underneath, tighten the thread tension on top and loosen it on the bobbin until the stitching lays flat.
Step 6: Sewing With a Walking Foot
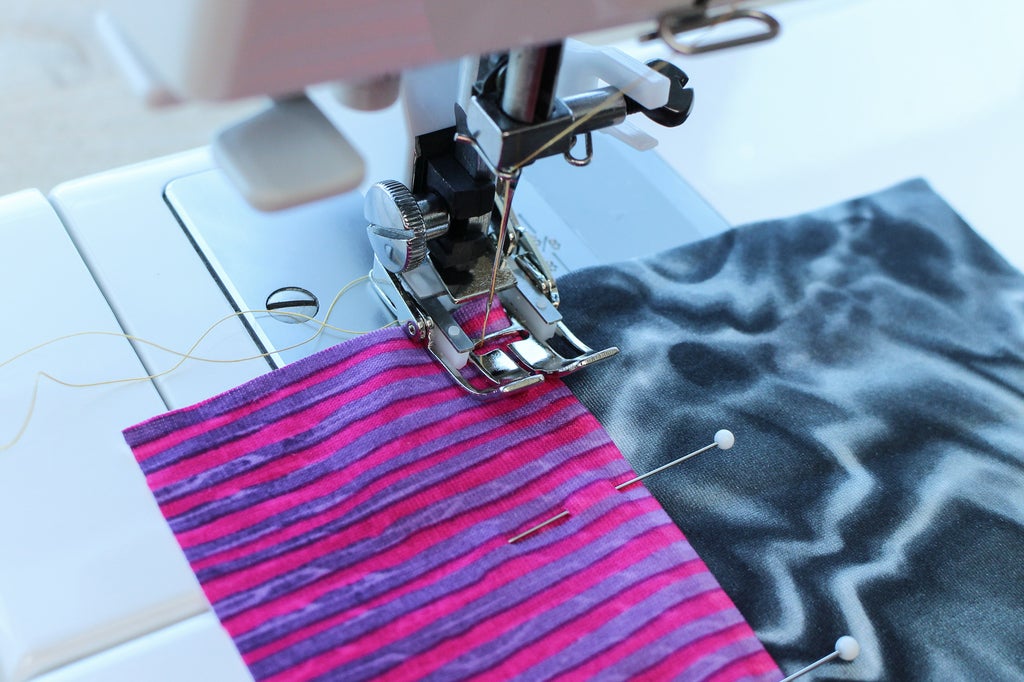
One thing that can happen when you're sewing stretch on a home machine is that the seam can pucker or get "wavy". This is because the fabric, especially the top layer, isn't feeding fast enough through the machine and it is getting stretched as it is sewn. One way to combat this is to use a walking foot attachment on your machine.


A walking foot has "walking" teeth that mirror the movement of the lower feed dogs, helping to move the fabric through the machine and create more even stitching. A walking foot is certainly not necessary to sew stretch,and it doesn't work on all stretch stitches, but if you are having trouble getting nice flat seams, it it can be a good option. Waking feet are also helpful for a lot of other types of sewing, especially if you're working with thick fabric or leather, so they aren't a bad investment.
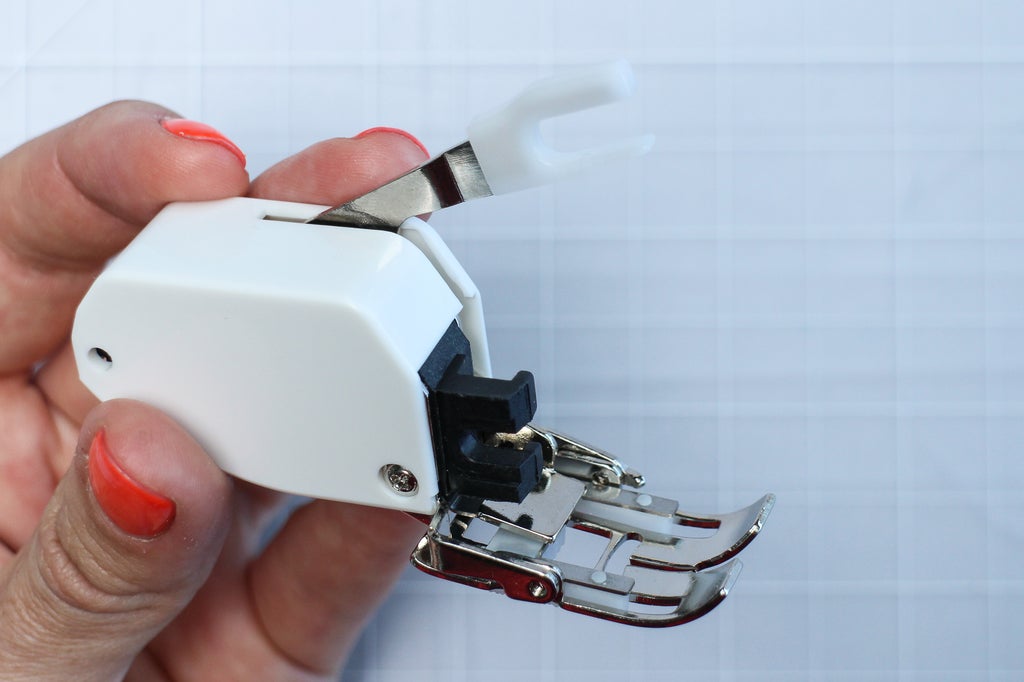
Not all walking feet work on all machines, so check your manual or look online to see which one to buy for your machine. (You don't necessarily need to buy the one sold by your machine's manufacturer though. Janome makes a walking foot for my machine that is $50, but I found a perfectly good one on amazon for $11).
To attach most walking feet, you need to unscrew the entire presser foot holder by unscrewing the thumb screw. Slide the walking foot over the presser foot bar while simultaneously fitting the little claw on the right of the foot over the base of the needle clamp screw. Tighten the thumb screw and you're ready to sew.

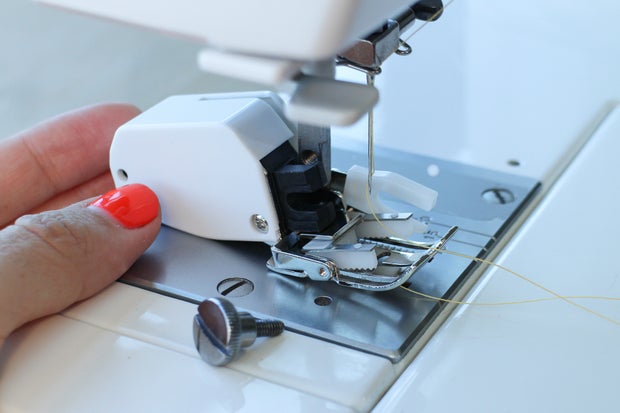


Sew just like you would normally when using the the walking foot attachment. Test it on your machine and compare the results you get from different stitches.
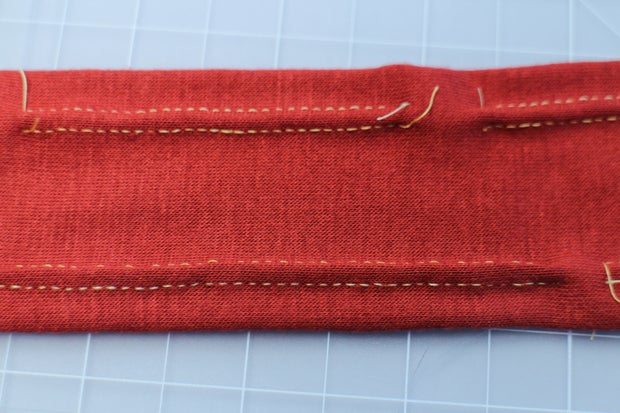
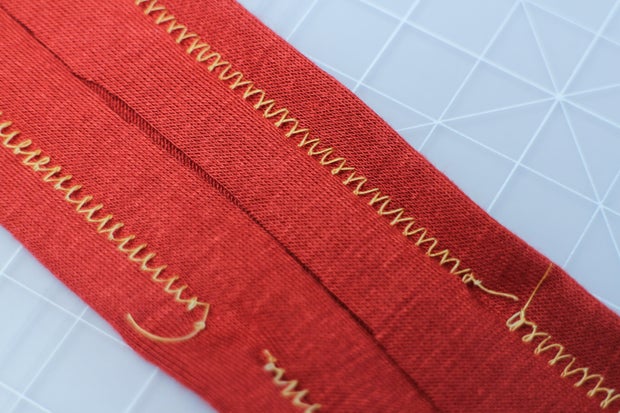
The red fabric in the top of this photo was zigzagged with a regular foot, and the zigzag on the bottom was sewn with a walking foot. As you can see the regular foot stretched the fabric out and made the seam wavy as it sewed the zigzag, while the walking foot seam is laying flat.
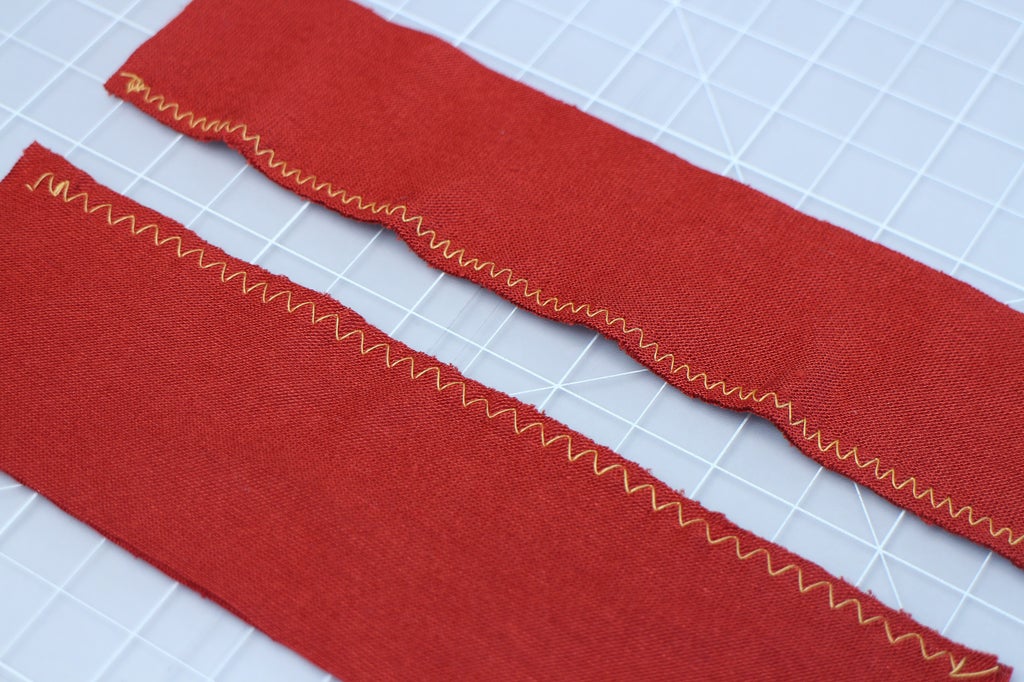
I found that on my machine, the regular zigzag and triple zigzag worked better with the walking foot, but the other stretch stitches actually worked much better with the regular foot. I imagine this will vary a bit from machine to machine, and fabric to fabric. Another reason to always test first!
Step 7: Quiz
{
    "id": "quiz-1",
    "question": "True or false: you can't sew stretch without a serger.",
    "answers": [
        {
            "title": "True",
            "correct": false
        },
        {
            "title": "False",
            "correct": true
        }
    ],
    "correctNotice": "Yes!",
    "incorrectNotice": "Nope, try again."
}
{
    "id": "quiz-2",
    "question": "A good way to sew a hem on stretch fabric is to:",
    "answers": [
        {
            "title": "use a regular straight stitch",
            "correct": false
        },
        {
            "title": "use a double needle",
            "correct": true
        },
        {
            "title": "lower the tension on your top thread",
            "correct": false
        }
    ],
    "correctNotice": "Good Job!",
    "incorrectNotice": "Sorry, try Again."
}
Step 8: What's Next?
Being able to sew stretch effectively with your home machine opens up a lot of great sewing possibilities, especially in the realm of clothing. Creating shirts, dresses, leggings, skirts and other comfortable clothes is totally possible even without a serger!
If you want to practice sewing stretch on a home machine, there are tons of great projects on Instructables you can try! I’ve written a very simple one on how to sew a Jersey Infinity Scarf and my Superhero Costume Class also delves much more deeply into stretch sewing and fitting, specifically using spandex.
In the next lesson, we'll tackle another important sewing skill: attaching zippers and buttons.


