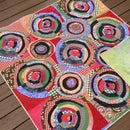
Introduction: Shibori Pole Wrapping
In this Instructable I will take you through the steps of using a PVC tube, string and bleach to make some fantastic shibori fabric. The string will act as a 'resist' - the string will bind the fabric so tightly that the bleach won't be able to penetrate the fibers that are underneath the string. The bleach will remove the color, and the patterns created will be determined by how the fabric is folded and how it's wound around the pole.
Step 1: Supplies
- Black fabric that reacts to bleach - cotton, rayon (used in this 'ible), bamboo, linen, test a bit first, but no silk. Bleach eats silk
- PVC pole of about 4 or 5 inch diameter and long enough to wrap fabric around it on the diagonal
- Masking tape
- Something to notch your pole - I used a hack saw
- Sturdy string
- Sponge
- Bleach
- Gloves
- Respirator - you don't want to be breathing bleach
- Bleach neutralizer - such as Chlorine Remover Plus, found on Amazon
Step 2: Position Your Fabric
Fist thing, notch the top of your PVC tube as shown. You need a place to hold onto the knot you are going to make at the end of your sturdy string. It won't stay with masking tape, believe me.
I happen to prefer the look of shibori fabric that has been folded and wound up on the diagonal, but that's not to say that's the way you have to do it, you may try not folding your fabric and you may opt to try wrapping it around horizontally. I think one achieves a much more organic look with the fabric placed on the diagonal - sort of like fish bones.
So, to fold or not to fold - you decide.
Put a bit of masking tape down along the fabric where it would come into contact with the pole if it were not hanging and letting gravity have it's way with it, you will be constantly removing and re-sticking this masking tape as you get into the rhythm of pushing the fabric up the pole after ever 5 or so wraps. The masking tape is so strong it will not just rip off as you slide up, you have to actually remove it.
Step 3: Twirl the Pole
You don't actually want to wrap the string around the pole, you want to hold the string taught, and twirl the pole, letting the string wrap around the pole as it turns. Remember that the string is the resist and has to resist the bleach getting to all of the fibers so it has to be tight - but not too tight or you will not be able to slide the fabric up the pole to make the folds/wrinkles.
Step 4: Push the Fabric to the Top of the Pole
You will want to stop about every 5 or 6 twirls of the pole to push the fabric up. Easier said than done. You want to brace the base of the pole between your feet, hold on with your feet or knees and also onto the string, then, using both hands or thumbs push the fabric towards the top of the pole.
Step 5: As Tight and Snug As Possible
Once you have the fabric all wrapped up you will want to secure it with some masking tape, it is surprising how strong the masking tape is.
Now, working outside or with a respirator on, pour some bleach into a cup. Using a sponge and your gloved hands, dab the bleach on very fast, you want to work quickly so the bleach does not penetrate too much and you end up with no black stripes at all.
After you have done this once you may want to experiment with wetting the fabric before dabbing on the bleach, or diluting the bleach. Varying the amount of time you leave the bleach on will also give different effects. I like to do this next to a pool (my mom's) so I can just chuck the PVC tube into the pool to stop the action.
At any rate, without a pool you will need a tall tub of water to dunk the pole into, or a hose to dilute it as much as possible. Then you want to soak your new lovely fabric in some water with the neutralizer in it to counteract the "rust never sleeps" action of the bleach. Seriously, I have only a few of what you see in these photos left because after 2 months they were all full of holes. Washing multiple times in the washer just is not good enough, better dyeing through chemistry - which is why you need a chlorine neutralizer - it's safe to add to your washer.
Step 6: Unwrapping
This is the fun part, but don't linger too long admiring your handiwork, even though you neutralized to some extent the bleach in the pool or the tub of water with bleach neutralizer it still needs to be washed and maybe some more neutralizer added to the wash if you can detect any oder of the bleach.
Step 7: Practice Practice Practice
I can almost guarantee you, no mater how adept you think you will be, your first time wrapping a wiggly piece of fabric on a slippery pole on the diagonal will frustrate you, and you may even be tempted to give up. But DON'T! It gets so easy to do, after awhile you can just about twirl that pole and hold that string taught with your eyes closed.
I've even done a T-shirt this way.


