Introduction: Star Vortex Technique Tutorial!
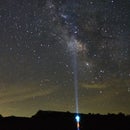
In the summer of last year, I embarked on an astrophotography trip to shoot my first ever Milky Way images. In addition, I also captured a timelapse series of a different set of stars, in which I used to create a star trail image stack (see my fifth image above).
But I felt that there was more I could do in terms of post-processing. That's where this Instructable comes in, as I'll be demonstrating how to simulate an effect known as star vortexing using Photoshop. This is slightly different from how star trail photos are created. A star trail image requires you to continuously capture images for a set amount of time, with the same perspective. On the other hand, a star vortex image not only requires you to shoot a continuous set of star images, but also requires you to consistently zoom out with the lens to create the spiral-like effect. This, unfortunately, requires specialized equipment that I certainly did not have.
But I did have Photoshop. And honestly, I think the results are just as pleasing. This Photoshop technique will work for any star image, as well! I tried this out on a Google Search image result, and obtained similar results, as you can see in the above pictures.
So, let's start! If you want to learn about taking pictures of the Milky Way, check out my previous Instructable here! Finally, if you like my Instructable, please vote for me in the Photography Contest!
Step 1: Prepping the Sky Layer
Essentially, what we'll be doing is separating the sky from our foreground, and then rotating it repeatedly until we obtain an image similar to star trails. What makes the spiraling effect, however, is that the stars are not rotating around a single central point.
First, we'll need to select our sky. I'll be using Photoshop CS5.5 for this Instructable.
- Open your image in Photoshop.
- Duplicate your current layer by pressing CTRL+J, so you won't mess up the foreground.
- Use the Quick Select Tool to select the sky. You'll see a running outline around your selection once you've selected the sky.
- Right-click your selection, and choose Refine Edge. A dialogue box will open: here, increase the Feather and decrease the Shift Edge until you can no longer see the foreground. You don't want to accidentally include your foreground when you're rotating things later! Click OK when you're done.
- Now turn your selection into a Layer Mask. To do this, in the bottom right of your screen, there will be a gray box with a little white circle within the Layers Panel. Click on this. This will isolate your selected layer.
- Finally, convert this layer into a Smart Object. We'll be duplicating this layer a lot, and we want to use the original layer every time we duplicate to avoid losing quality. Right click on your current sky layer and click Convert to Smart Object. You'll see that your it slightly changes how your layer looks in the Layer Panel.
On to the next step!
Step 2: Creating the Transform Action
Now we'll create the repeating action to rotate our sky layer.
- Under the Actions Panel, click on the New Set button. I named mine 'Star Vortex'.
- Hit Record. Once you do, you'll see a little small red dot to indicate that Photoshop is ready to record any changes that you make to your image.
- Press CTRL+J to make a copy of your layer.
- Then press CTRL+T to create the bounding box that will eventually be rotated. At the center of the X, there is a small crosshair. Move this crosshair to the part of the image around which you want your stars to rotate.
- Zoom into a section of your image, so that you can easily tell when the stars are shifting after a rotation.
- Change the rotation angle to 0.05 degrees. Feel free to experiment with this value afterwards!
- Now, in the Layers Panel, change the Blending mode to Lighten. This means that every time your stars shift, your image will "update" so that the lightest part of the image (as in, the newly moved stars) will show on top of the previous layer.
- Then, click the little link-button: this will allow you to maintain your aspect ratio when you adjust the width of the image.
- Finally, change the width to 99.95%.
- Now, back in the Actions Panel, you can hit the Stop square icon to stop recording your actions.
In the next step, we'll apply this action to our image!
Step 3: Applying Your Action!
First, in order to make our lives a bit easier, we can duplicate our recorded actions so that we don't have to manually apply our action every single time to create a new layer.
- Select the 2 Actions: Layer via Copy and Transform. In the top right hand corner of the Actions Panel (see picture 1), click the little drop down menu. Now click Duplicate. Repeat this 4 times, so that you'll have a total of five repeated actions.
- Now, select all five repeated actions, and duplicate them 4 more times. This will create a set of 25 repeated actions. Every time you click Play, you will be generating 25 new image layers, with each one rotated.
- Finally, click Play. Keep in mind that this is slightly CPU-intensive, so depending on the processing power of your computer, it may take a while to complete the Action. Once the Action is completed, you'll see your image update with increasingly longer star trails. Repeat your Action as many times as you wish to obtain your desired effect. I did this for a total of 100 new image layers (pressing Play 4 times).
Once you're satisfied with your sky, we can start cleaning up our image.
Step 4: Cleaning Up the Image
You'll notice that once you're finished, the region between the sky layer and the foreground may not be perfect (see image 1). We can "brush" away the imperfections to reveal the original background layer.
- Select all of your image layers except for the background layer. Press CTRL+G to group them into a single unit. Now, apply a layer mask to this group.
- Press B to select the Brush tool (or find it on the left hand side of Photoshop). Adjust the brush settings at the toolbar near the top. I wanted the brush to be somewhat large, but still have a soft edge, so I set my brush size to 201 pixels and my brush hardness to 0%.
- Now, paint over the region between the sky and your foreground. You should see the background layer reveal itself once again. As you can see in picture 4, this produces great results.
That's it for cleaning up the image! As you can see in picture 2, had I removed the initial streak in the image from the beginning, the final result would not have included this mini-imperfection. I did end up hiding away this part for the final image, as you can see in the next step.
Step 5: Final Results!
Here you can see some of the trial-and-error images I ended up with.
The first image is a result of me moving the cross-hair near the right edge of the screen. The second image is what I eventually settled on in terms of cross-hair positioning. However, there were still some noticeable defects in the region between my sky and my foreground, so I cleaned this up to obtain my third image.
I hope you enjoyed the tutorial! If you have any questions or comments, feel free to leave them below!

Participated in the
Photography Contest 2017


