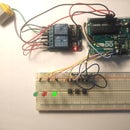
Introduction: Start-Stop Dc Motor Control With Arduino
A simple start-stop circuit that controls a small dc motor via transistor
***********
Parts list
***********
2 pushbuttons
2 resistors 220Ω or 330Ω
2 resistors 10kΩ or 4.7kΩ
1 resistor 270Ω (for transistor)
1 transistor 2N2222
1 red LED
1 green LED
1 diode 1N4001 (or 1N4002)
1 small dc motor
Step 1: The Code and the Connections
/*******************************************
TITLE: A simple start-stop circuit that controls a small dc motor via transistor
Created by: P.Agiakatsikas
DATE: 15/01/17
*********************************************/
int buttonPin1 = 2; // Start button
int buttonPin2 = 3; // Stop button
int greenLedPin = 6; // green led start status
int redLedPin = 7; //red led stop status
int motorPin = 9; // the motor's pin
int buttonStatus1 = 0;
int buttonStatus2 = 0;
void setup() {
pinMode(motorPin, OUTPUT);
pinMode(greenLedPin, OUTPUT);
pinMode(redLedPin, OUTPUT);
pinMode(buttonPin1, INPUT);
pinMode(buttonPin2, INPUT);
}
void loop() {
buttonStatus1 = digitalRead(buttonPin1);
buttonStatus2 = digitalRead(buttonPin2);
if (buttonStatus1 == HIGH && buttonStatus2 == LOW) { // if the start button is pressed (AND stop button not)
digitalWrite(motorPin, HIGH); // turn the motor ON
digitalWrite(greenLedPin, HIGH); //turn the green led indicator ON
digitalWrite(redLedPin, LOW); //turn the red led indicator OFF
}
if (buttonStatus1 == LOW && buttonStatus2 == HIGH) { // if stop button is pressed (AND the start off)
digitalWrite(motorPin, LOW); // turn the motor OFF
digitalWrite(greenLedPin, LOW); //turn the green led indicator OFF
digitalWrite(redLedPin, HIGH); //turn the red led indicator ON
}
}
Step 2: And a Video
And the demonstration video show how it works


