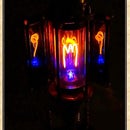
Steamlight Pharo

16,984

161

20

Introduction: Steamlight Pharo

About: I love to invent and create new things in a "steampunk styled way" working with brass, copper, vulcanized-fibre, brass gears and (ply)- wood. On one side I am fascinated in neon lights and small ele…
Hello Everybody
This is my second Steampunk projekt the "Junophopr -steamlight -Pharo".
It´s a small lighthouse in the stampunk stile.
It works with a very small electronic which I have replaced from a decoration ball with changing colours by three LED.

Step 1: Parts in Details

I used several copper stuff from the plumber as you see, some brass screws, a wodden hand made box (by my own, as a carpenter I am) and a special brass socket E-27 from a big bul called: "centra-beam"-bulb.  There is also some copperwire  4 mm in the diameter and other parts of electrical stuff like brass  "Lüsterklemmen" needed.

Step 2: The Optical Parts

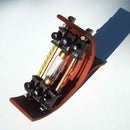
To hold the lens in front of the lantern, I took an  keyholding ring placed the lens in and fixed it with the "Lüsterklemmen" (sorry I don`t know the right translation).  The reflector is made of an old tea spoon

Step 3: More Details of Construction

Step 4: Start the Light

When you switch on the light it starts the sequence with green, changing to red, then it pauses (the blue ligth is shining in the box) and starts agin with green, just like a real Lighthouse signal.

Be the First to Share

    Recommendations

    • Game Design: Student Design Challenge

      Game Design: Student Design Challenge
    • Make It Bridge

      Make It Bridge
    • Big and Small Contest

      Big and Small Contest

    20 Comments

    0
    diy_bloke
    diy_bloke

    11 years ago on Step 2

    Sometimes also called 'Screw terminals'

    0
    Brosiman
    Brosiman

    11 years ago on Step 4

    Great work and worthy of 4 stars.......

    0
    photis22
    photis22

    11 years ago on Step 4

    This could be made infinately more cool if you used an open flame in a glass tube, plasma of some kind, or high light output LED's and then further amplify and direct the light so it ends up making a sort of a flashlight that you could then put on bearings to give you a beakon effect, you might also put an LED at the bottom of the tube holding the light up and put some stratiegically placed holes up the pipes width to have a cool light effect.

    0
    Beergnome
    Beergnome

    11 years ago on Step 4

    I'm loving your work!
    If I may make a suggestion, there are several Lighthouse effect circut plans and kits out there in the model railroad world that might look more interesting in the device.
    the lighthouse LED effect will slowly ramp the LED up to full brightness, give a super bright pulse of light, then ramp it back down to repeat the effect.

    might be interesting to try ;)

    halten Sie die gute Arbeit!

    0
    Aeon Junophor
    Aeon Junophor

    Reply 11 years ago on Introduction

    Hi Beergnome

    Thanks for your comment. I haven´t known this fact jet . Could you send me a link for such plans? and especially where I can get such a "Lighthouse LED"?

    Well I try to find my own style and the high quality aspect compaired with funny ideas of using allday things in an unsusual new combination are in the center of my steampunk objects.

    By the way:Did I convinced you with my other objects in the contests? If Yes , vote for me;-)))))

    0
    Beergnome
    Beergnome

    Reply 11 years ago on Introduction

    if you dig around this site, I belive they have several LED light effect kits for Model railroads for sale.
    http://www.heathcote-electronics.co.uk/Scenic.htm


    this website will give a PDF of the light house circut itself, you seem to be able to work with some basic electronics, so maybe this will be useful to you
    http://www.discovercircuits.com/H-Corner/ho-train-lite.htm

    and of course I will vote for you sir!

    0
    drabinowitz
    drabinowitz

    11 years ago on Step 2

    "Lüsterklemmen" is German for "terminal strips"

    0
    Aeon Junophor
    Aeon Junophor

    Reply 11 years ago on Step 2

    Hi
    Thanks for your help

    I will use this term in future;-)))

    0
    Ace Frahm
    Ace Frahm

    11 years ago on Introduction

    I misread the title, I thought it said "Steampunk BACON lamp".

    0
    Viaticus
    Viaticus

    11 years ago on Introduction

    Beautiful! I looked but did not notice what kind of lens you used.

    0
    Aeon Junophor
    Aeon Junophor

    Reply 11 years ago on Introduction

    You can take any lens, it doesn`t matter even an eye glass from specs will work

    0
    snoopindaweb
    snoopindaweb

    Reply 11 years ago on Introduction

    How about those Magnifiers that come with "Extra Hands"..?

    0
    nigel cox
    nigel cox

    11 years ago on Step 2

    Good evening Junophor, you are creating some excellent steampunk items, really creative, the parts you are writing about can be found in ceiling light fittings and are the electrical contacts inside, very easy to remove, hope this helps regards Doc Cox

    0
    Aeon Junophor
    Aeon Junophor

    Reply 11 years ago on Introduction

    Oh Yes your hint wil really help me, enjoy my little objects and if you want, you als can vote for me inthe contests.
    Yours Aeon Junophor

    0
    terrybnz
    terrybnz

    11 years ago on Step 4

    Very cool, nice creative use of materials. Great work, keep it up.

    0
    Aeon Junophor
    Aeon Junophor

    Reply 11 years ago on Step 4

    Thanks
    I will ! keep it up cause there are so much more ideas in my head then time for construction but as you see, it wíll go on step by step;-)))

    Have already voted and rated my objects? This is another step of motivation to me!!!

    0
    -chase-
    -chase-

    11 years ago on Introduction

    checking out your instrucables after our pms
     - you make some really cool lighting desplays for sure!!!

    chase

    0
    ironsmiter
    ironsmiter

    11 years ago on Introduction

    "Lüsterklemmen"
    closest I can come is "Brass Terminal-Block Busbar"

    0
    Aeon Junophor
    Aeon Junophor

    Reply 11 years ago on Introduction

    Hi
    Thanks for your help. I use these Brass Terminal-Block Busbars very often so you will read your term in the next descriptions;-)))

    0
    action pig
    action pig

    11 years ago on Step 4

    Very cool project, with a beautiful design. Nicely done!