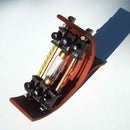
Introduction: Steampunk Nixie Tube Clock
Hi everybody!
My Steampunked NIXIE TUBE CLOCK project is a really long-time-project started in october 2014 and ended today in june 2017.
After reading the instructables nixie clock project of andrea biffi I had some sleepless nights until I decided to built my own clock too! A lot of questions immediately rose in my head and so I got into contact with andrea biffi by email. He patiently answered all of them and gave me so much support Meanwhile we became real friends. Thanks Andera!
As a real steampunk I like to present you this project once again in a STEAMPUNK CREATORS DIARY –Style and add some pictures and constructive comments too. All details about the pcb itself are written down best by andrea biffi so please look a this instructable nixie clock.
And here are two short pictures in motion:
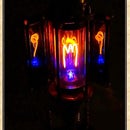
You remember: Nixies like the chosen IN-12A are neon valve tubes, where ten cathodes have shape of digits and are lighted up by plasma when high voltage flows through them. Whenever I can, I try to get such tubes and they fit perfectly to the steampunk-style in general as well as to my objects in special ;-)) I really love the idea of upcycling and let these tubes glowing new! If you like you can also visit the "Dampfkraftlabor" an read there more about my steampunk objects (in german language).
WARNING: this circuit raises the voltage to deadly 300V so you must avoid to touch contacts while working, I'm not kidding, please BE CAREFUL!
And now let´s start:
Step 1: Let´s Start With the Material Overview Drilling First Holes
After collecting all parts together I started to prepare the main tube made of copper to get the small fittings for the tube holders in.
Step 2: Creating the Hooked Nixie Tube Holders
The hooked tube holders had been cut to the right length and expanded as shown at the picture. With a file the already existing triangled hole will be worked out tom the right dimensions. Then solder both parts together.
Step 3: Shim Rings for the Main Pipe
To fix the candle holders with the main copper tube I had to work out these shim rings. I used two slices of PTFE material from the scrap. Because of the very slippery material I had to fix the shim rings to the copper tube with some brass made screws M3 .
Step 4: Integrating the Nixie Tubes
As you can see I chose for the nixie tubes the IN-12A typed ones.
To keep the chosen nixie tube in the bulb socket I first glued a plate of red fibre with a plywood panel together. After drying six round slices had been cut out with a holesaw. Then I attached a printed outline from the data sheet and cut the holes with a fretsaw !
The uv activated resin works best, because it hardens without creating any tensions to the glass body of the nixie tube. All other 2K resins and even hot glue build up a tension by shrinking when they react and also because of thermal effects.
Step 5: Threading the Wires and Assemble the Main Pipe
After the wires had been threaded through the six small fittings the whole bunch of cathode wires had been soldered together and were directed down to the bottom of the candle holder as you can see in detail at the pictures. At least the brass made candle holders had been screwed together again.
Step 6: Plug Development
It was necessary to develop a special plug for connecting the nixie tubes because the was no space left in between the nixie and the brass socket. Take also care of a very good insulation otherwise an electrical shortcut with high voltage might kill the pcb.
Step 7: Woodworking
The baseplate is made of solid mahogany wood from the scrap and keeps the pcb in.
Step 8: Installation of the Pcb
As you can see I build the whole nixie clock without testing with the pcb. Just at the end I added the electronic parts. And it works very well.
Thanks again to the famous inventor andrea biffi!!!
Step 9: A Detailed Glance at the End
After the period of two and a half years building this nixie tube clock and of course putting this project very often beside it is now a great honor to me to present you this report hopin´ that you enjoyed it also.
Yours Aeon Junophor


