Introduction: Steampunked-candle-light
Hi everybody
After a long wintertime I am back again :-)
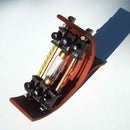
Some days ago a good friend of mine asked me to invent a maritime-styled steampunk light for decorating a captain´s candle-light dinner.
He wanted to serve some drinks and snacks on board of an victorian airship for a role play- so his idea. Well I really did my best and here is the result.
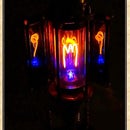
These special steampunked candles should either glow in red and green as a sort of position lights at the captain´s table or change their position lights frequently - so he told me. Now these lights are able to do both!!
This new intructable project is very easy to build, only a few tools are necessary.
And now I present this detailed instructable to you - hope you love it too....:-))
If you like it best vote for it!!
Yours Aeon Junophor
As you already know from my other projects you can get a first impression by a short movie
Step 1: The Lamp Stand
I love to work with massive copper and brass elements combined with plywood an vulacanized fiber. For my projects an use them whenever I can.
So here the lamp stand is made of plywood and vulcanized fiber. In this stand I drilled some holes with a forstner driller to keep the battery holder and a switch inside. To create a technical design look I put another plywood ring upon which holds later on the lantern. This ring is decorated with some brass screws and small stainless steal balls (diameter. 2,2 mm). The for bigger crews closes the batteryholder. All metall parts have been polished and covered with zapon laquer.
So here the lamp stand is made of plywood and vulcanized fiber. In this stand I drilled some holes with a forstner driller to keep the battery holder and a switch inside. To create a technical design look I put another plywood ring upon which holds later on the lantern. This ring is decorated with some brass screws and small stainless steal balls (diameter. 2,2 mm). The for bigger crews closes the batteryholder. All metall parts have been polished and covered with zapon laquer.
Step 2: The Brass Lantern
Each lantern is made of brass parts from two equal vintage kerosene burners, which I got from ebay.
The latern itself keeps a tricky secret to spread the light as wide as possible.
As a sort of light dispenser I used the cleaned balls of empty roll-on deodorants. The bright LED light let them glow magically. The balls fit perfectly tight inside the new brass cage.
At the top there is a brass made Edison E27 mm socket crowned with a copper bonnet.
To get the two main halfs together I first formed a copper ring and soldered it soft together. The "teeth" of the burner elements fits like gears perfectly to another. With needle-nosed pliers I crimped the "teeths" to close the ball in as you can see at the pictures .
The former wickholders keep the new wires to the battery holder inside. They are also soft soldered to the coppertube parts (diameter25 mm) which later fit in the stand-hole.
Step 3: The Light Inside
At a "One Euro shop" I bought some "discolights" which I only modified by changing the blue LED with a red one. With the new step-switch you can now choose green light, green and red light together or red ligtht in two qualities (one or two LEDs are shining). The lats step let the light rotate so that it changes from green to red.
The new wires fixes the light-element at the wick holder. There you can screw the new lantern on.
The battery holder must be cut out with scissors to fit in the stand.
The new wires fixes the light-element at the wick holder. There you can screw the new lantern on.
The battery holder must be cut out with scissors to fit in the stand.
Step 4: A Steampunked Paperwork
As a really steampunk artist I createtd a documentary of this project in the victorian style and placed it on my homepage "Dampfkraftlabor". This paperwork is called "creating diary" and is also an important part of my steampunk works, and livings as well as a steamy candle light dinner. (see short movie below)
Three Cheers to all the steampunks
Yours Aeon Junophor
Hope you enjoyed this project
Three Cheers to all the steampunks
Yours Aeon Junophor
Hope you enjoyed this project

Participated in the
Epilog Challenge V

Participated in the
Battery Powered Contest


